Why work late on Friday? Schedule your offboarding workflows!

Anyone who has worked in IT has experienced the pain of planning for a time-sensitive offboarding that needs to happen right on time.
The days of anticipation and planning, the scramble to make sure everything that needs to happen happens when it needs to happen (not a second too early or too late), the group of stakeholders looking over your virtual shoulder, the laundry list of manual tasks, and on and on. And all of that typically goes down on a Friday afternoon when you should be planning your weekend moves!
Even the most skilled IT admins and BetterCloud users, who benefit from the ability to automate all of the above with ease, have still been on the hook to ensure the right workflow starts running at the right time! Thanks to our new Scheduled Workflow functionality, you can set and forget* (*forgetting not recommended) your offboarding workflows to start running on-demand at a preset date and time. That way, you can ensure the process starts right on time and save time and resources at the end of the week when you need it the most. No more watching the clock!
Sounds good right? Here’s how to get started:
Build your workflow
If you’re reading this, there’s a good chance you already have some offboarding Workflows set up in your BetterCloud instance. If so, feel free to skip ahead to the “Schedule Your Workflow” heading.
If not, I recommend checking out our “Templates” interface to help you get started. You can find that on the left sidebar under “Workflows.” The Offboarding wizard there will walk you through the process of tailoring the perfect workflow for your team’s needs.
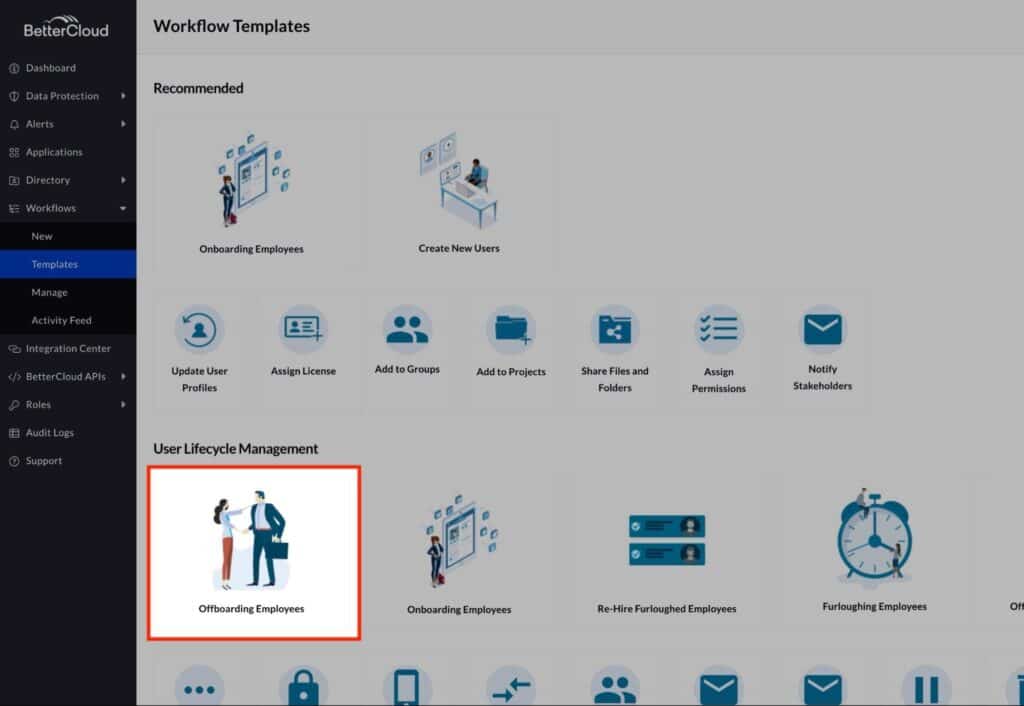
Pro Tip: Do you already have multiple Offboarding workflows set up? You might be interested in slimming things down with Dynamic Branching Workflows. Check it out!
Schedule your workflow
Once you’ve got your workflow built out (and maybe run on a crash test dummy to make sure it works as expected), it’s time to set the schedule. You’ll find the “Schedule for Later” button at the top and bottom of the page when you go to run a workflow on-demand:
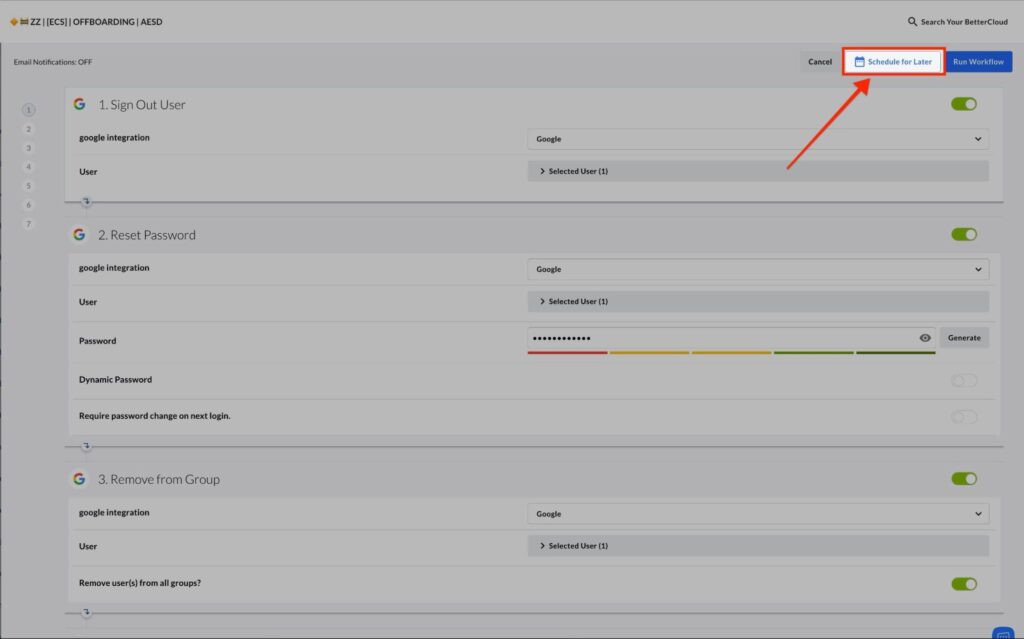
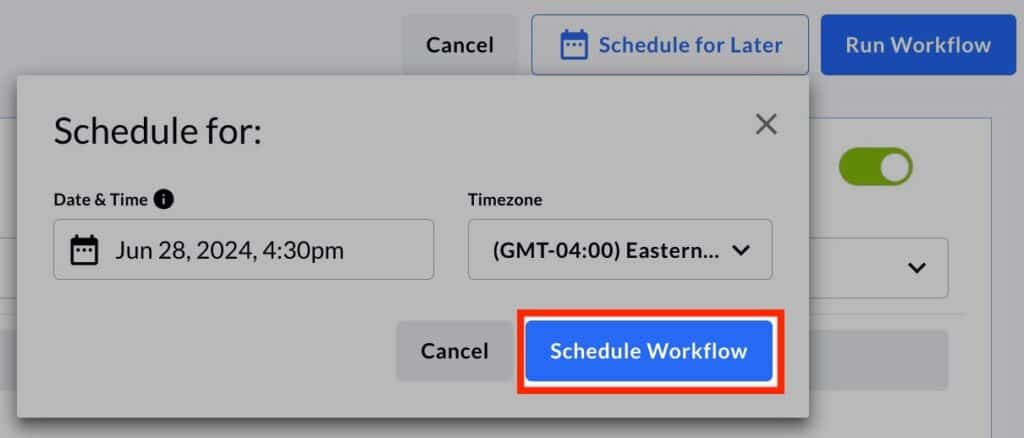
From there, it’s a matter of setting the schedule and moving on to the rest of your workweek:
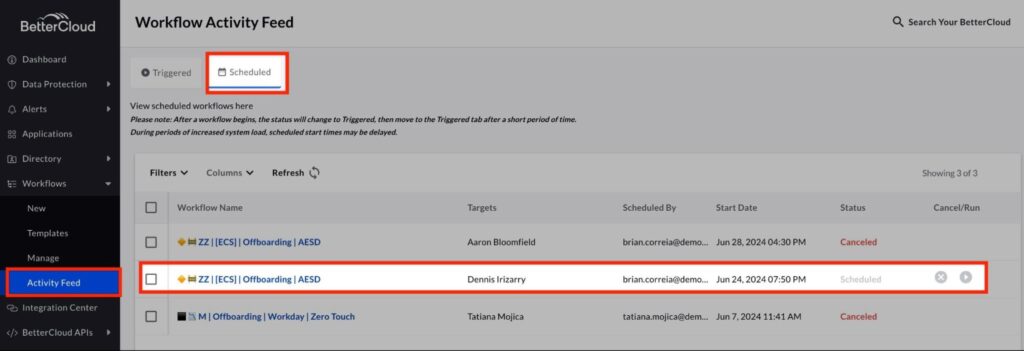
Need to double-check the schedule?
Cancel the workflow?
Run it now?
Reconfigure?
You can get the list of scheduled workflows by navigating to the “Scheduled” tab in the Workflow Activity Feed:
Audit your workflow
Once that start time rolls around, you’ll see that the workflow has triggered:
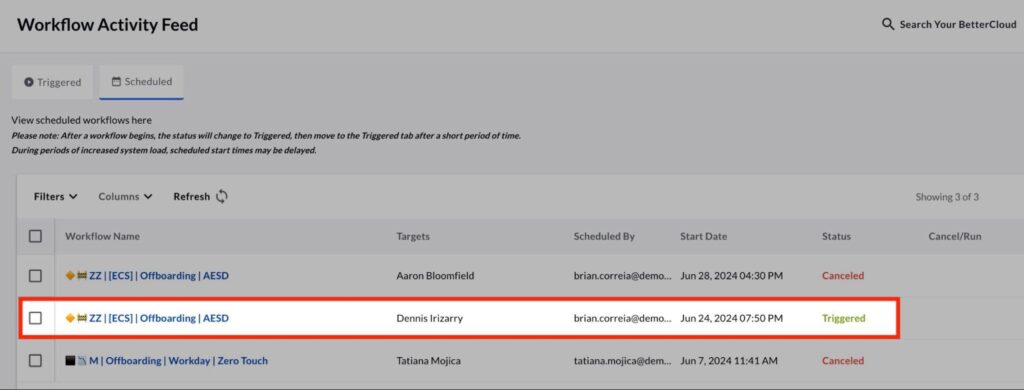
And you’ll be able to find the scheduled workflow right alongside the rest of your instances in the Workflow Activity Feed.
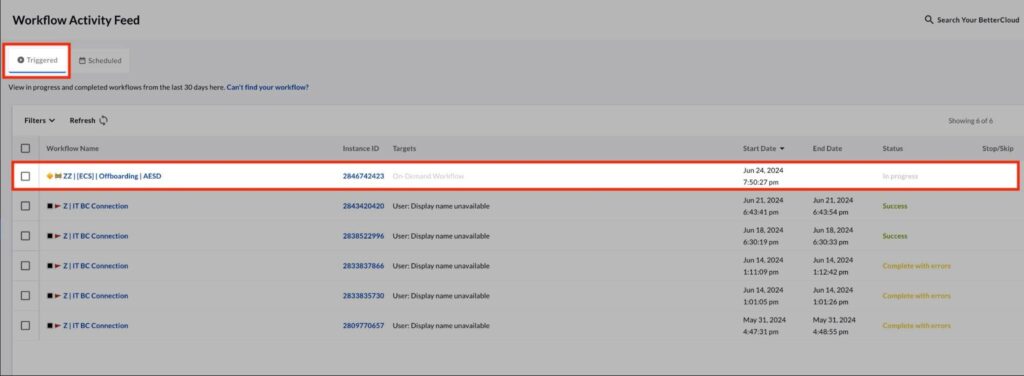
When the workflow is done running, you can (and should!) audit it just like any other workflow instance: Check for the results for failed actions to make sure everything is under control.
Looking good? TGIF! Time to close the laptop and get that weekend started early 😎.


