How to Reduce Stripe Transaction Fees in WordPress (3 Expert Tips)

If you run an online store, then you probably love the convenience of using Stripe to easily process multiple payment types. But the small fees it charges can quickly add up and eat into your profits. 💸
If you want to boost your sales and reduce annoying transaction fees, then listen up! 👂
We accept Stripe payments through all of our online stores, so we’ve learned a few tricks for managing transaction fees without hurting the customer experience.
In this post, we’ll share some proven strategies to reduce Stripe transaction fees in WordPress.
Why Reduce Stripe Transaction Fees in WordPress?
Stripe is a powerful payment gateway widely used by WordPress site owners. It offers seamless integration and support for various payment methods.
However, Stripe charges a standard transaction fee of 2.9% + 30¢ per successful credit card transaction in most countries. These fees can quickly add up for businesses with high sales volumes, causing you to lose lots of profits.
For example, if your WordPress site generates $10,000 in monthly sales, then Stripe would take $290 plus 30 cents for every transaction. For a large number of small transactions, the costs are even higher.
Individual transaction fees may seem small. But over time, they can significantly lower your earnings.
Reducing the payment processing fee helps you keep more of your revenue, especially if you sell products or services at a lower price. By using alternative payment methods like ACH or Bacs Direct Debit, you can cut down on these costs without affecting the customer experience.
Plus, it allows you to reinvest the savings into other areas of your business, like marketing software, plugin upgrades, or growing your operations. Overall, it helps you create a cost-effective payment system for your business.
Having said that, let’s take a look at how to easily reduce Stripe transaction fees in WordPress. You can try one or all of these expert tips.
Tip 1: Accept ACH Payments in WordPress (For Customers in the U.S.)
If your business is based in the United States or you have many customers from that region, we recommend accepting ACH (Automated Clearing House) payments on your website.
Unlike traditional Stripe transactions, which come with a standard fee of 2.9% + 30¢, ACH payments typically cost a flat fee of 0.8% per transaction, capped at $5.
This means that no matter how large the payment is, the fee will never be more than $5. This makes it especially cost-effective for high-value transactions.
For example, if a customer makes a $1,000 purchase on your WordPress site, then the Stripe fee for a credit card payment would be $29.30. However, if the same payment is made through ACH, the fee would only be $5.
So, in this case, switching to ACH would instantly save you $24.30! If lots of your customers are spending higher amounts, then this can really add up.
Keep reading to learn how to add ACH payments to a WordPress payment form or to a WooCommerce store.
Create a WordPress Payment Form with ACH Payment
If you run a simple membership site or you sell a limited number of products, then you might be using a WordPresss payment form.
In that case, we recommend using WP Simple Pay to add ACH payments to your payment form options. We’ve tested this plugin for lots of different use cases, and we think it’s fantastic.
We love that it comes with a user-friendly builder, premade payment templates, and complete spam protection. To learn more about our experiences with the plugin, see our WP Simple Pay review.
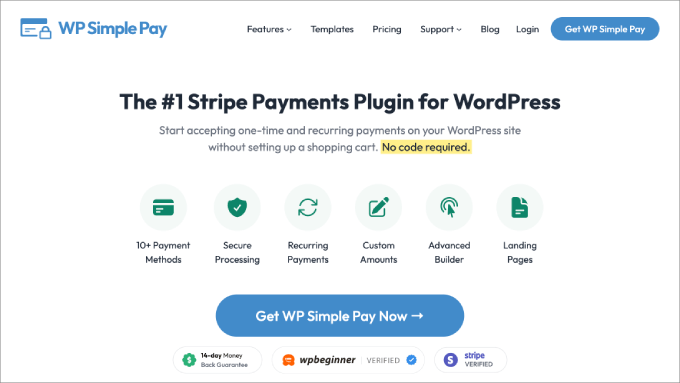
First, you’ll need to install and activate the WP Simple Pay plugin. For details, check out our tutorial on how to install a WordPress plugin.
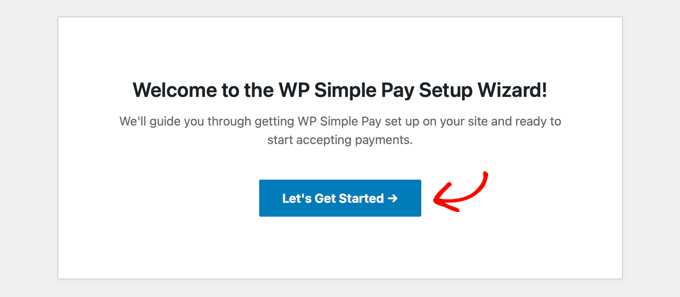
After you activate the tool, a setup wizard will appear on your screen. Here, just click the ‘Let’s Get Started’ button.
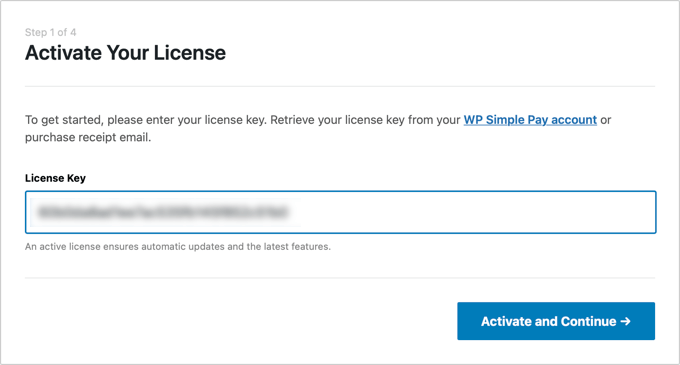
You will now need to enter the license key. You can find this information in your WP Simple Pay account area.
Next, click the ‘Activate and Continue’ button.
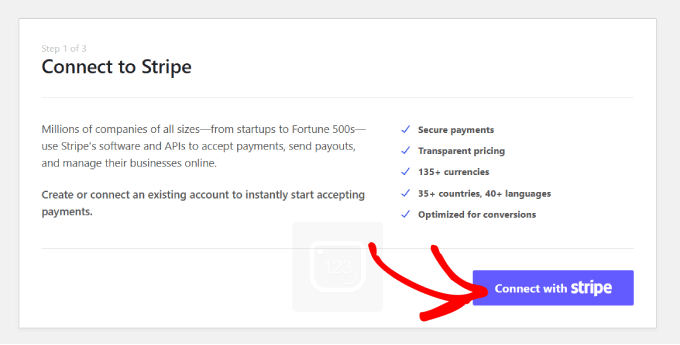
Once that’s done, you’ll need to connect Stripe with your WP Simple Pay account. Keep in mind that the plugin will not work unless you connect it with a new or existing Stripe account.
To do this, click the ‘Connect with Stripe’ button.
Then, you’ll need to log in to your Stripe account to connect it to WP Simple Pay. For more details, see our tutorial on how to accept Stripe payments in WordPress.
After that, you can configure the rest of the setup wizard settings however you want.
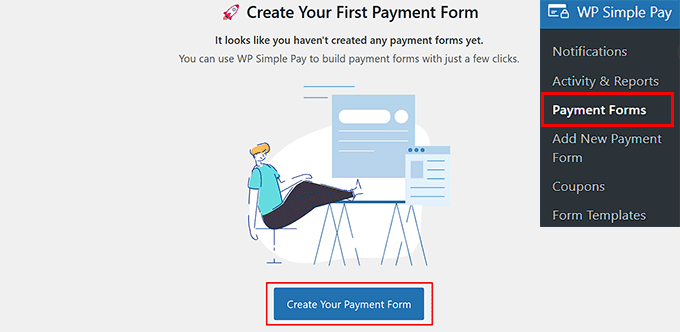
Then, visit the WP Simple Pay » Payment Forms page from the WordPress dashboard and click the ‘Create Your Payment Form’ button.
This will take you to the ‘Select a template’ screen, where you will notice a list of premade templates.
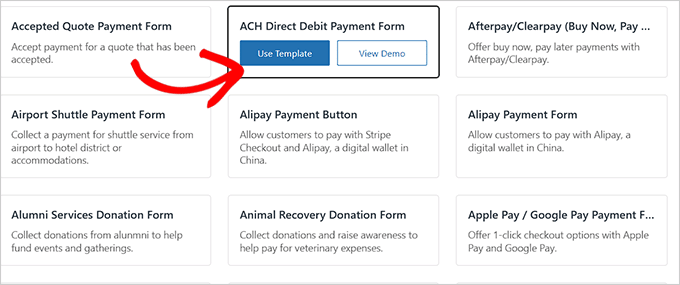
From here, locate the ‘ACH Direct Debit Payment Form’ template and click the ‘Use Template’ button under it.
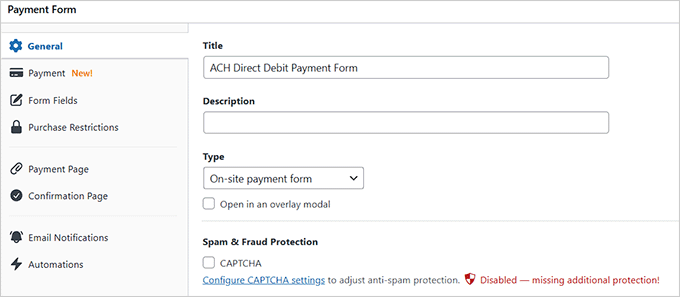
You will now be directed to the ‘Add New Payment Form’ page, where you can add a title and description for your form.
After that, select your form type as ‘On-site payment form.’
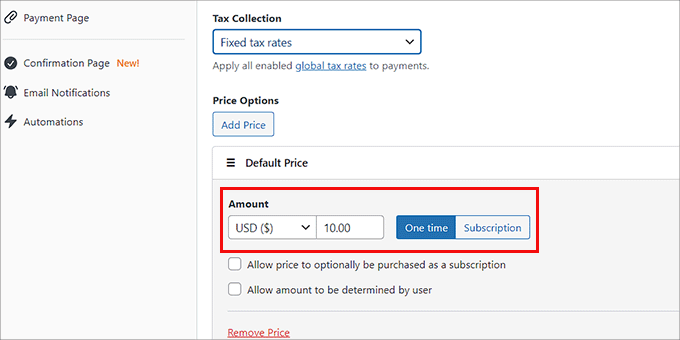
Then, switch to the ‘Payment’ tab from the sidebar and choose your preferred tax collection rates from the dropdown menu.
You can also use the form to add the price for the service or product you plan to sell. If you have a subscription service, then you can select the ‘Subscription’ option.
Next, add subscription tiers by clicking the ‘Add Price’ button.
Once you have done that, scroll down to the ‘Payment Method’ section.
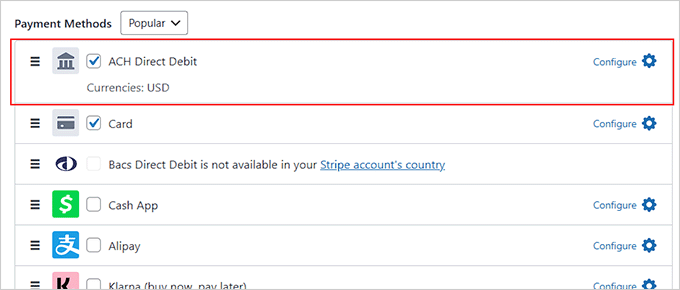
Here, you will notice that the ‘ACH Direct Debit’ and ‘Card’ payment options have already been selected for you. You can also choose other options, such as Cash App, iDEAL, or Klarna.
After that, you can add form fields, include a confirmation message, set up email notifications, and create a custom page for your payment form from the settings in the builder.
Once you are done, just click the ‘Publish’ button to store your settings.
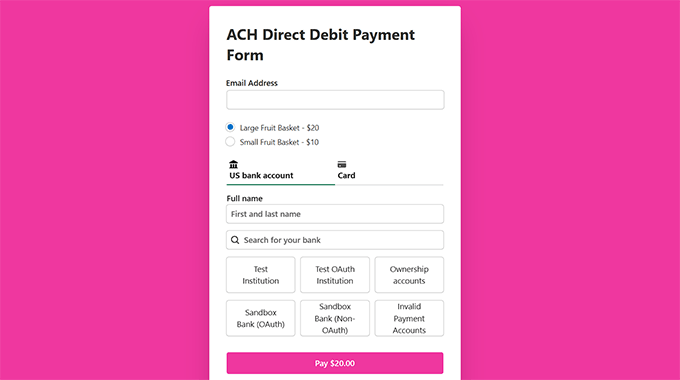
You’ve now given customers a payment option that reduces your store’s Stripe transaction fees.
For detailed instructions, see our tutorial on how to accept ACH payments in WordPress.
Offer ACH Payments in Your WooCommerce Store
If you have an existing WooCommerce store, then the above method may not be the best match for you.
In that case, you’ll need to install and activate Payment Plugins for Stripe WooCommerce. For details, see our tutorial on how to install a WordPress plugin.
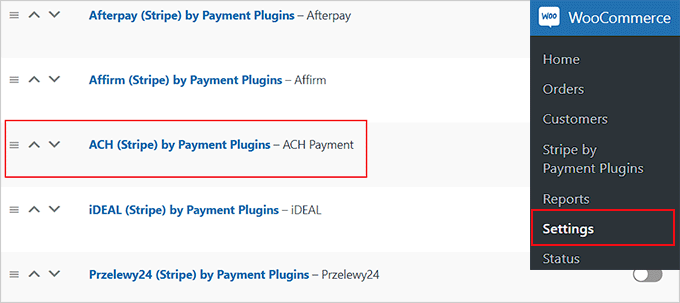
Once you activate the tool, visit the WooCommerce » Settings » Payments page. Here, you will notice a list of payment methods displayed on your screen.
Now, locate and click the ‘ACH (Stripe) by Payment Plugins’ option.
This will direct you to a new page where you must first switch to the ‘API Settings’ tab.
Here, go ahead and click the ‘Connect to Stripe’ button to integrate your Stripe account with your online store.
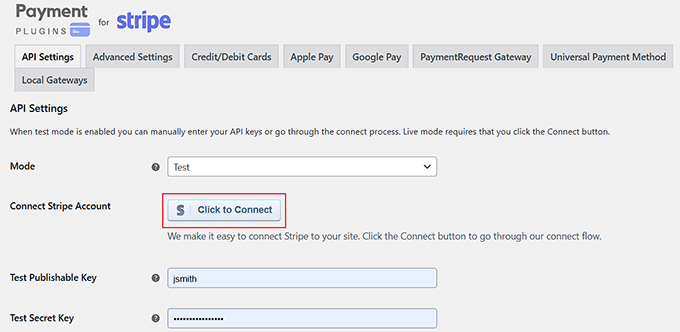
After that’s done, head back to the ‘Local Gateways’ section and choose the ‘ACH’ option.
Now, check the ‘Enabled’ box to add ACH as a payment option in your online store. You can also add a custom title and description for ACH payments.
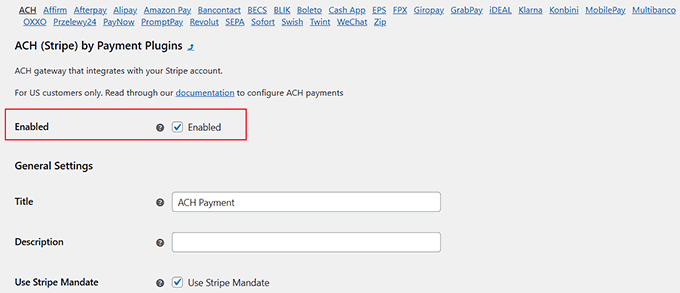
Finally, click the ‘Save Changes’ button to store your settings. It’s as simple as that!
Tip 2: Accept Bacs Direct Debit Payments (For Customers in the UK)
As we mentioned, the method above is only suitable for businesses with customers in the United States. If your WordPress site serves customers in the United Kingdom, then offering Bacs Direct Debit can help reduce Stripe transaction fees.
Bacs Direct Debit charges around 1% per transaction, capped at £2. This makes it a cost-effective option for businesses with customers in the UK.
For instance, let’s say a customer makes a £500 payment. If they use a credit card, then you would pay about £14.80 in fees. But if the same payment is made via Bacs Direct Debit, the fee could be as low as £2.
As with ACH payments, there are two ways you can do this. You can accept Bacs Direct Debit payments either on a WordPress form or in your online store.
Create a WordPress Form that Accepts Bacs Direct Debit Payments
We recommend WP Simple Pay for accepting these payments through Stripe. It includes a ready-made Bacs Direct Debit Payment Form template, so it’s super easy to set up.
To get started, you’ll need to install and activate the plugin.
⚠️ Important Note: There is a free version of WP Simple Pay, but you will need the premium plugin to accept Bacs Direct Debit payments on your form.
After you activate the tool, a setup wizard will open up on your screen. Here, you’ll need to add your license key and then connect with Stripe.

This step is super important because WP Simple Pay won’t work if it isn’t connected to a new or existing Stripe account. To learn more, see our tutorial on how to accept Stripe payments in WordPress.
Once you’ve finished the setup wizard, visit the WP Simple Pay » Payment Forms page and click the ‘Create Your Payment Form’ button.

You will now be taken to the ‘Select a template’ screen.
Find the ‘Bacs Direct Debit Form’ template and click the ‘Use Template’ button under it.
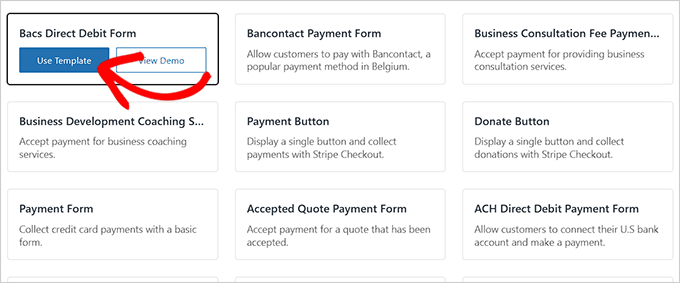
This will take you to the ‘Add New Payment Form’ page, where you must add a title and description for your form.
After that, you can choose your form type as ‘On-site payment form.’
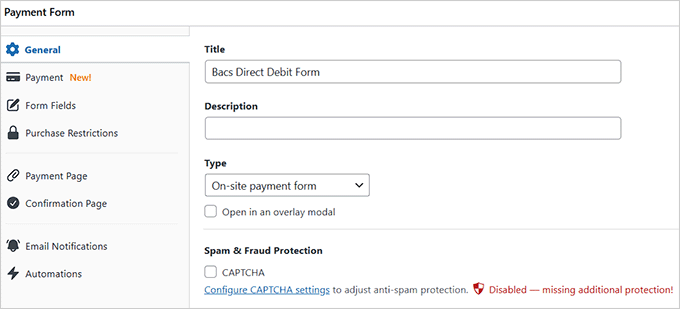
Then, switch to the ‘Payment’ tab from the left column.
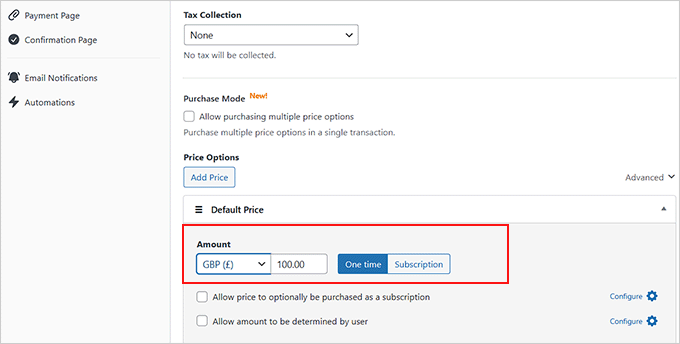
Here, you have to choose your preferred tax collection rates from the dropdown menu under the ‘Tax Collection’ option.
Next, add the service or product price that you plan to sell using the form. If you have a subscription service, then you can select the ‘Subscription’ option and add tiers.
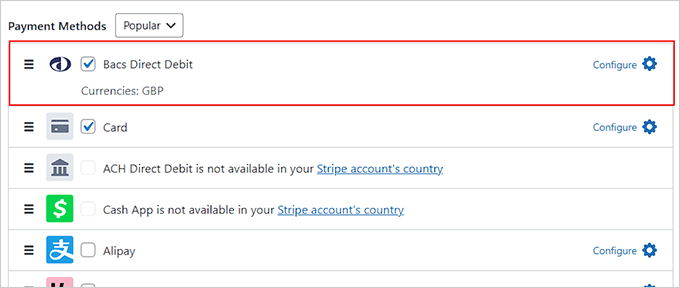
After that, scroll down to the ‘Payment Methods’ section, where the ‘Bacs Direct Debit’ option will already be selected.
You can also choose other payment options that fit your preferences.
⚠️ Important Note: The Bacs Direct Debit option will only be available if you have chosen the United Kingdom as the country for your Stripe account.
To change these settings, visit the WP Simple Pay » Settings page and choose a country from the dropdown menu.
Next, edit the form fields, add a confirmation message, and set up email notifications according to your form.
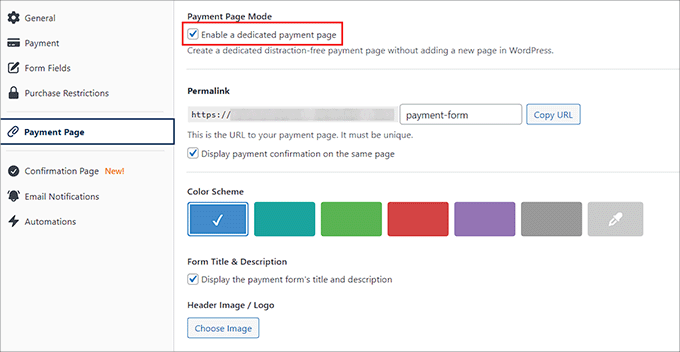
Finally, head over to the ‘Payment Page’ tab and check the ‘Enable a dedicated payment page’ box. The plugin will now let you build a custom page for your payment form.
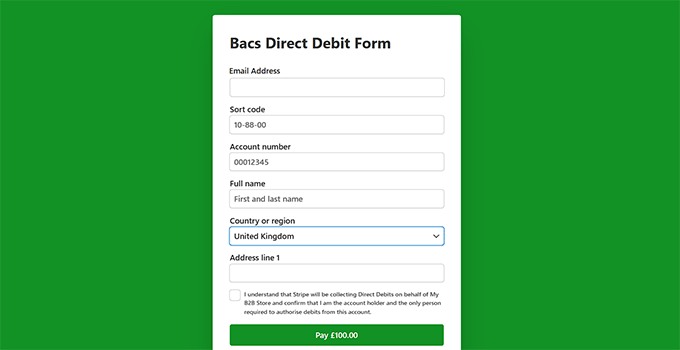
Once you are done, click the ‘Publish’ button to store your settings. Your website can now easily accept Bacs Direct Debit payments.
Offer Bacs Direct Debit Payments in Your WooCommerce Store
If you already have a WooCommerce store, then the method above won’t be the best option. In that case, you can install and activate the Stripe Payment Plugin for WooCommerce.
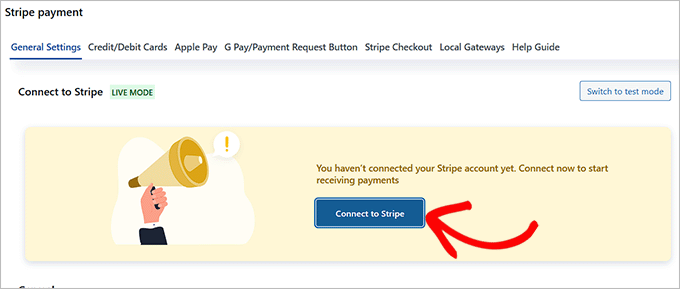
For details, see our tutorial on how to install a WordPress plugin. After activating the tool, visit the WebToffee Stripe page from your WordPress dashboard and click the ‘Connect to Stripe’ button.
This will take you to a new screen. Here, just follow the on-screen instructions to connect the plugin to your Stripe account.
Then, head back to your dashboard and visit the WebToffee » Local Gateways page.
Next, switch to the ‘Bacs’ tab at the top and check the ‘Enable’ box.
You can also add a title, description, and order button text. Finally, click the ‘Save Changes’ button to store your settings.
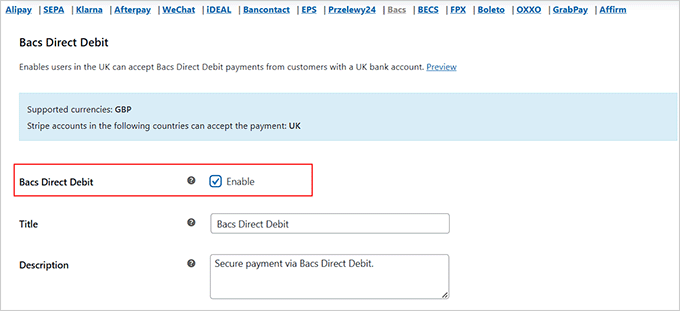
You have now successfully added the Bacs Direct Debit option as a payment method in your online store.
✋ Expert Advice: Adding ACH or Bacs Direct Debit as payment options does not guarantee that customers will use them.
To increase the number of customers choosing these payment methods, you can add a custom message to your payment form or WooCommerce checkout page asking shoppers to select it.
If you’re a small business, you can remind customers that choosing an alternative payment method will help keep your company running. If they are loyal or repeat buyers, they will be much more likely to make this simple switch.
Or, check out our third tip below👇 for another way to reduce Stripe transaction fees in WordPress.
Tip 3: Upgrade to Premium Plugins (For Customers Everywhere)
One of the best ways to reduce transaction fees on your WordPress site is by upgrading to a premium plugin. This way, you only pay the plugin’s premium fee and avoid extra charges on top of Stripe’s standard transaction fee.
Free payment processing plugins often add additional fees, sometimes 1% or more, on top of Stripe’s standard fee (2.9% + 30¢ per transaction). Upgrading to the premium version helps you skip these extra costs and pay just Stripe’s fee.
If you want to add a simple payment form that accepts Stripe payments, then we recommend opting for WP Simple Pay Pro. It removes extra platform fees charged by the free version of the plugin, allowing you to pay only Stripe’s standard transaction fee.
Meanwhile, for stores selling digital products, the Easy Digital Downloads Pro version also removes extra fees, making it an ideal option. To learn more, see our complete Easy Digital Downloads review.
Similarly, WPForms Pro allows payment collection without extra platform charges, ensuring you only pay the regular Stripe transaction fee.
We recommend this premium plugin for selling a single product on your website. To learn more, see our WPForms review.

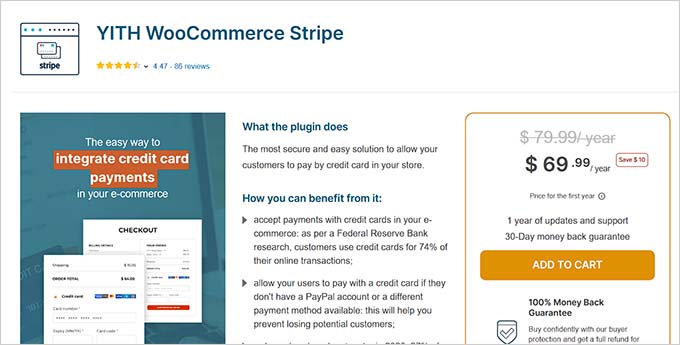
On the other hand, YITH WooCommerce Stripe eliminates the extra transaction fees often added by other payment gateways.
It’s an excellent solution for businesses using WooCommerce to sell physical products.
Upgrading to these premium versions ensures you only pay Stripe’s transaction fees, reducing your overall costs while giving you additional features.
Bonus Tip: Pass Payment Processing Fee to Customers in WordPress
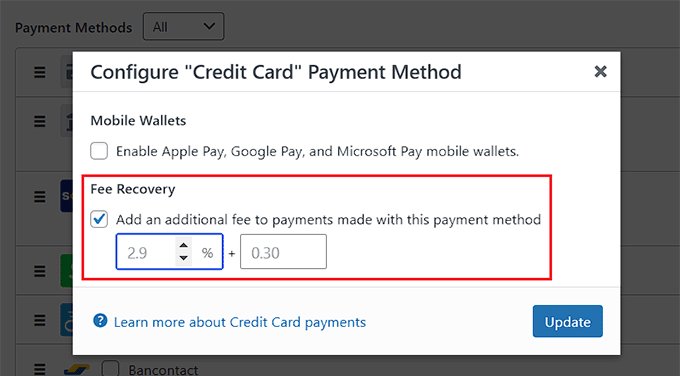
Alternatively, you can simply pass the Stripe payment processing fee to customers. This ensures that your profit margins remain unaffected by transaction costs.
When you pass the payment processing fee to the customers, you add this extra cost to the customer’s bill instead of paying it yourself.
For example, if a customer buys an item for $100 and Stripe charges a fee of $3, you may add that $3 to the total cost. So, the customer would pay $103 instead of just $100.
However, charging customers extra fees could impact your sales. So, you may want to do some market research before adding that cost to the product’s total price.
Also, if you already have a well-established business, raising your prices without letting customers know can lead to a negative user experience. To avoid scaring away customers, you might consider telling them why you’re raising prices. This transparency can help build customer trust.
For detailed instructions, see our tutorial on how to pass the payment processing fee to customers in WordPress.
We hope this article helped you learn how to reduce Stripe transaction fees in WordPress. You may also want to see our beginner’s guides on how to add Bancontact payments in WordPress and how to add Giropay payments in WordPress.
If you liked this article, then please subscribe to our YouTube Channel for WordPress video tutorials. You can also find us on Twitter and Facebook.


