How To Optimize Images for the Modern Web

Imagine having to wait five seconds for each image when scrolling through Instagram. Can you think of anyone wanting to wait that long for each image to load? We don’t think so.
Images, though necessary, can be tricky to work with. They add a lot of bulk to the web page and can slow your website down, even if you do everything else correctly.
According to Google research, a visitor is 90% more likely to leave your website when the loading time goes from one second to five seconds. This not only reduces the chances of conversion but also negatively impacts search engine optimization (SEO).
Optimizing images for the web — reducing their size without losing quality — can help you improve your page load times and cut down on file bloat. It sounds like a lot of effort, but with the right image optimization tools, you can simplify the process and boost your site’s performance quite easily.
In this guide, we’ll talk about the importance of image optimization and its impact on your website. Then, we’ll look at a few different ways you can optimize your images.
Let’s jump right in!
What Is Image Optimization for the Web?
Image optimization is the process of making your web images as compact as possible without sacrificing quality.
Think of it like packing for a trip — you want to bring everything you need, but you don’t want to lug around a heavy suitcase.
Similarly, we want our images to look great but, at the same time, not slow down our website.
How Does Image Optimization Work?
Say you’ve got a photo of your dog you want to put on your website.
First up, we look at the dimensions, or image resolution.
If you’re optimizing your mobile website and it only needs to show images up to 1000 pixels wide, there’s no point in uploading a 4000-pixel-wide photo. Sure, it’ll look better, but it’ll be unnoticeable to your visitors and end up slowing down your site. Simply resizing the image alone can make the file way smaller.
Next, we move to compression. We’ll discuss compression types in a bit. For now, remember that there are two types: lossy and lossless.
If we use lossless compression, we’re telling the computer, “Make this smaller, but don’t change how it looks!”
The algorithm, or the compression tool, will figure out a way to reduce file size without losing quality by simply organizing the file better.
If we go for lossy compression, we’re saying, “Make this smaller, and it’s okay if you have to remove some things, as long as it still looks good.”
The algorithm might decide that two very similar shades of blue can be just one shade, or that some tiny details in the background aren’t super important. Or maybe the dark sky doesn’t need as many pixels dedicated to black. We can also strip out extra info that’s hidden in the image file. Things like when and where the photo was taken, what camera was used — stuff we don’t need for a website.
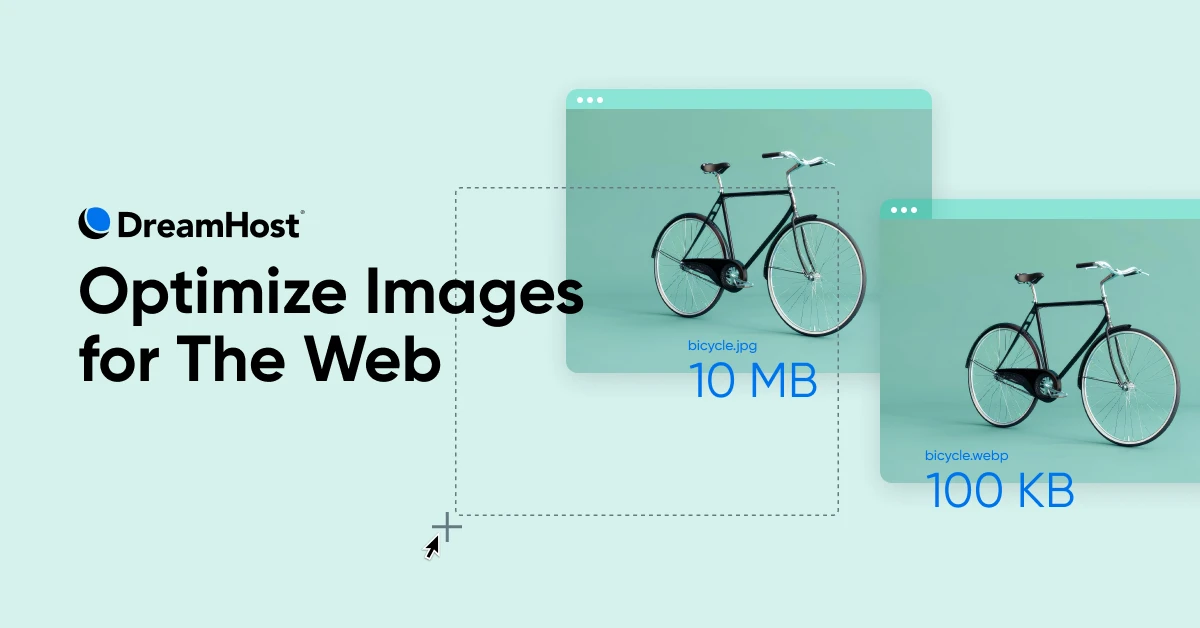
So, putting it all together: we start with a 5MB dog photo. We resize it, then compress it carefully, strip out the extra information, and save it as a WebP. Now we’ve got a 100KB image that still looks great but loads way faster.
And that’s the goal of image optimization: making images small enough to load quickly, but still looking good enough to show off your awesome dog.
It’s a balancing act, but with a bit of practice, you’ll get the hang of it. Your website visitors will thank you when they can see your cute pup without waiting for the image to load.
How To Pick an Image Compression Tool?
The best image compression algorithm is one that can create the smallest image files without losing quality. However, it also depends on what type of compression can help you get to the file size you want.
As we mentioned earlier, there are two types of compression:
- Lossless compression: Think of yourself packing for a trip using those vacuum storage bags. You squeeze out all the air, making your stuff smaller. And when you unpack, everything’s exactly as you packed it. Lossless compression algorithms work exactly like this. They try to retain as much of the image as possible while still reducing the file size. When you open the image, it looks identical to the original. It’s great for keeping images crystal clear without deleting data.
- Lossy compression: Lossy compression is more like packing for a long trip by leaving a few things behind. Maybe you don’t need all ten t-shirts, so you only pack four. Sure, your bag is lighter, but you’ve also lost a bit of what you started with. This can give you the smallest possible file sizes, but it comes at the cost of a slow but permanent decline in image quality. JPEG, or JPG, is a common lossy image type.
For instance, if you’re sending document scans where the text needs to be legible, you want the lossless compression. But for regular photos that you clicked on your trip? Lossy would do a good job and also give you a much smaller image file without making it obvious that the image was compressed.
Now the question is, does all of this really matter?
Does Image Optimization Matter?
Almost 80% of web pages across the internet have images as the most impactful element. Which means optimizing them can give your website a meaningful boost in performance.
Search engines like Google also consider Core Web Vitals (CWV) to decide which website ranks higher.
Core Web Vitals (CWV)
Google created Core Web Vitals (CWV), a trio of user experience metrics to improve web browsing speed, accessibility, and quality. The three Core Web Vitals metrics are LCP, FID, and CLS.
Read More
Core Web Vitals is a set of metrics that measure a site’s performance, with one of the most important metrics being the Largest Contentful Paint (LCP).
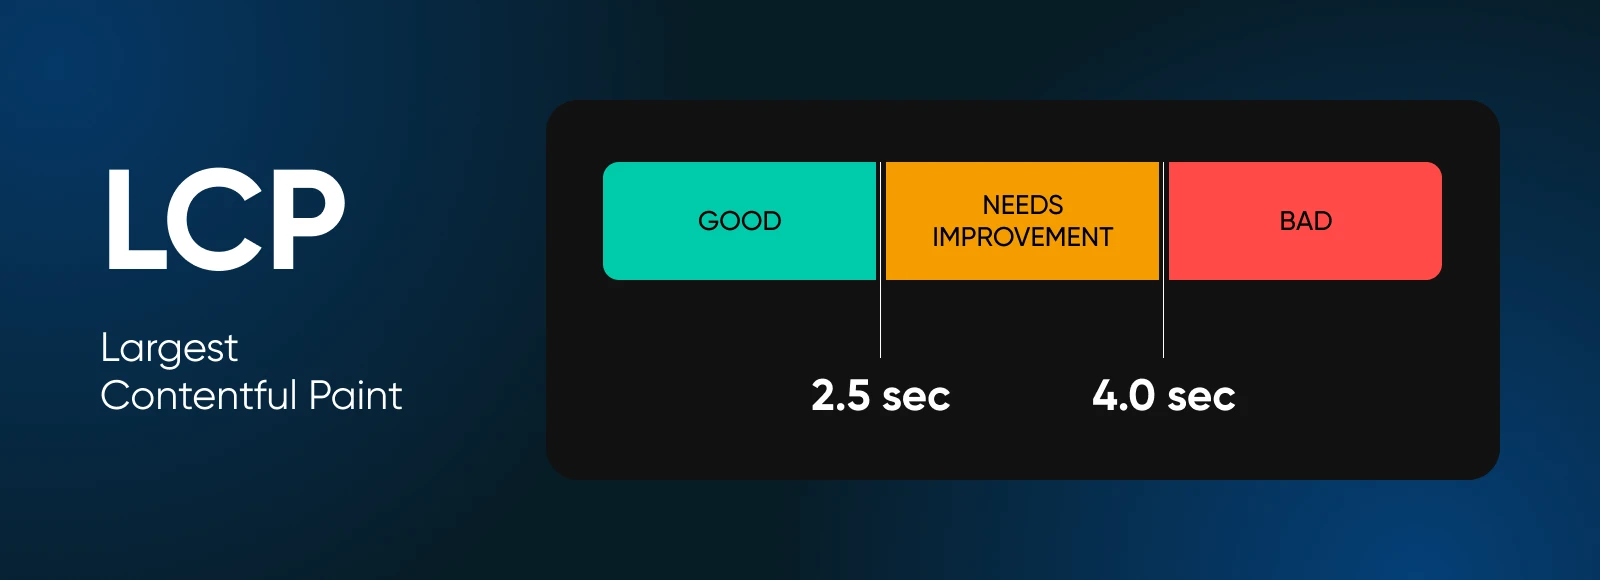
LCP measures the time it takes for the largest element on the page to load. This is generally the hero image for most websites.
These large image files often have a negative impact on your website’s LCP score. And if the score remains that way for a while, it can have a depressing effect on your conversions.
Therefore, optimizing images is one of the most effective ways to improve your site’s performance and boost your SEO.
Different Image File Types
Choosing the right image format isn’t just about making your pictures look pretty.
The right image format can dramatically affect your website’s performance, user experience, and even your search engine rankings.
So, if you use images on your website, it’s important to familiarize yourself with the different file types and when to use them.
JPEG (Joint Photographic Experts Group)
JPEG is one of the oldest image file formats, along with BMP and GIF.
Pros:
- Great for photographs and complex images with lots of colors.
- Offers a good balance between file size and image quality.
- Widely supported across all browsers and devices.
Cons:
- It uses lossy compression, which means some data is lost when the image is compressed.
- Doesn’t support transparency.
- Not ideal for images with text or sharp edges, as they can look blurry.
Best for: Photographs, complex illustrations, and any image where a slight loss in quality isn’t noticeable.
PNG (Portable Network Graphics)
PNG is a versatile format that provides high-quality images while also supporting transparency.
Pros:
- Supports transparency.
- Uses lossless compression, so there’s no quality loss when saving.
- Great for images with text or sharp edges.
Cons:
- Larger file sizes compared to JPEG for photographs.
- Not as efficient for complex photographs.
Best for: Logos, screenshots, images with text, or any image that needs transparency.
GIF (Graphics Interchange Format)
GIFs took over the internet with their looping animations, and you can see them as animated stickers or memes.
Pros:
- Supports simple animations.
- Small file size for simple images.
- Widely supported across browsers and devices
Cons:
- Limited to 256 colors.
- Not suitable for photographs or complex images.
- Can result in large file sizes for long animations.
Best for: Simple animations, icons, and very simple graphics.
WebP
Since the image formats mentioned above are quite old and the internet has gone way beyond their capabilities, Google came up with WebP for a more efficient image format.
Pros:
- Offers both lossy and lossless compression.
- Supports animation and transparency.
- Significantly smaller file sizes compared to JPEG and PNG (about 25-35% smaller).
- Better quality-to-size ratio than JPEG.
Cons:
- Not supported by older browsers (looking at you, Internet Explorer).
Best for: Pretty much everything, if your audience uses modern browsers. It’s especially important for websites that need to balance quality and performance.
SVG (Scalable Vector Graphics)
SVG is a bit different from the rest of the image formats. Instead of being made up of pixels, SVGs are based on mathematical formulas.
Pros:
- Scales to any size without losing quality.
- Very small file sizes for simple graphics.
- Can be styled with CSS and manipulated with JavaScript.
- Great for responsive design.
Cons:
- Not suitable for complex photographs.
- Can be slow to render if very complex.
- Requires more processing power than images.
Best for: Logos, icons, simple illustrations, and any graphic that needs to look sharp at any size.
3 Easy Ways To Optimize Images for the Web
Now that you understand what optimization is, and what the different file types are, let’s see how we can optimize an image in action.
Fortunately, image optimization doesn’t require advanced technical knowledge. There are a number of tools that can help you resize, compress, and convert images to different formats with ease.
Let’s take a close look at a few different methods.
1. Resize and Crop Images
One of the easiest steps you can take to optimize your images is to resize or crop them. You could use a photo editing tool like Adobe Photoshop for advanced users or Canva if you want something simple and out of the box. Both of these tools can help you crop and resize images and also save in lower resolutions to reduce the file sizes.
You can also use the default photo viewer on your computer for resizing and cropping.
If you use Windows, you can easily crop and resize images in Microsoft Photos. On Mac, the app is called “Preview.”
We’ll show how this works on a Windows computer.
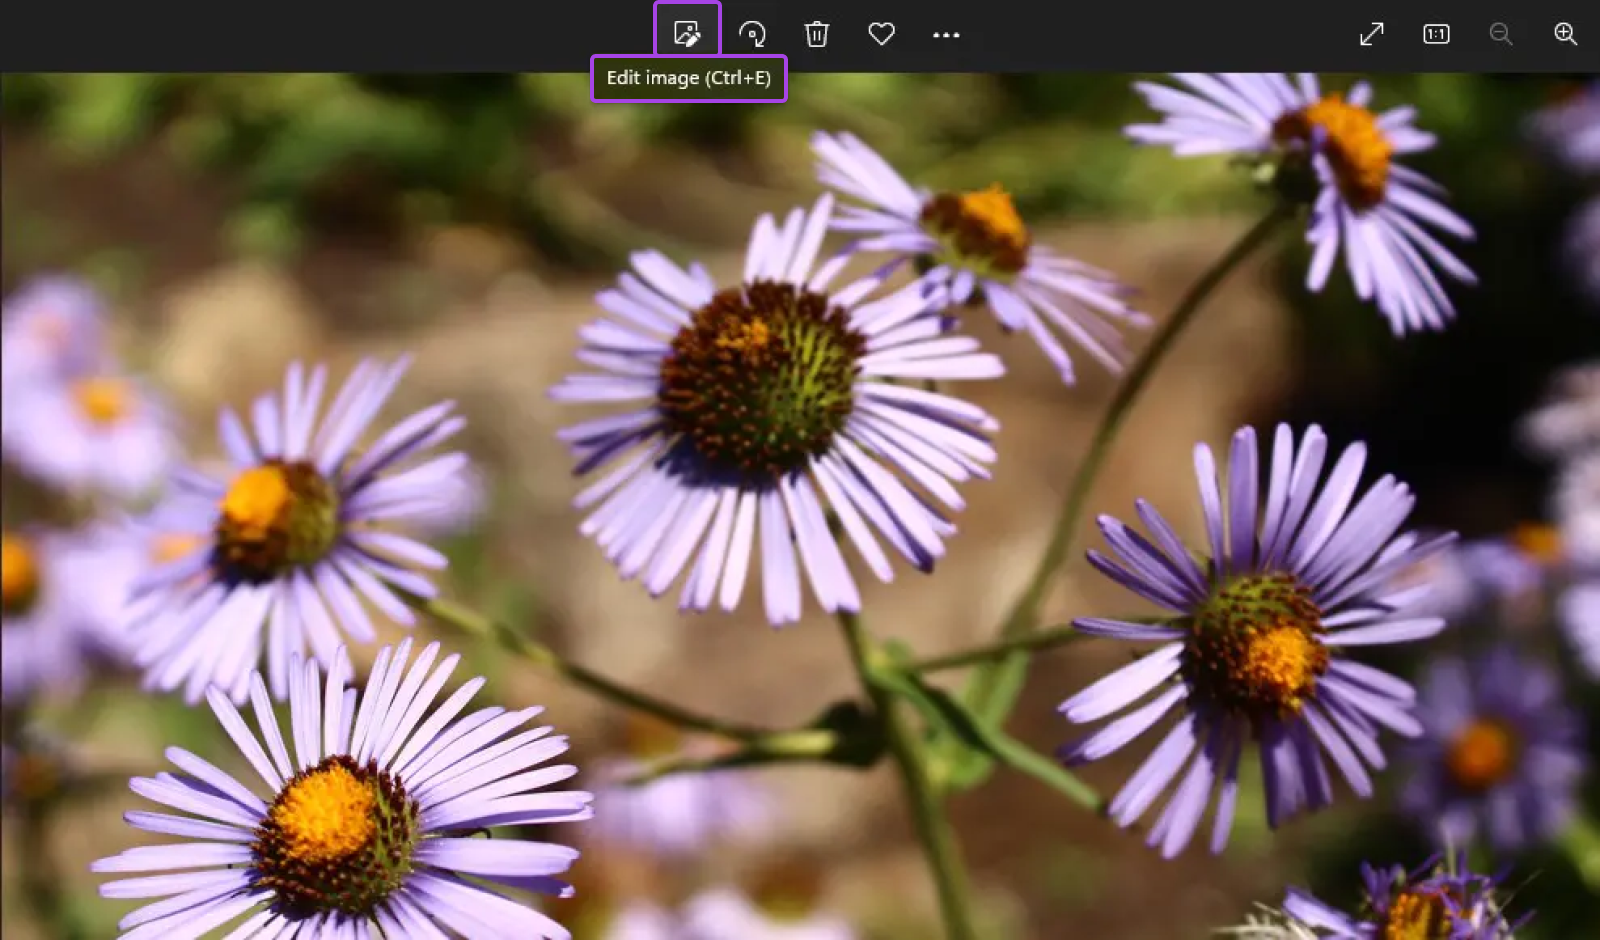
To get started, open your image in the “Photos” app by double-clicking the image.
Then click on the first icon for Edit image in the top menu:
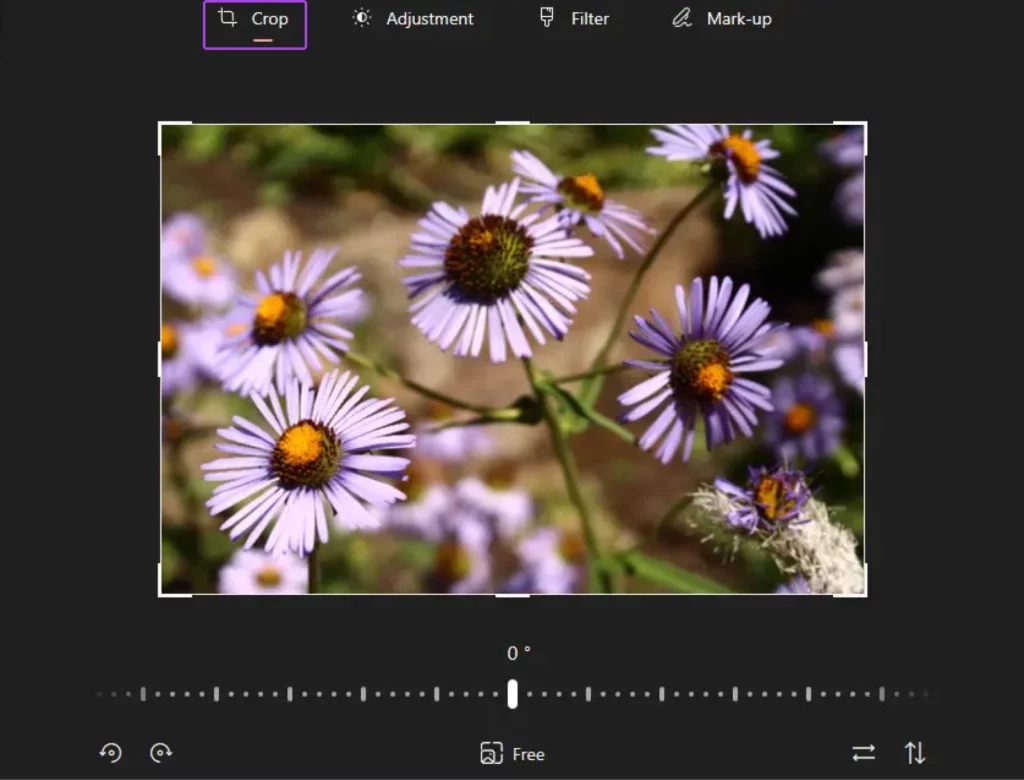
Now, click the Crop icon on the top of the Edit menu bar and decide what part of the image you want to use.
You can also resize images using the Windows Photo Editor by clicking on the three dots and then selecting Resize.
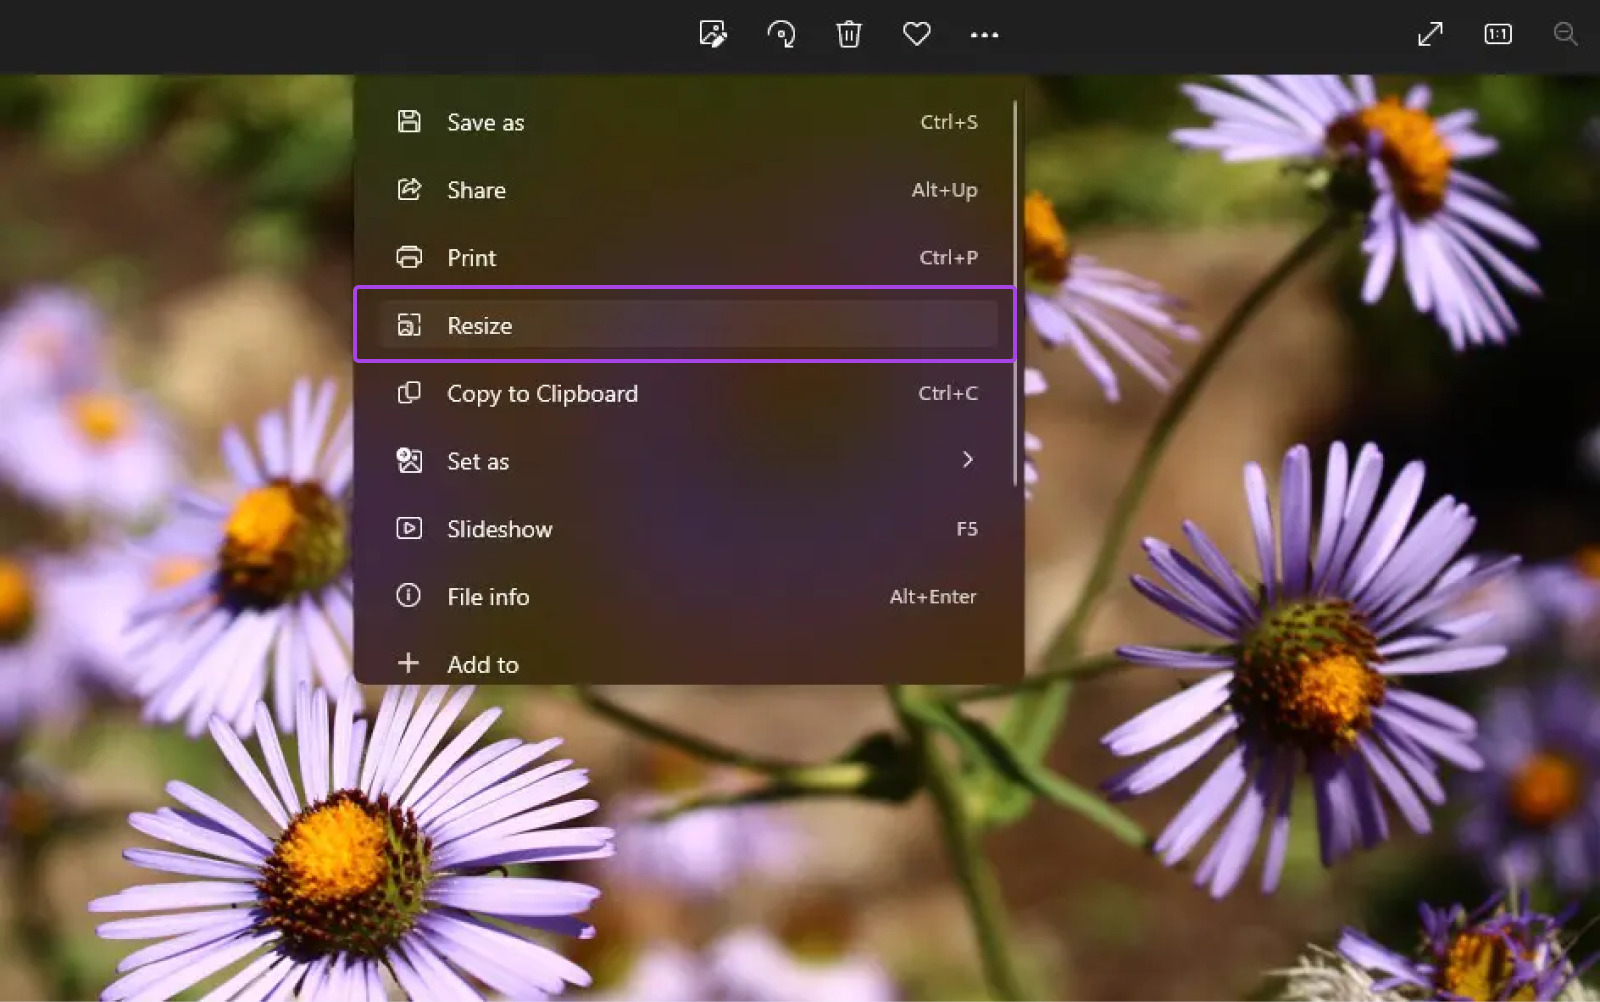
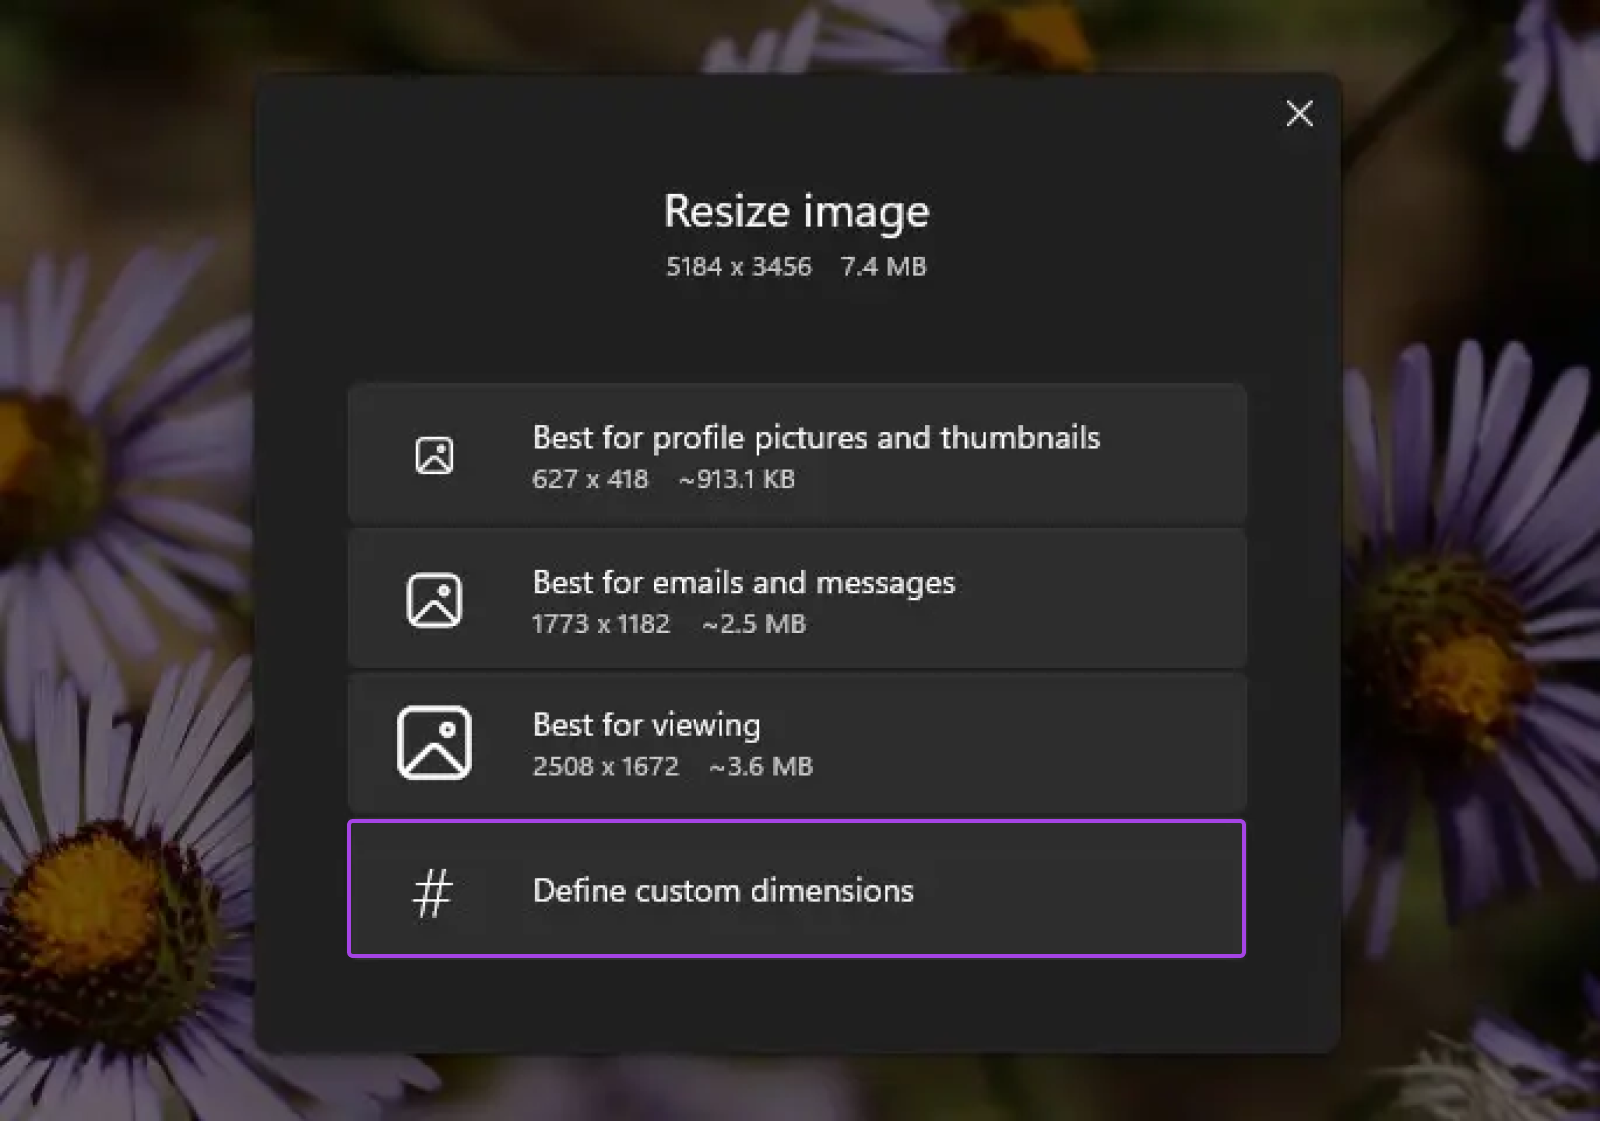
Now you can pick different image sizes or enter your own dimensions for the image.

If you click on Define custom dimensions, you can change the width and height of the image and also control its quality using the slider.
For instance, if you want to compress the image without changing the dimensions, you can lower the image quality to get smaller image files.
At the end, click on Save resized copy. We recommend that you choose a different name for the resized image to avoid overwriting the original one.
2. Use an Online Tool To Compress and Optimize Images
You can also do the same and a bit more with online image optimization tools. Some optimization tools also help you process images in bulk. This can help you save a lot of time.
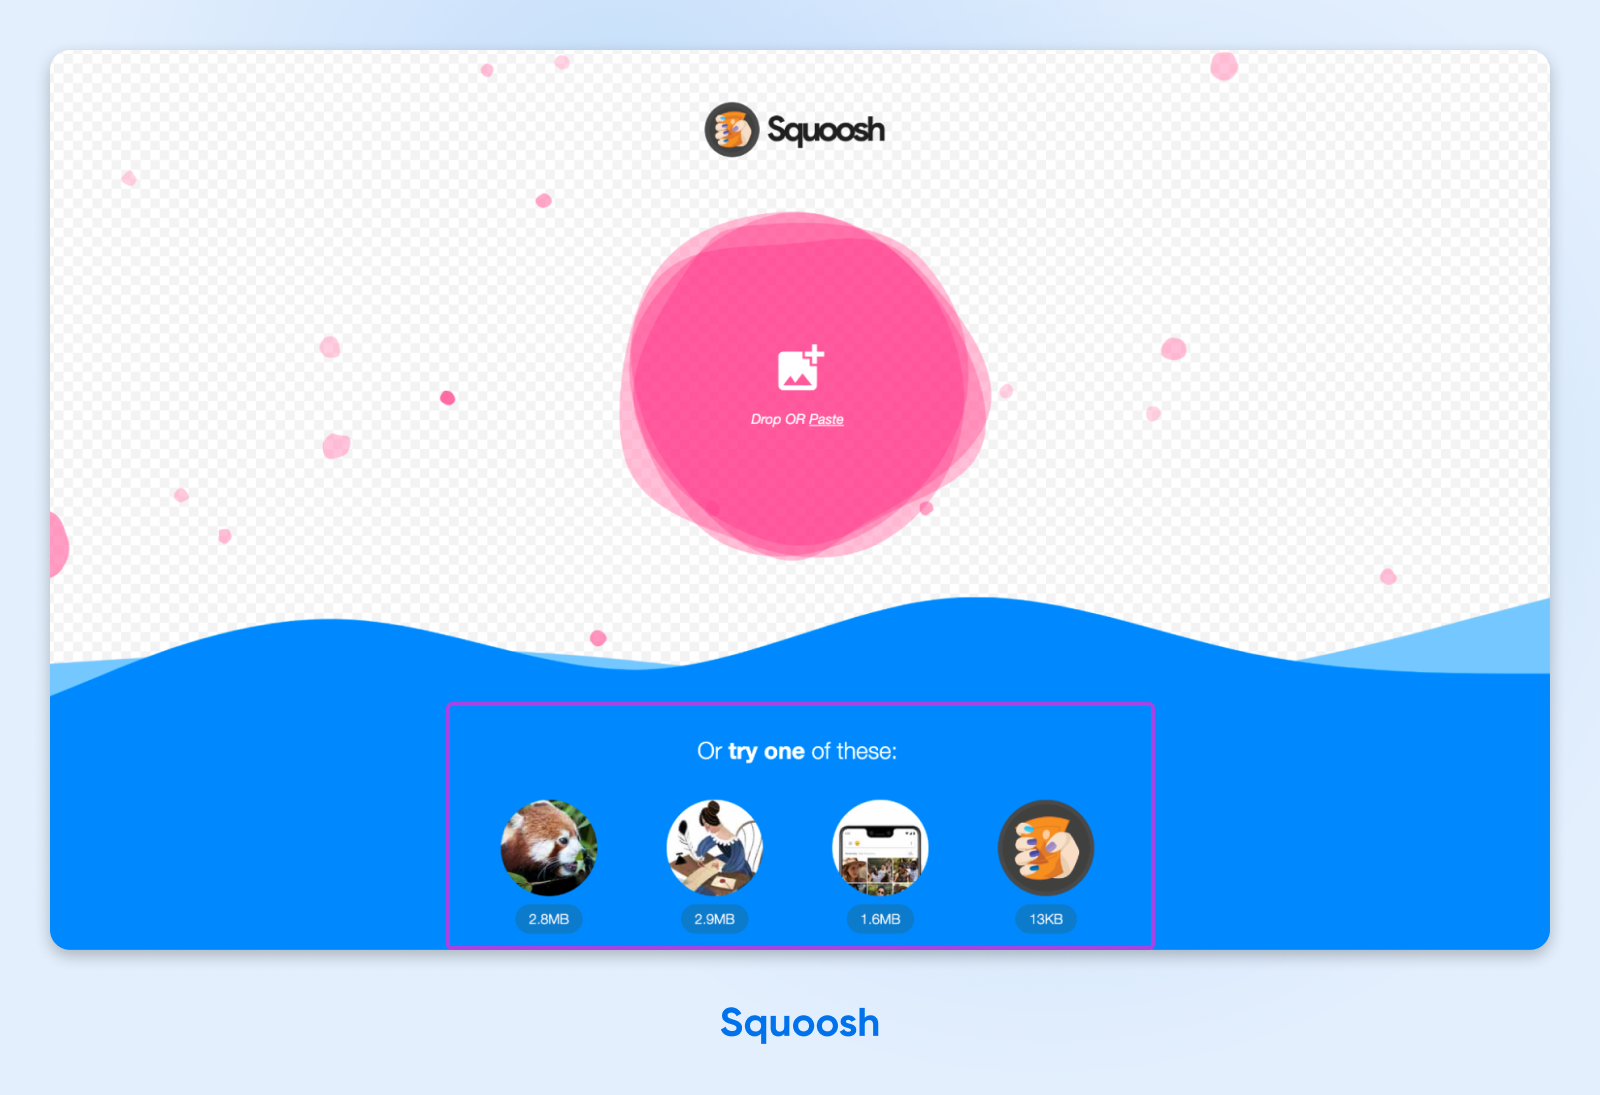
Squoosh
At DreamHost, we love to use Squoosh for a couple of reasons:
- It’s free and web-based: There’s no need to download or install anything.
- Shows real-time comparison: You can see how your optimizations affect image quality instantly.
- Supports multiple file formats: It gives you the option to pick the output file type.
- Offers compression method selection: You can choose between the different compression methods/algorithms and also see how your selection affects the final file size and image quality in real time.
Here’s how you can resize an image with Squoosh.
Go to https://squoosh.app and add an image from your device. If you’re just testing the platform, you can use one of the demo images they’ve provided in the “Or try one of these” section.
Once you see the image, you’ll see a panel on the right side of the page with different image compression options. Toggle over to the Resize button.
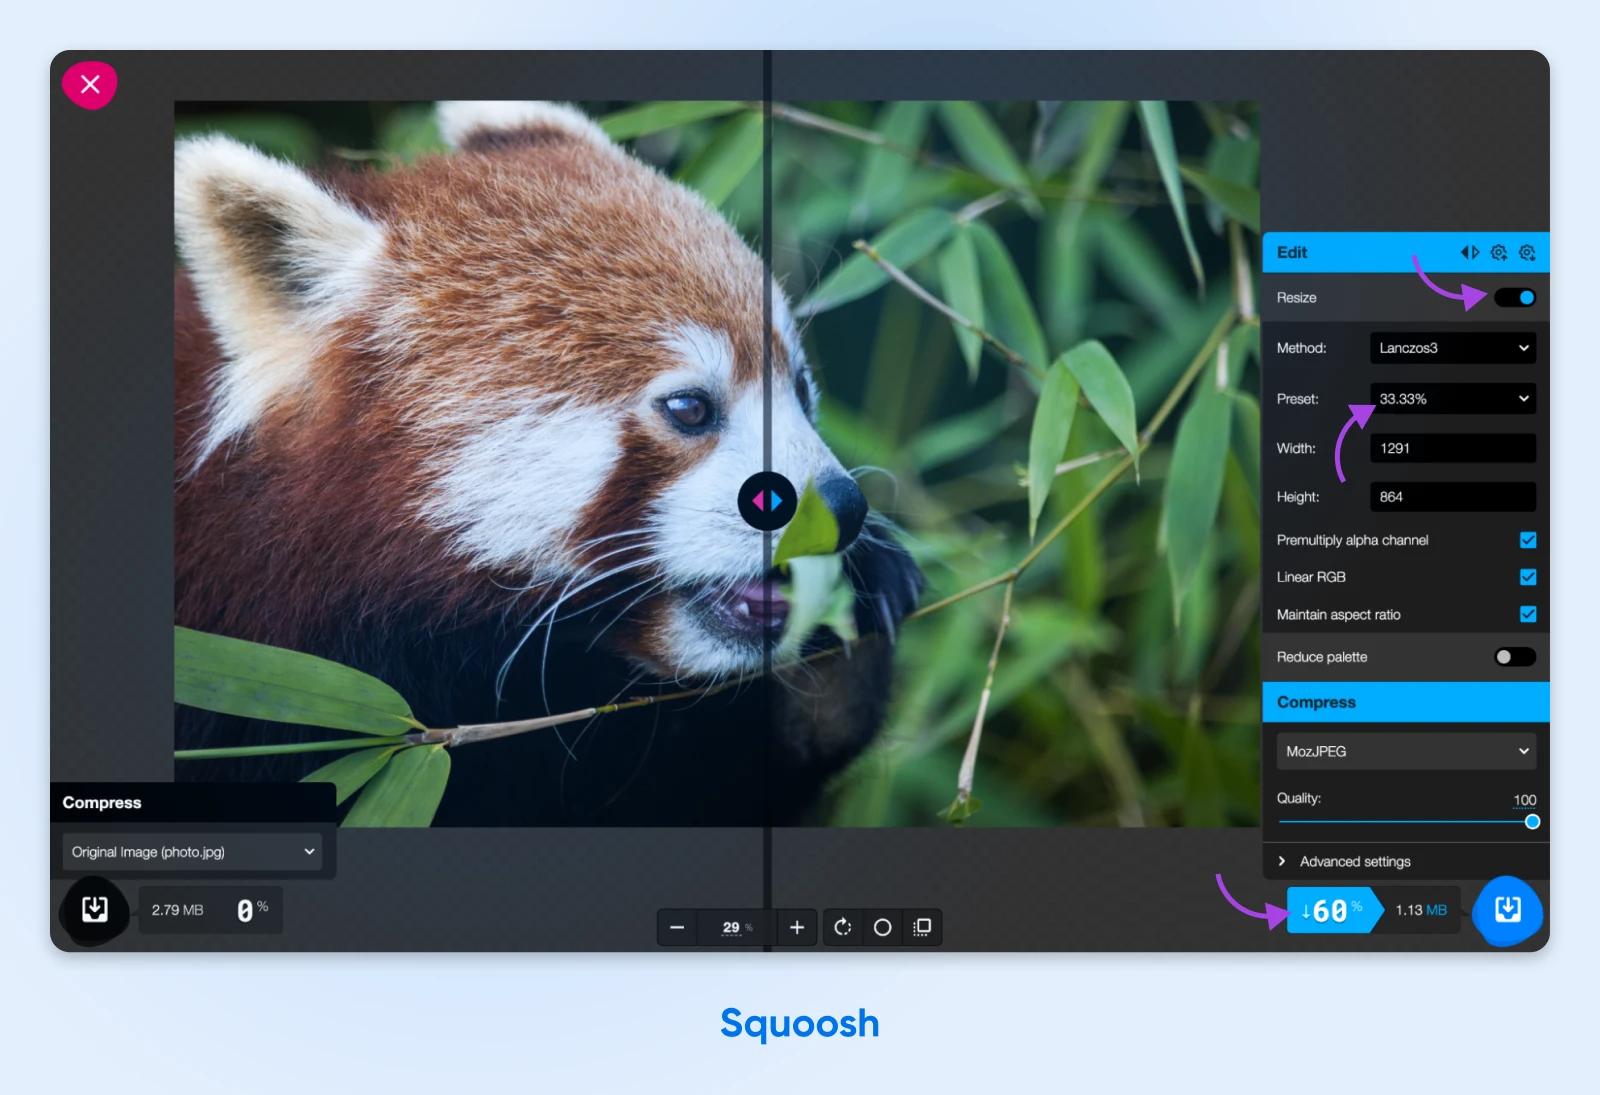
This will give you a few additional options to change the resize method, select a preset size, and more. For this example, we’ve selected the preset as 33.33%.
What this means is that the image dimensions will be reduced to 33.33% of the original size. So, if your original image was 3000 pixels wide, selecting the 33.33% preset will give you a 1000-pixel-wide image.
You’ll also notice that resizing the image significantly reduces the file size — in our example, by 60%.
Once done, click the blue Download button on the bottom right of your screen, and voila! You now have a compressed image.
TinyPNG
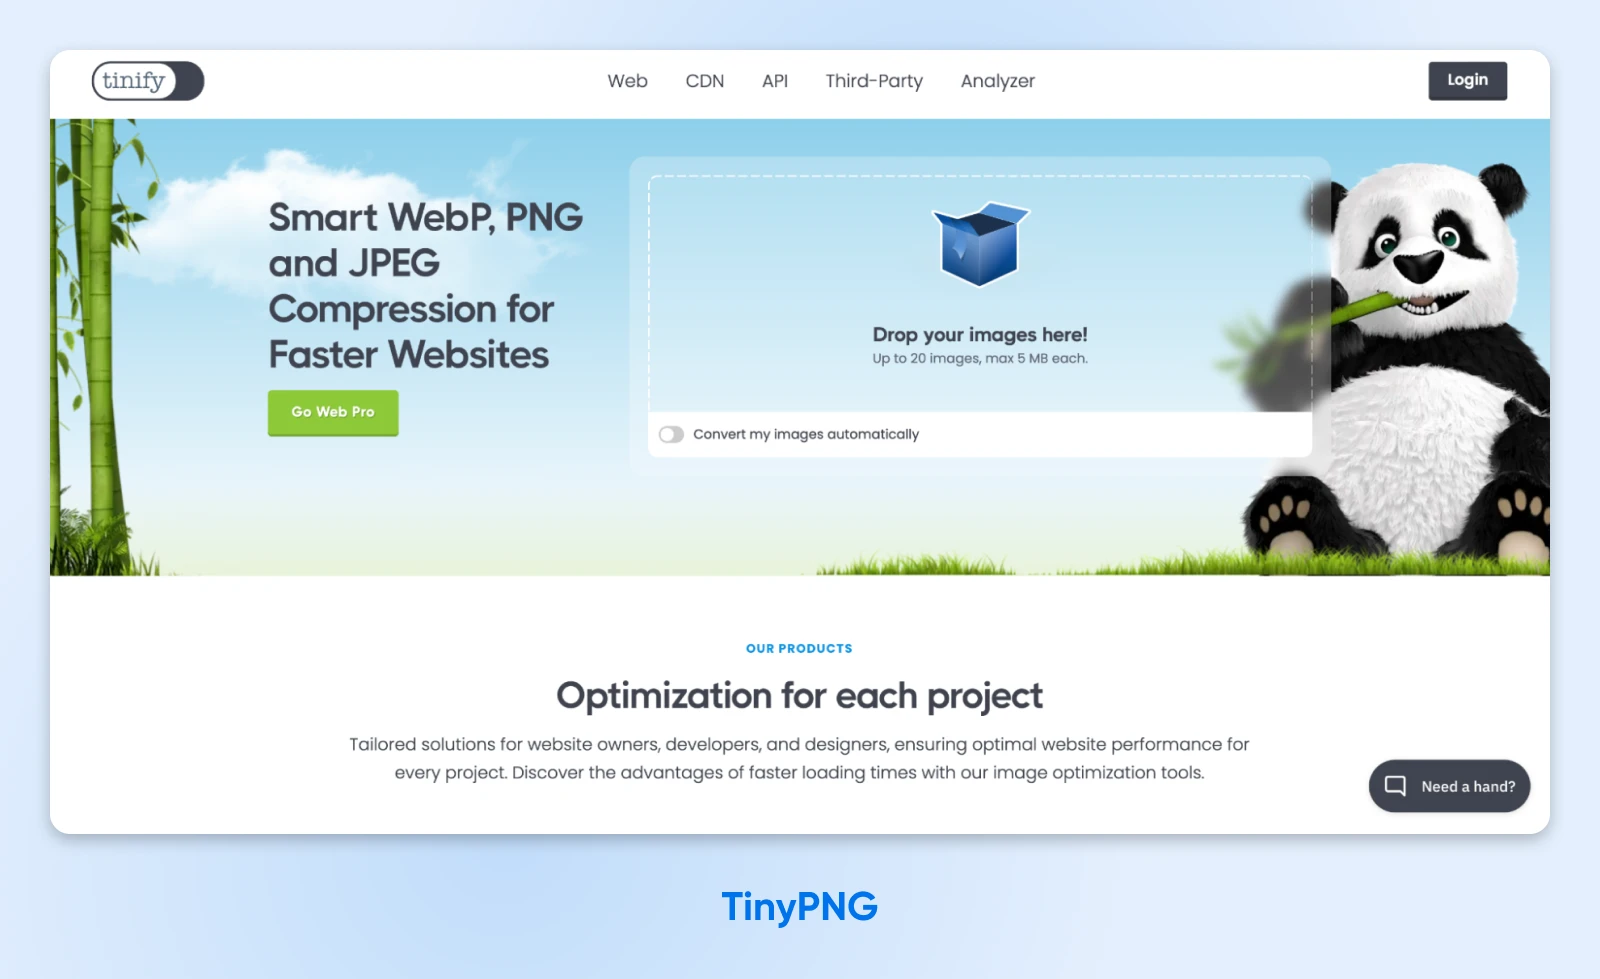
TinyPNG is a user-friendly web app that enables you to compress up to 20 images at a time of up to 5MB each. It’s free to use and supports WebP, PNG, and JPEG images.
Unfortunately, you can’t optimize SVG images with this one just yet. This tool is best for you only if your images are already less than 5 MB in size.
To optimize an image with TinyPNG, simply upload your image files into the box at the top of the page and wait for the compression process to complete.
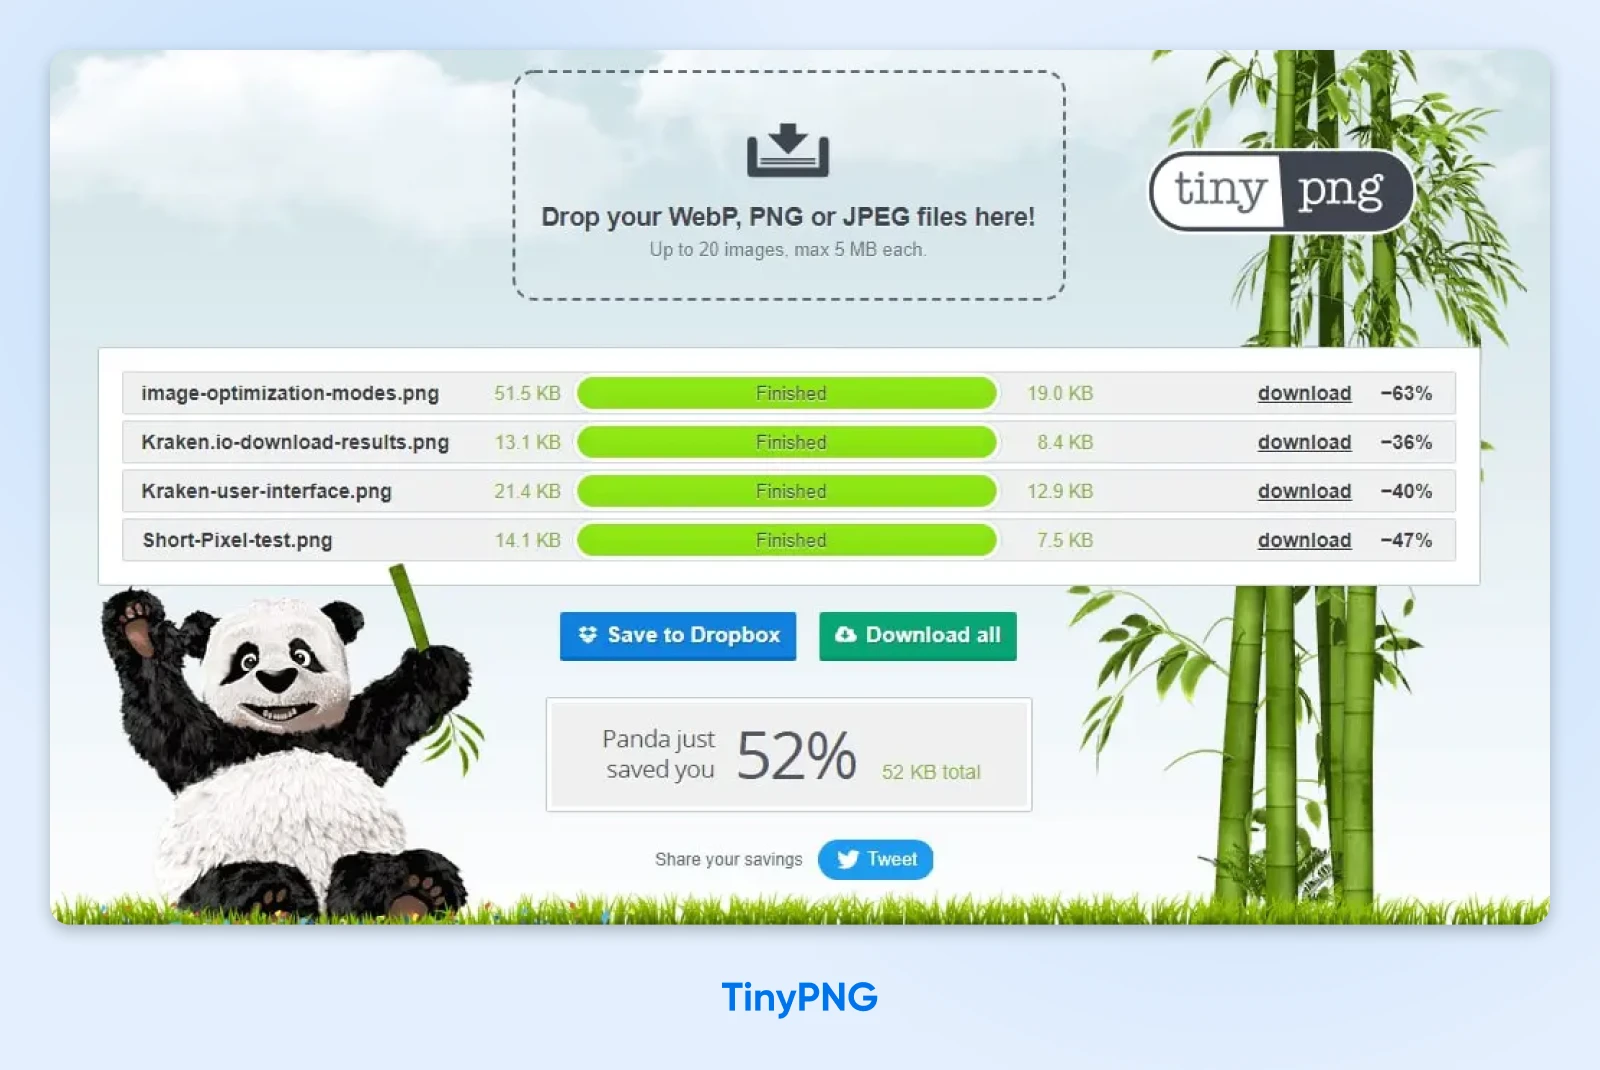
That’s about it! You can then review the results and download your optimized images. For raw images, we’ve noticed image sizes reducing by 40%-70%.
Kraken.io
Kraken.io is another online image optimizer that you can use. Like TinyPNG, it’s lets you compress images in bulk.
Kraken offers a variety of options for picking the type of compression, how you want to export the files, and more.
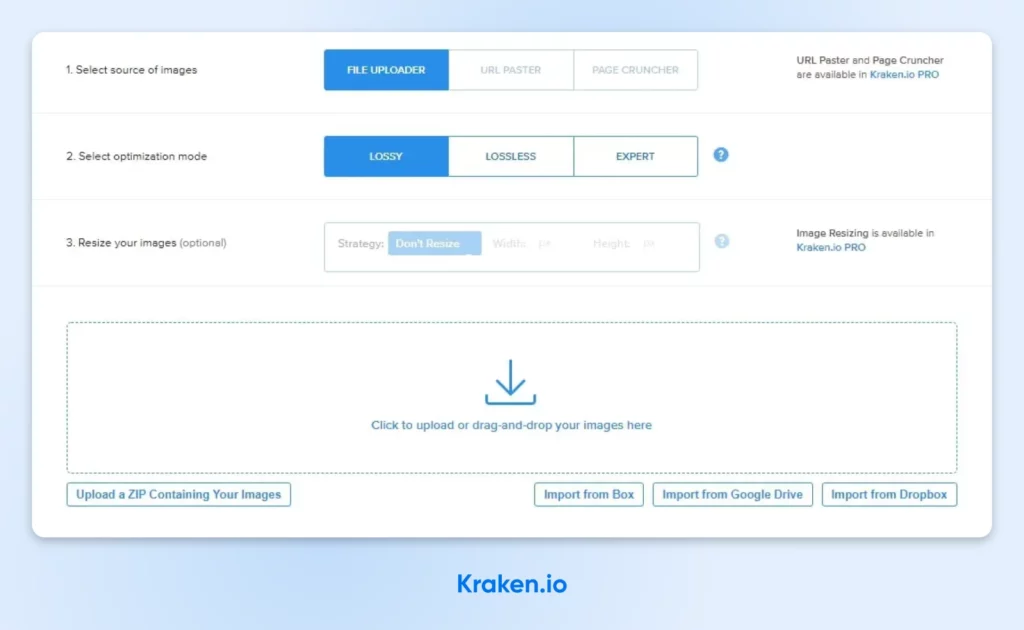
For example, you can choose from three optimization modes, including “Lossy,” “Lossless,” and “Expert.”
Kraken.io gives you more control over how your images are compressed. You can choose to prioritize image quality over file size, or vice versa.
To optimize an image with Kraken.io, simply upload the images you want to compress, select an optimization method, and choose a download option.
For instance, you can download each file individually, download multiple files together in a zip file, upload them directly to Dropbox, or share them straight to Facebook and Twitter.
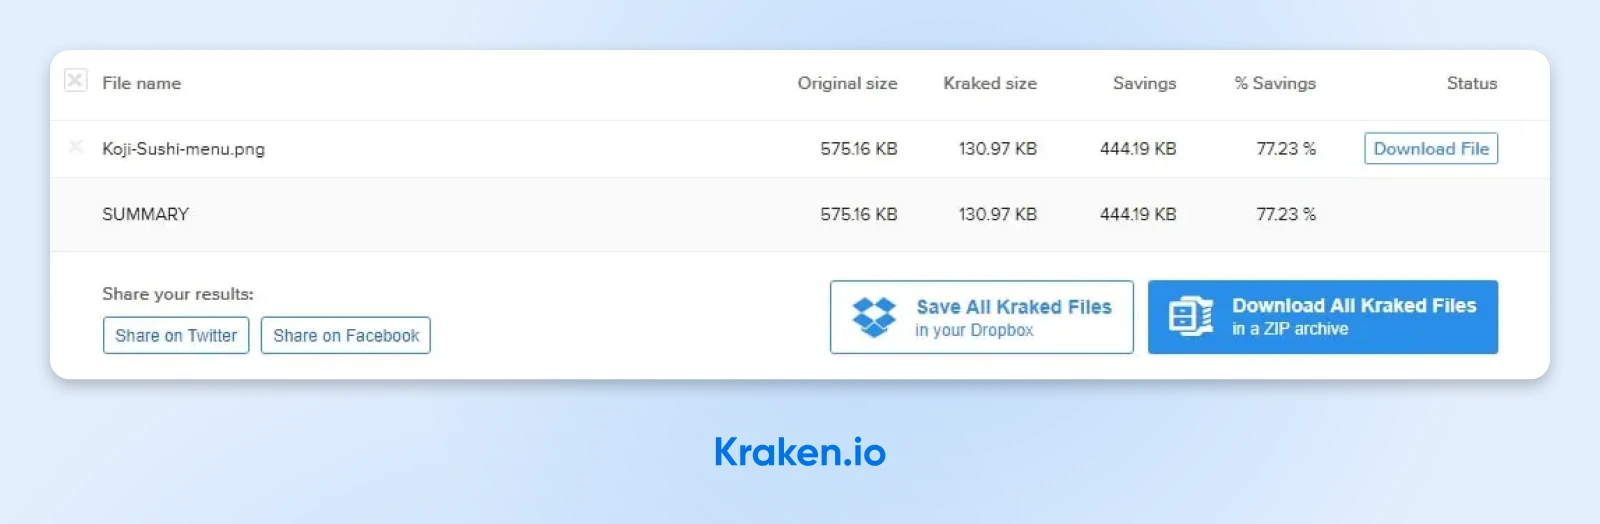
However, the major downside of this tool is that the free version is quite limited. They offer a 100MB testing quota and a maximum of 1MB, which, if you’re compressing images in bulk, may get consumed within a single use.
3. Install a WordPress Plugin
If you have a WordPress website, you don’t need to compress images before uploading. There are several plugins that work behind-the-scenes, optimizing WordPress images as you upload them — and making your site load faster in the process.
Plugins
WordPress plugins are add-ons that extend the functionality of WordPress. They can be used for anything, from adding e-commerce features to complete WordPress page builders, SEO tools and more.
Read More
Let’s look at some of the most popular image optimization plugins.
Smush
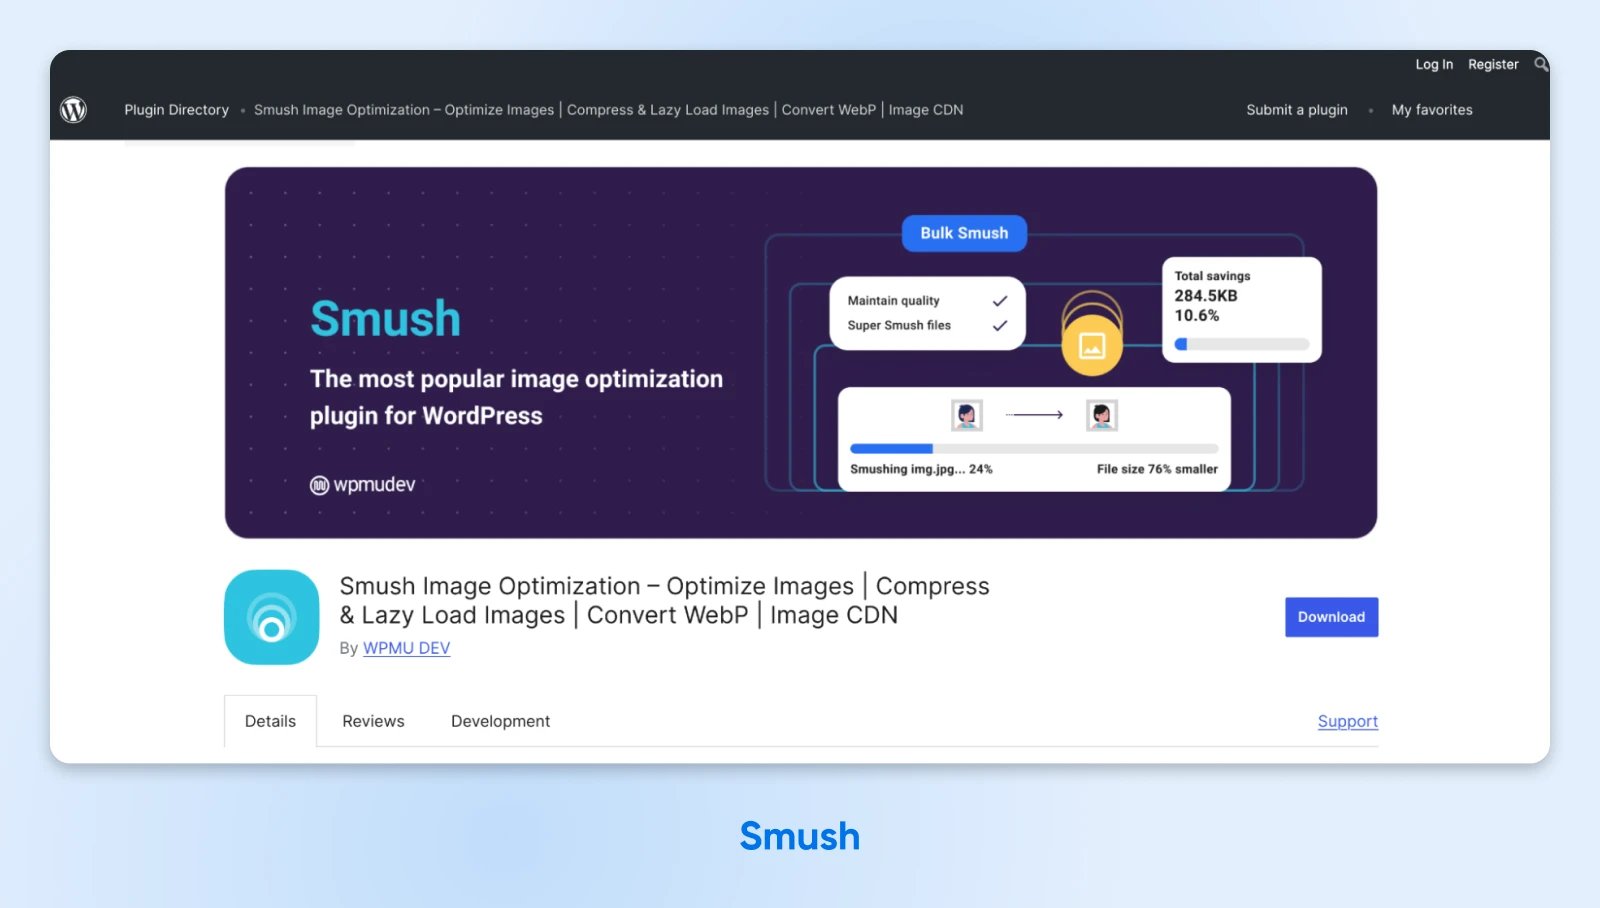
Smush is a popular WordPress image optimizer with over a million active installations and a five-star rating. It helps you improve your page load times by compressing and resizing your images.
For example, the “Bulk Smush” feature detects images on your site that can be optimized and enables you to compress them in bulk.
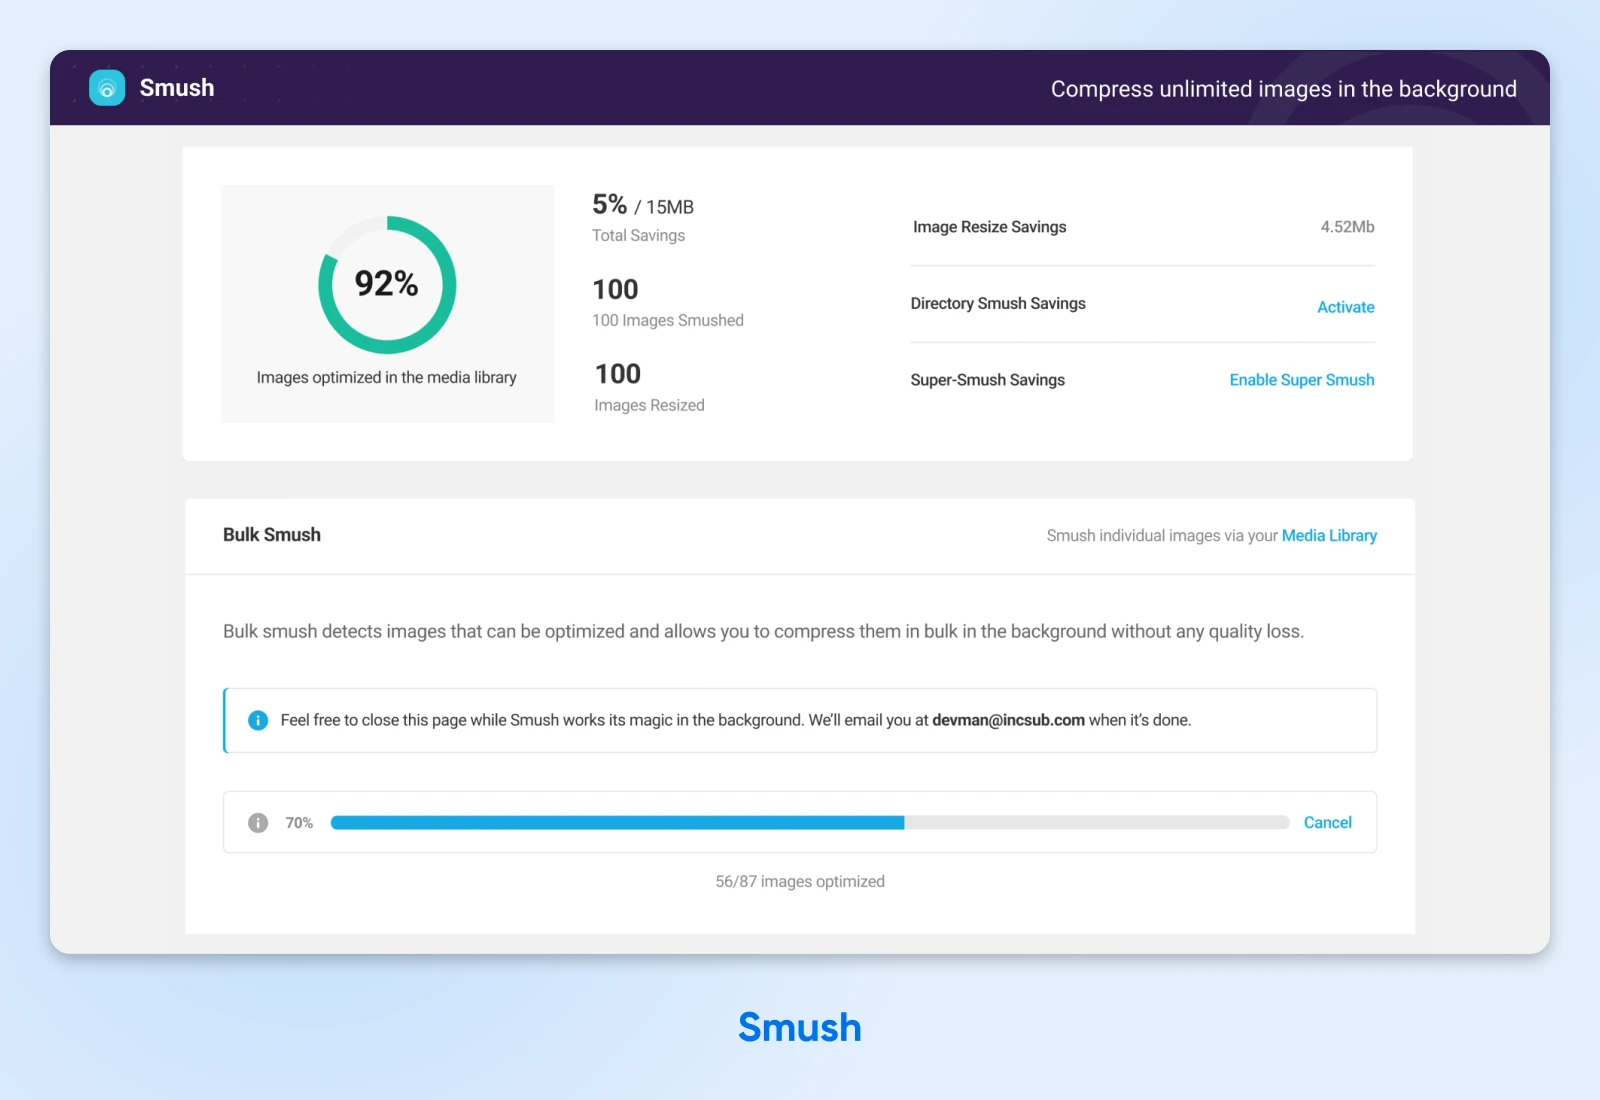
You can also set the maximum image dimensions, and Smush will auto-resize images that exceed the limits while maintaining aspect ratios.
There are many customization features in the free version of Smush, including lazy loading and bulk smush frequency that help you optimize your WordPress website with minimal additional effort.
If you upgrade to Smush Pro, you’ll get access to more features, including the option to automatically compress images and serve them in WebP format. Plans start at $15 per month.
ShortPixel Image Optimizer
ShortPixel is a lightweight image compression plugin for WordPress websites. One of the major benefits of ShortPixel is that it supports HEIC (Apple format), WebP, and AV1 Image File Format (AVIF) image formats.
Apart from that, ShortPixel also has smart cropping. With this feature, all thumbnails of your images are not only optimized but also cropped to automatically display the subject of the image. This feature is designed especially for e-commerce websites.
ShortPixel supports three different compression methods: lossy, glossy, and lossless.
We’ve talked about lossy and lossless. But glossy is a new one here.
Glossy is a high-quality, ShortPixel-specific lossy compression algorithm that’s designed for photographers. So, if you have a photography portfolio website, ShortPixel might be perfect for your image compression needs.
You can also compress your thumbnails and create a backup of your original images. For more options, you can upgrade to the premium version, which starts at $9.99 per month. You can also buy credits in bulk and use them as and when required.
Jetpack
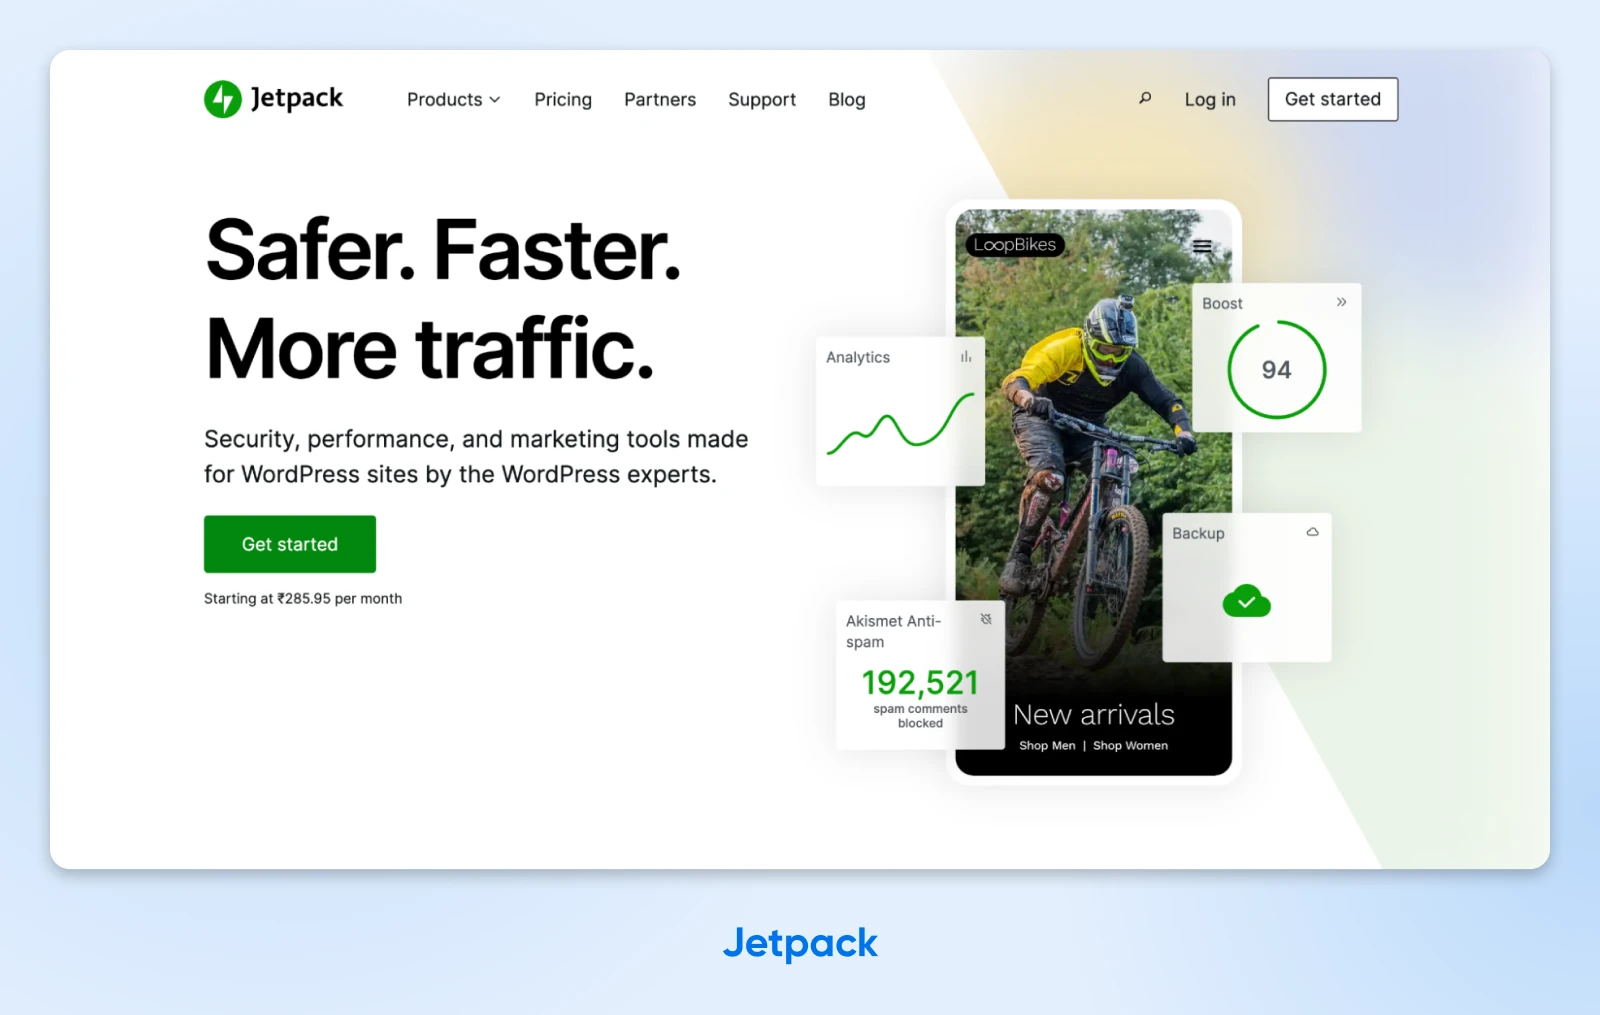
While Jetpack isn’t an image optimization plugin, its Site Accelerator feature includes an option for optimizing images and hosting them on a Content Delivery Network (CDN).
CDN
CDN is short for “Content Delivery Network.” It refers to a geographically-distributed network of web servers (and data centers) that collaborate to ensure speedy content delivery via the internet.
Read More
You can find these image optimization options under the plugin’s Performance & speed settings:
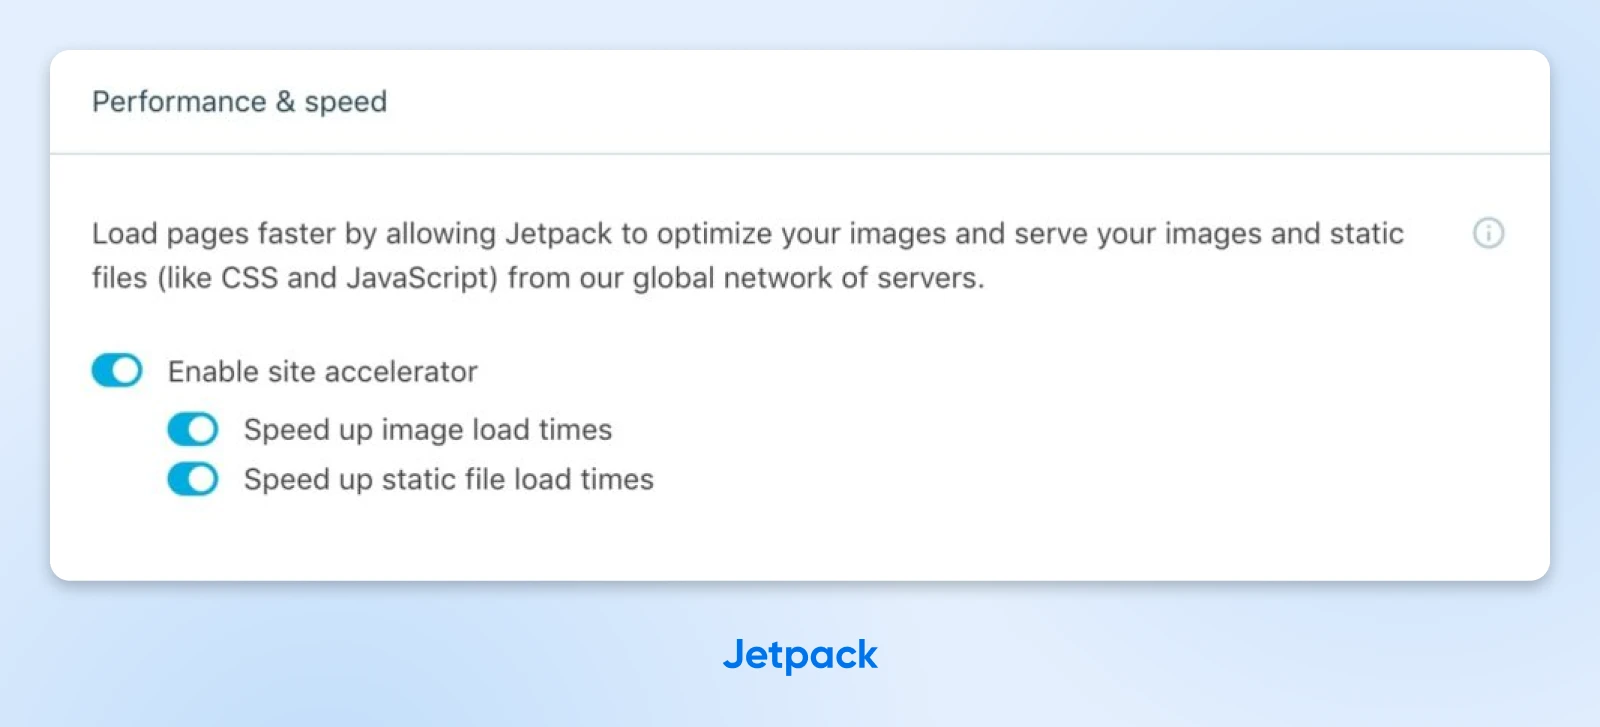
These features are available for free with Jetpack Boost. The plugin comes with other tools that help you enhance your website performance.
Speed Up Your Site With Optimized Images
Poorly optimized images can have a negative impact on your site’s performance. Fortunately, you can speed up your site and improve SEO rankings simply by resizing and compressing your images.
To recap, here are three easy ways to optimize your images:
You can also improve the performance of your site by choosing a powerful hosting plan. Our DreamPress managed WordPress hosting offers fast and reliable service with 24/7 support and a 100% uptime guarantee!
Check out our plans today.
Pro Services – Design
You Dream It, We Code It
Tap into 20+ years of coding expertise when you opt for our Web Development service. Just let us know what you want for your site — we take it from there.
Learn More
Did you enjoy this article?
