How to Do A/B Split Testing in WordPress (Step by Step)

Do you want to run A/B split tests on your WordPress site to improve conversions?
Split testing helps you understand how small changes in content and design affect user behavior. You can create different versions of a landing page and see which one converts the best.
In this article, we will show you how to easily do A/B split testing in WordPress.
What Is A/B Split Testing?
A/B split testing is a technique that allows you to compare two versions of the same web page against each other so that you can determine which one performs better and produces the best results.
Marketers often use A/B split testing for their landing pages to find out which one gets them more conversions and sales.
Split testing can be used to test any element on the page, including call-to-action buttons, color schemes, layout changes, marketing text, images, and more.
Basically, you show different variations of a page to your audience. After that, you track user engagement and conversions to find out which variation gives you the best results.
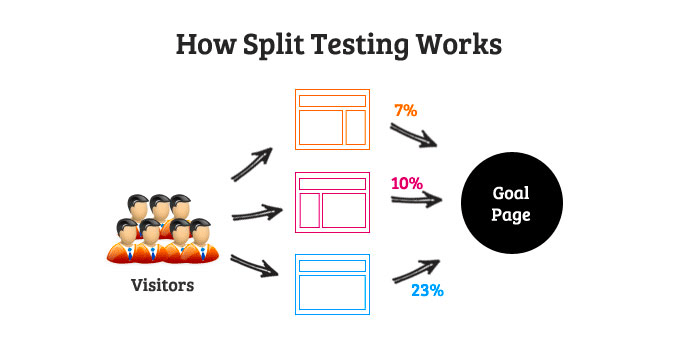
How to Do A/B Split Testing in WordPress
Before we move forward, there are a few things you will need for this tutorial.
Previously, Google Optimize was a free tool that many people used for split testing. However, Google Optimize sunsetted on September 30, 2023. Google announced that it would be investing in A/B testing in Google Analytics 4, which is the latest version of the famous analytics platform.
This means that if you were using Google Optimize before, then you can no longer access your experiments, personalizations, and historical data. When you open your account, you will see a message at the top showing that the tool is now sunset.
Fortunately, there are some other simple ways of A/B testing in WordPress. These are great Google Optimize alternatives, as they are easier to use and help you conduct experiments in WordPress. Simply click the links below to jump ahead to your preferred method:
Method 1: A/B Testing in WordPress Using Thrive Optimize
Thrive Optimize is part of the Thrive Theme suite and lets you run experiments and split tests in WordPress.
Since Google Optimize is no longer available, Thrive Optimize is a great alternative to conduct A/B tests. It offers more features, and you don’t need to enter a code to run a split test. Plus, it will keep your experiment data safe.
Just keep in mind that you will only be able to use Thrive Optimize if you are also using the Thrive Architect page builder plugin.
First, you’ll need to visit the Thrive Themes website and sign up for an account.

After creating an account, you can download the Thrive Product Manager plugin from your account area.
Next, you’ll need to install and activate the Thrive Product Manager plugin. For more details, please see our guide on how to install a WordPress plugin.
From here, you can go to the Product Manager page from your WordPress dashboard and click the ‘Log into my account’ button.

On the next screen, you’ll see different Thrive Theme products.
From here, you’ll need to install Thrive Optimize and Thrive Architect. Simply check the ‘Install Product’ options and click the ‘Install selected products’ button at the bottom.

If the products don’t automatically activate, then you will need to head back to the Product Manager page from your WordPress dashboard and activate Thrive Architect and Thrive Optimize.
You should now see a success message once the plugin is installed.

Next, you’ll need to head to Thrive Dashboard » Thrive Optimize from your WordPress admin panel.
After that, you can add a new page by going to Pages » Add New from your WordPress admin panel. Once you are in the content editor, simply click the ‘Launch Thrive Architect’ button.

Next, Thrive Architect will ask you what type of page you would like to create.
You can create a normal page, a blank page with a header and footer, a completely blank page, or select a pre-built landing page. For this tutorial, we will select the ‘Pre-built Landing Page’ option.

There are many pre-built landing page templates to choose from. Simply select one and edit your page.
For more details on how to edit your page with Thrive Architect, you can see our guide on how to design landing pages in WordPress.

In the Thrive Architect page builder, you will see an A/B testing option in the right panel.
Go ahead and click the ‘A/B’ icon.

Next, you can create different variants for your page for split testing.
We recommend clicking the ‘Duplicate this variation’ button for your control page. This will create a clone of your main page so you won’t have to create the landing page all over again from scratch.

You will now see a duplicate variant of your landing page.
Go ahead and click the ‘Edit Variation’ button to make changes.

Next, you can edit the landing page to split-test different elements.
For example, we will change the color of the call to action (CTA) button. Once you are done, just click the ‘Save Work’ button at the bottom.
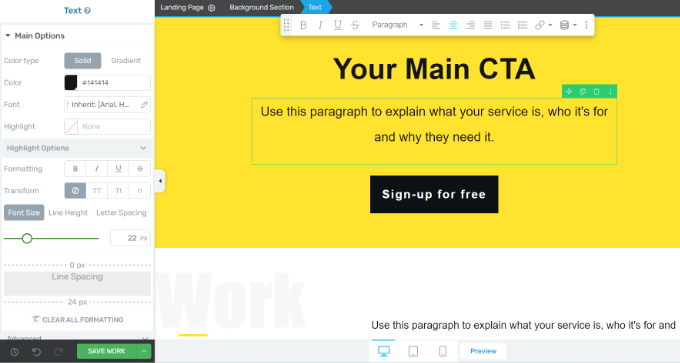
Now, you can click the ‘A/B’ button from the panel on the left to go back to the A/B testing dashboard.
Next, Thrive Architect also lets you split traffic for each variation. Simply use the toggles at the bottom to allocate the amount of traffic to each page.
Once you are done, go ahead and click the ‘Set Up & Start A/B Test’ option.

A popup window will now open.
Go ahead and enter a name for your split test and a short description. You can also toggle on the ‘Enable Automatic Winner Settings’ option and set conditions to pick a clear winner, as well as the duration that Thrive Optimize will run the A/B test.
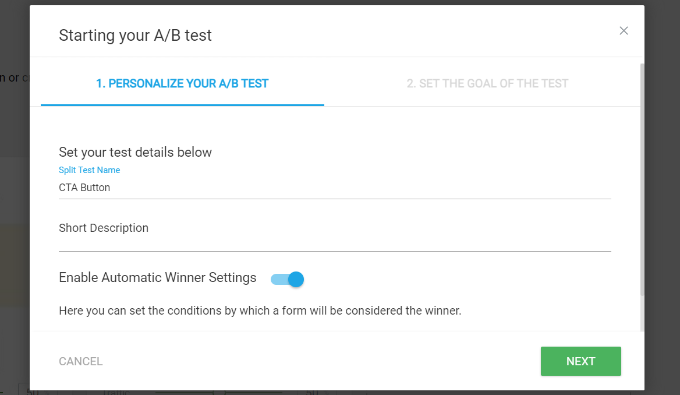
After that, simply click the ‘Next’ button.
Now, you can select a goal for your test. There are 3 options, which include revenue, visit goal page, and subscription. After picking a goal, you can click the ‘Start A/B Test’ button.

For this tutorial, we will select the ‘Subscription’ goal for our test.
Next, you’ll be redirected to the WordPress content editor. You can scroll down to the ‘Thrive Optimize – A/B Test Overview’ meta box and see the 2 variations.
You don’t have to do anything else. The plugin will now test both variations and show the winner.

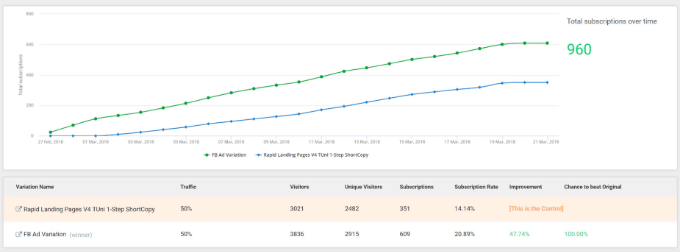
To view how the variations are performing, you can click the ‘View Test Details’ option in the meta box.
Here, you can see the conversions over time for each variant and also see which is the control variant. There is also an option to stop the test and choose a winner.
Method 2: A/B Testing in WordPress Using Nelio AB Testing (Free)
If you are looking for a free solution for running A/B tests on your WordPress site, then you can use Nelio AB Testing.
While the free version isn’t as powerful as Thrive Optimize, you will get basic features to conduct experiments on your website. For example, you can test headlines, create two different versions of a page to test them, and more.
However, if you are looking for a visual builder and additional options like assigning weights to each variant in the experiment, then we recommend using the first method instead.
To start, you’ll need to install and activate the Nelio AB Testing plugin. If you need help, then please see our guide on how to install a WordPress plugin.
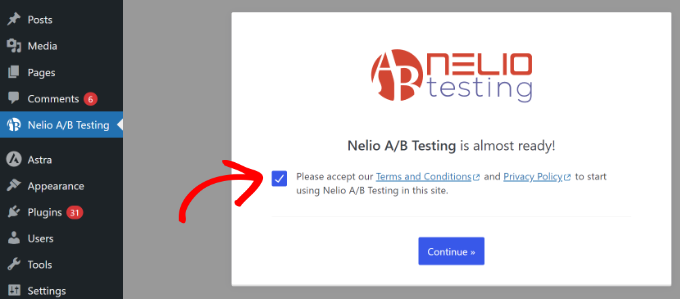
Upon activation, you can head to Nelio A/B Testing from your WordPress dashboard. From here, click the checkbox to accept the terms of service and privacy policy of the plugin, and then click the ‘Continue’ button.
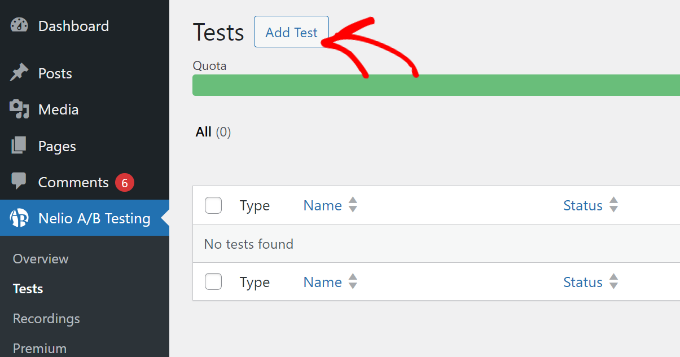
After that, you’ll be taken to the Neilo A/B Testing » Tests page in the WordPress admin panel.
Go ahead and click the ‘Add Test’ button.
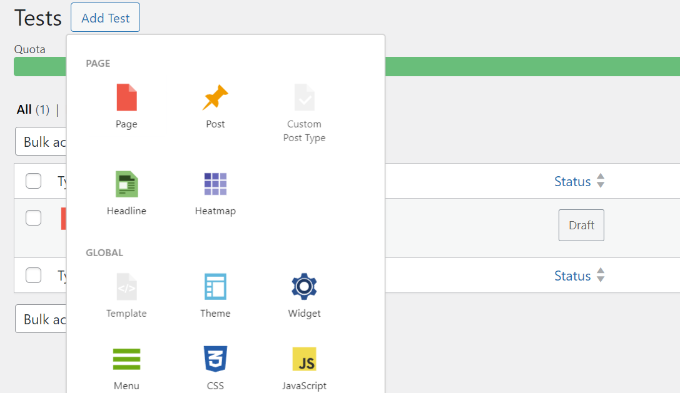
Next, you’ll see options to test on your website. For example, the plugin lets you split test pages, posts, headlines, widgets, menus, themes, JavaScript, CSS, and more.
For the sake of this tutorial, we will select the ‘Headline’ option and split-test some titles for a blog post.
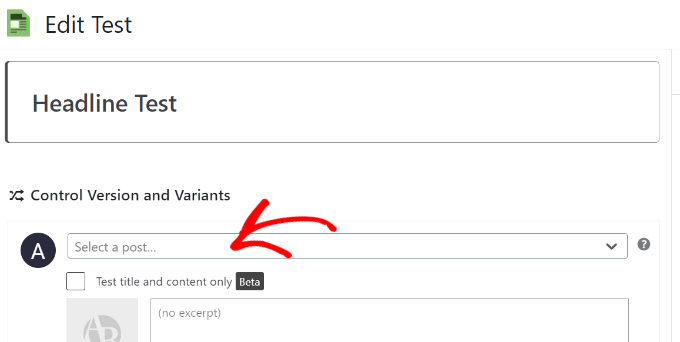
After that, you can enter a title for your test at the top.
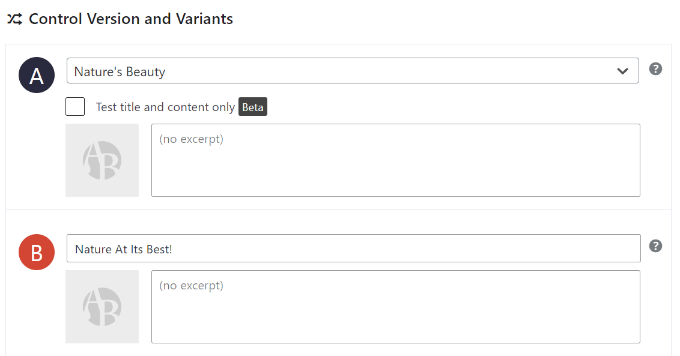
From here, you will see the Control Version and Variants section. First, you can click the dropdown menu and choose a post title. This will be the control version (labeled A).
Next, you can scroll down and enter details of a variant (labeled B).
This will be the new headline you will be testing against the one that’s already live.
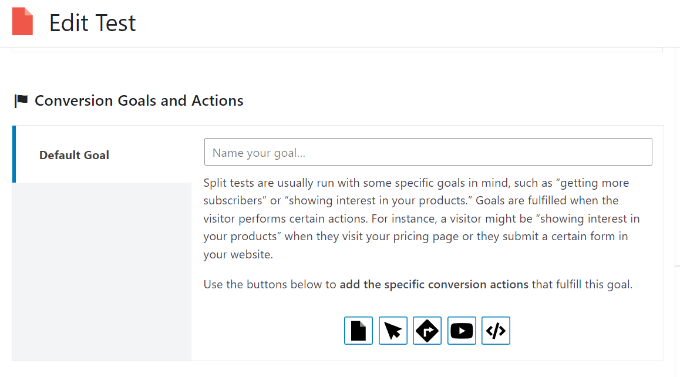
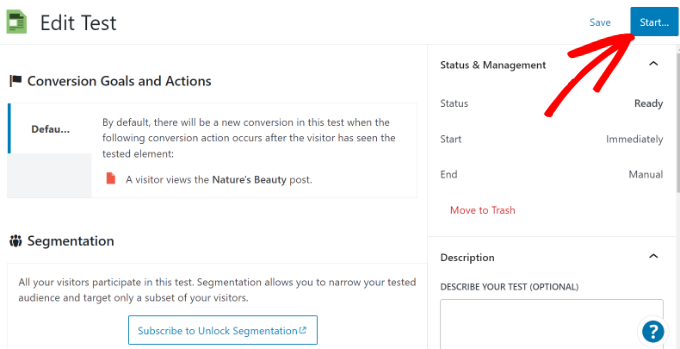
After that, you can scroll down to the Conversion Goals and Actions section. You will notice that the plugin will use the default goal for this experiment type. In this case, it will measure views for your page with a new headline.
However, you can define your own goals for other experiment types. For example, if you want to test a page, then you can select whether you’d like to measure page views, clicks, clicks on external links, YouTube video playback, or choose a custom event.
The plugin also lets you create segmentation and narrow your test audience. However, this feature is only available for premium users, and you’d need to subscribe to a paid plan.
After setting your conversion goals, you can click the ‘Start’ button at the top to start A/B testing.
Nelio A/B Testing plugin will now conduct the experiment.
To stop the experiment, you can go to the Nelio A/B Testing » Tests page and then click the ‘Stop’ link under the test.
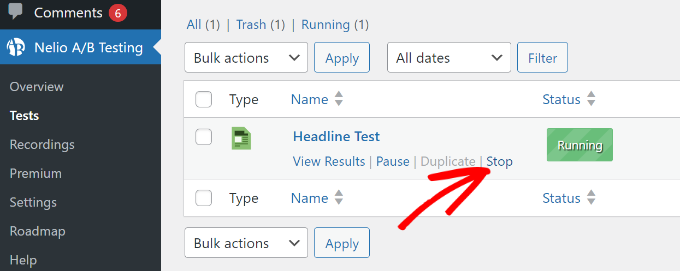
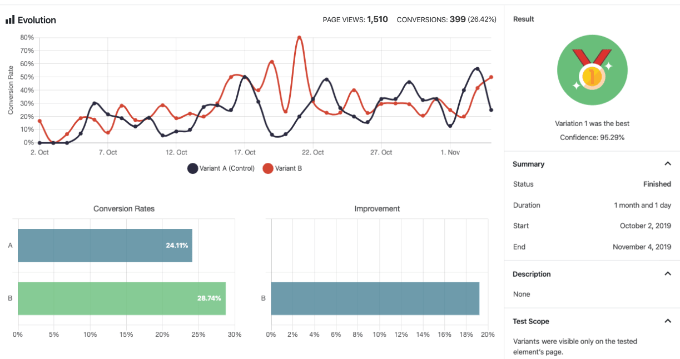
You can also click the ‘View Results’ option to see which variant is performing the best.
The plugin will help you select a winner and show conversions for each variant.
Bonus Tips for Running A/B Tests in WordPress
When it comes to doing split tests on your website, here are some tips for running your experiments the right way:
- Decide on a Goal – You’ll need to first decide which feature you want to test and what the end goal is. A good place to start is by studying your audience and their needs. You can also get feedback from users to understand what they are looking for and then split test elements on your site to boost conversions.
- Keep Your Experiments Simple – It’s generally a good idea to just create 2 versions of your landing pages, ads, text, and other elements. This makes it easier to compare which variant is performing the best.
- Document Your Split Test Results – After you’ve successfully conducted an experiment, you should document the results. This way, you’ll have valuable data for future reference and easily see what worked on your site.
We hope this article helped you learn how to do A/B split testing in WordPress. You may also want to see our guide to WordPress conversion tracking made simple and how to create an email newsletter the right way.


