How to Create Custom WordPress Layouts With Elementor
Do you want to create your own custom page layouts in WordPress?
Elementor is a drag-and-drop WordPress page builder that allows you to easily design custom WordPress layouts without having any coding knowledge.
In this article, we will show you how to easily create custom WordPress layouts with Elementor with just a few clicks.
Why and When Do You Need Custom WordPress Layouts?
Many free and premium WordPress themes come with multiple layout choices for different kinds of pages. However, sometimes, none of these layouts will meet your requirements.
If you know how to code in PHP, HTML, and CSS, then you can create your own page templates or even build a child theme for your site. However, the majority of WordPress users are not developers, so this option doesn’t work for them.
Wouldn’t it be great if you could just design page layouts using a drag-and-drop interface?
This is exactly what Elementor does. It is a drag-and-drop WordPress page builder plugin that allows you to easily create your own custom WordPress layouts without any coding skills.
It has an intuitive user interface that lets you build custom layouts with a live preview. It comes with many ready-to-use modules for all kinds of web design elements.
Elementor has several professionally designed templates that you can instantly load and use as a starting point. It works with all standard-compliant WordPress themes and is compatible with all popular WordPress plugins.
Having said that, let’s take a look at how to create custom WordPress layouts with Elementor.
Getting Started With Elementor
First, you will need to purchase the Elementor Pro plugin. It is the paid version of the free Elementor plugin and gives you access to additional features and 1 year of support.
Next, you will need to install and activate the Elementor plugin. For more details, see our step-by-step guide on how to install a WordPress plugin.
Upon activation, you must visit the Elementor » Settings page to configure the plugin settings.
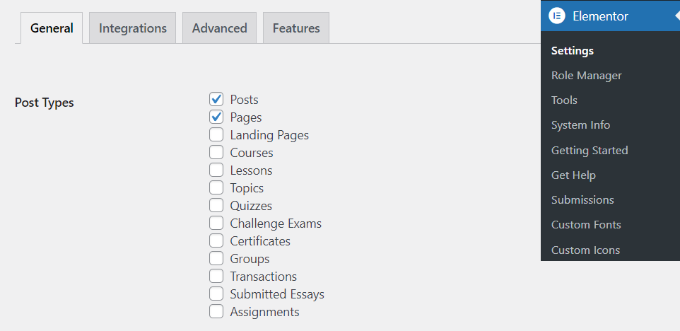
Here, you can enable Elementor for different post types. By default, it is enabled for your WordPress posts and pages. If you have custom post types on your site, then those will also appear here, and you can enable them as well.
You can exclude or include user roles that can use Elementor when writing posts or pages. By default, the page builder is enabled only for administrators.
Then, don’t forget to click on the ‘Save changes’ button to store your settings.
Creating Custom WordPress Layouts With Elementor
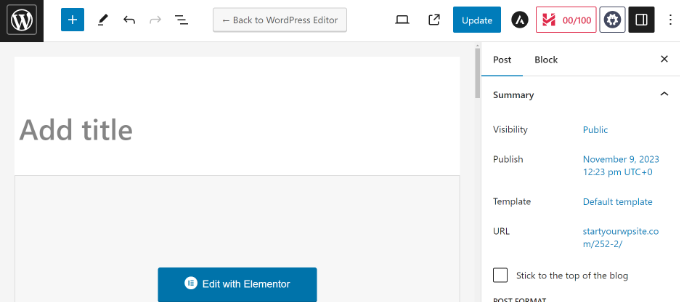
First, you need to create a new page or post on your WordPress site. On the post editing screen, you will notice the new ‘Edit with Elementor’ button.
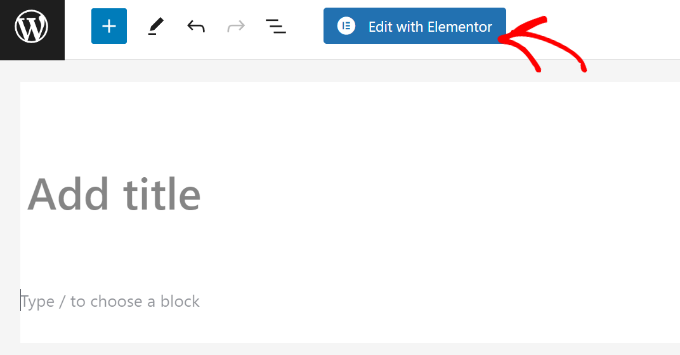
Clicking on it will launch the Elementor user interface, where you can edit your page using Elementor’s drag-and-drop page builder.
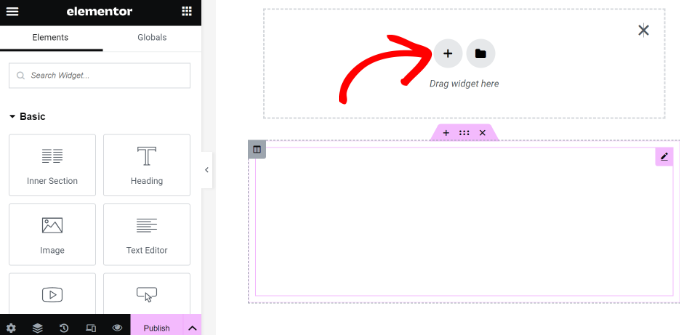
You can add sections and build your page from scratch, or you can pick a template.
Templates give you a quick and easy way to get started. Elementor comes with several professionally designed templates that you can customize as much as you want.
Let’s start with a template by clicking on the ‘Add Template’ button.
This will bring up a popup where you will be able to see the different templates that are available. You should look for a template that is similar to what you want for your page layout.
In our example, we are looking at 404 page templates.
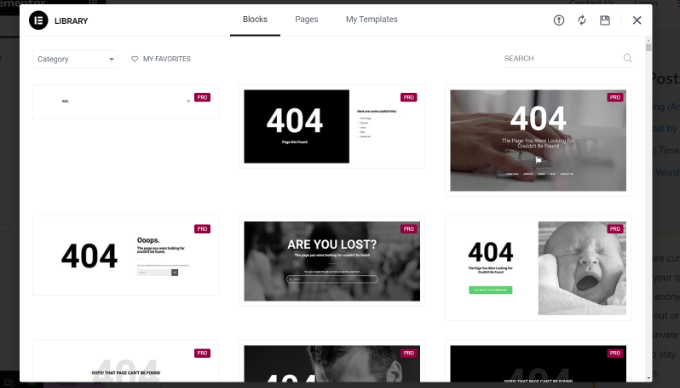
Now, you need to click to select the template you like and then click on the ‘Insert’ button to add it to your page.
Elementor will now load the template for you.
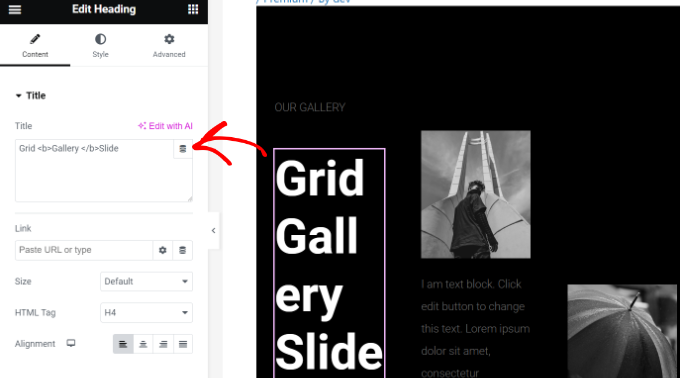
You can now start editing the template to match your needs. Simply point and click on any element to select it, and Elementor will show you its settings in the left column.
How Elementor Layouts Work
Now, let’s talk about how Elementor layouts work.
Elementor layouts are built using sections, columns, and widgets. Sections are like rows or blocks that you place on your page.
Each section can have multiple columns, and each section and column can have its own styles, colors, content, and so on.
You can add anything in your columns and sections using Elementor widgets. These widgets are different kinds of content blocks that you can place in your Elementor sections.
Simply select a widget and drop it into your section or column. There is an extensive set of widgets available that cover all the popular web design elements that you can think of.
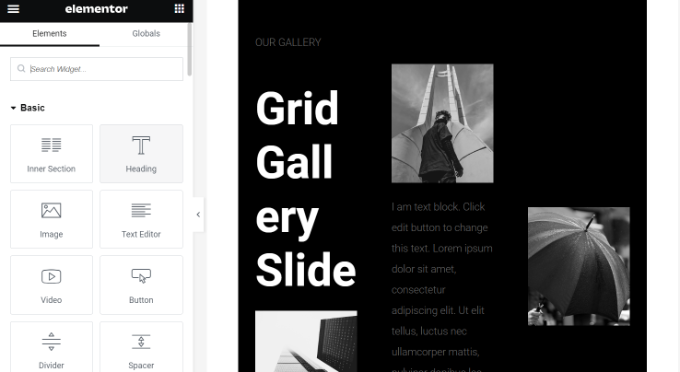
You can add images, text, headings, image galleries, videos, maps, icons, testimonials, sliders, carousels, and so much more.
You can also add default WordPress widgets and even the widgets created by other WordPress plugins on your site. For example, if you are using WPForms to create different forms for your site, then you can use its widget in Elementor.
Once you are done editing, you can click on the arrow next to the ‘Publish’ button to view different save options.
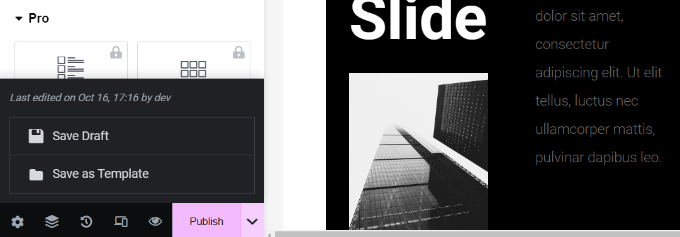
Note: Saving a page layout will not publish the page on your WordPress site, but it will save it.
You can now preview your page or go to the WordPress dashboard.
This will bring you back to the WordPress post editor. You can now save your WordPress page or publish it on your website.
Creating Your Own Templates in Elementor
Elementor allows you to save your own custom layouts as templates. This way, you can reuse your own templates to create new pages even faster in the future.
Simply edit the page you would like to save as a template with Elementor.
In the Elementor builder interface, click on the arrow next to the ‘Publish’ button. You will now see more options to save your post. Simply click the ‘Save as Template’ option.
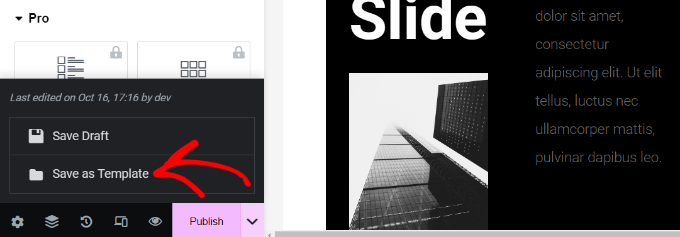
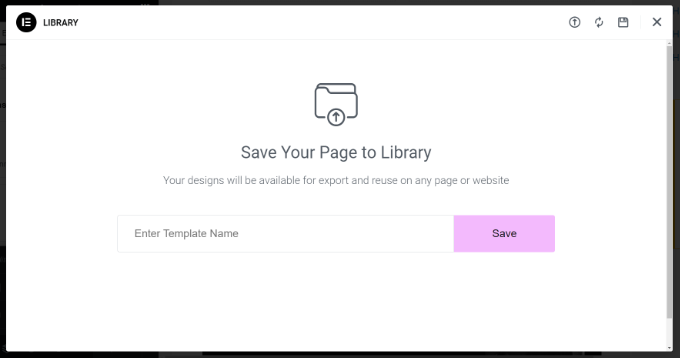
This will bring up a popup where you need to provide a name for your template.
After entering the name, click the ‘Save’ button.
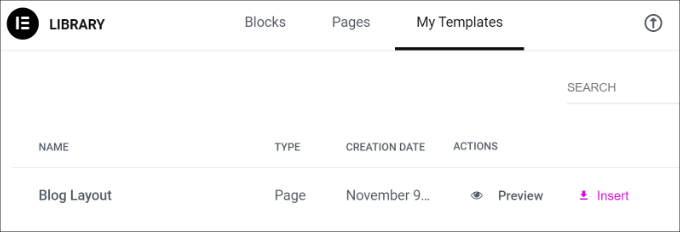
Next time you are creating a custom page layout, you will be able to select it from the ‘My Templates’ tab.
All you have to do is click the ‘Insert’ button for your custom page layout.
You can also export this template and use it on other WordPress sites using Elementor.
Simply click the 3 dots icon and then click the ‘Export’ option.
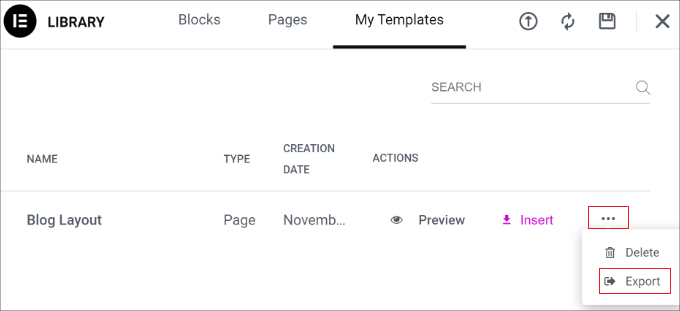
From here, you can download the template onto your computer.
Elementor Alternatives for Creating Custom Layouts
Besides Elementor, there are other landing page and website builders that let you create custom layouts for your site.
Here are some of the best Elementor alternatives you can use:
- SeedProd is the best drag-and-drop WordPress website builder that lets you create custom layouts for your landing pages. There are 300+ theme or landing page templates to choose from. SeedProd also offers tons of customization options and blocks to create stunning pages. For more details, you can see our complete SeedProd review.
- Divi is a visual theme and page builder. It’s been in the industry for over 14 years and offers different features for creating WordPress layouts, including a layout library. There are lots of customization options in the visual builder, and you don’t have to edit any code.
- Thrive Architect is a powerful and beginner-friendly page builder that you can use to create beautiful layouts. It comes with 352+ templates and many customization options. You can use its front-end visual builder to edit any element on the page. For more details, see our Thrive Architect review.
- Beaver Builder is another popular drag-and-drop page builder for WordPress. It is easy to use, and you can easily set up layouts for pages and posts using Beaver Builder. It also offers pre-built templates for landing pages, but there are not as many as with SeedProd or Divi.
We hope this article helped you learn how to create custom WordPress layouts with Elementor. You may also want to see our expert comparison of Elementor vs. Divi vs. SeedProd and our picks for the best web design software.
If you liked this article, then please subscribe to our YouTube Channel for WordPress video tutorials. You can also find us on Twitter and Facebook.


