How To Add a Contact Form in WordPress Without Code


Most business owners juggle countless tasks every day. Emails, phone calls, social media messages, and more. It’s easy to lose track of who asked what.
A WordPress contact form helps by routing inquiries into one place. Instead of scattered messages showing up from unknown email addresses, visitors simply fill out a short form, and you get the details you need within the dashboard.
In this step-by-step guide, we’ll see how to add a no-code contact form to your WordPress site and how to optimize it for the best results.
A site represents your brand.
When people want to reach you, a form sends a message that you value communication. An open email link can add unnecessary obstacles to reaching your team and even lead to spam.
A form is a single channel that keeps requests organized and often filters out junk with CAPTCHA or anti-spam plugins like Askimet.
Also, contact forms capture the required details upfront. For instance, a real estate agent might want prospective clients to share their budget range, home requirements, or preferred areas. Or an online shop might need an order number so they can quickly check the shipment status.
A contact form captures these details quickly, saving time, reducing guesswork, and making your business look more polished.
Most WordPress users rely on plugins to avoid writing code. You’ll find many form builders, each with a slightly different approach.
WPForms, Contact Form 7, and Ninja Forms are a few popular examples. They’re known for user-friendly options and the ability to add a form to any page or post.
- WPForms stands out for its visual drag-and-drop builder and quick setup. It includes built-in templates like a standard contact form, a feedback form, or a newsletter signup. This is often the first pick for new WordPress users.
- Contact Form 7 is free and well-loved, though it looks dated by default and it can take some effort to make it look good.
- Ninja Forms is another drag-and-drop choice with a wide range of add-ons.
Picking a plugin usually depends on your experience and needs.
If you only want a simple contact form, you can’t go wrong with any of these.
If you plan to add payment gateways, registration forms, or advanced features, check each plugin’s add-on library before you decide.
Plenty of new WordPress users worry they need coding skills. That’s not the case with a well-built form plugin.
Here’s a closer look at each phase, using WPForms as an example.
Step 1: Install and Activate the Plugin
Go to your WordPress dashboard, which should be <yourdomain.com>/wp-admin — unless you’ve changed it to strengthen security.
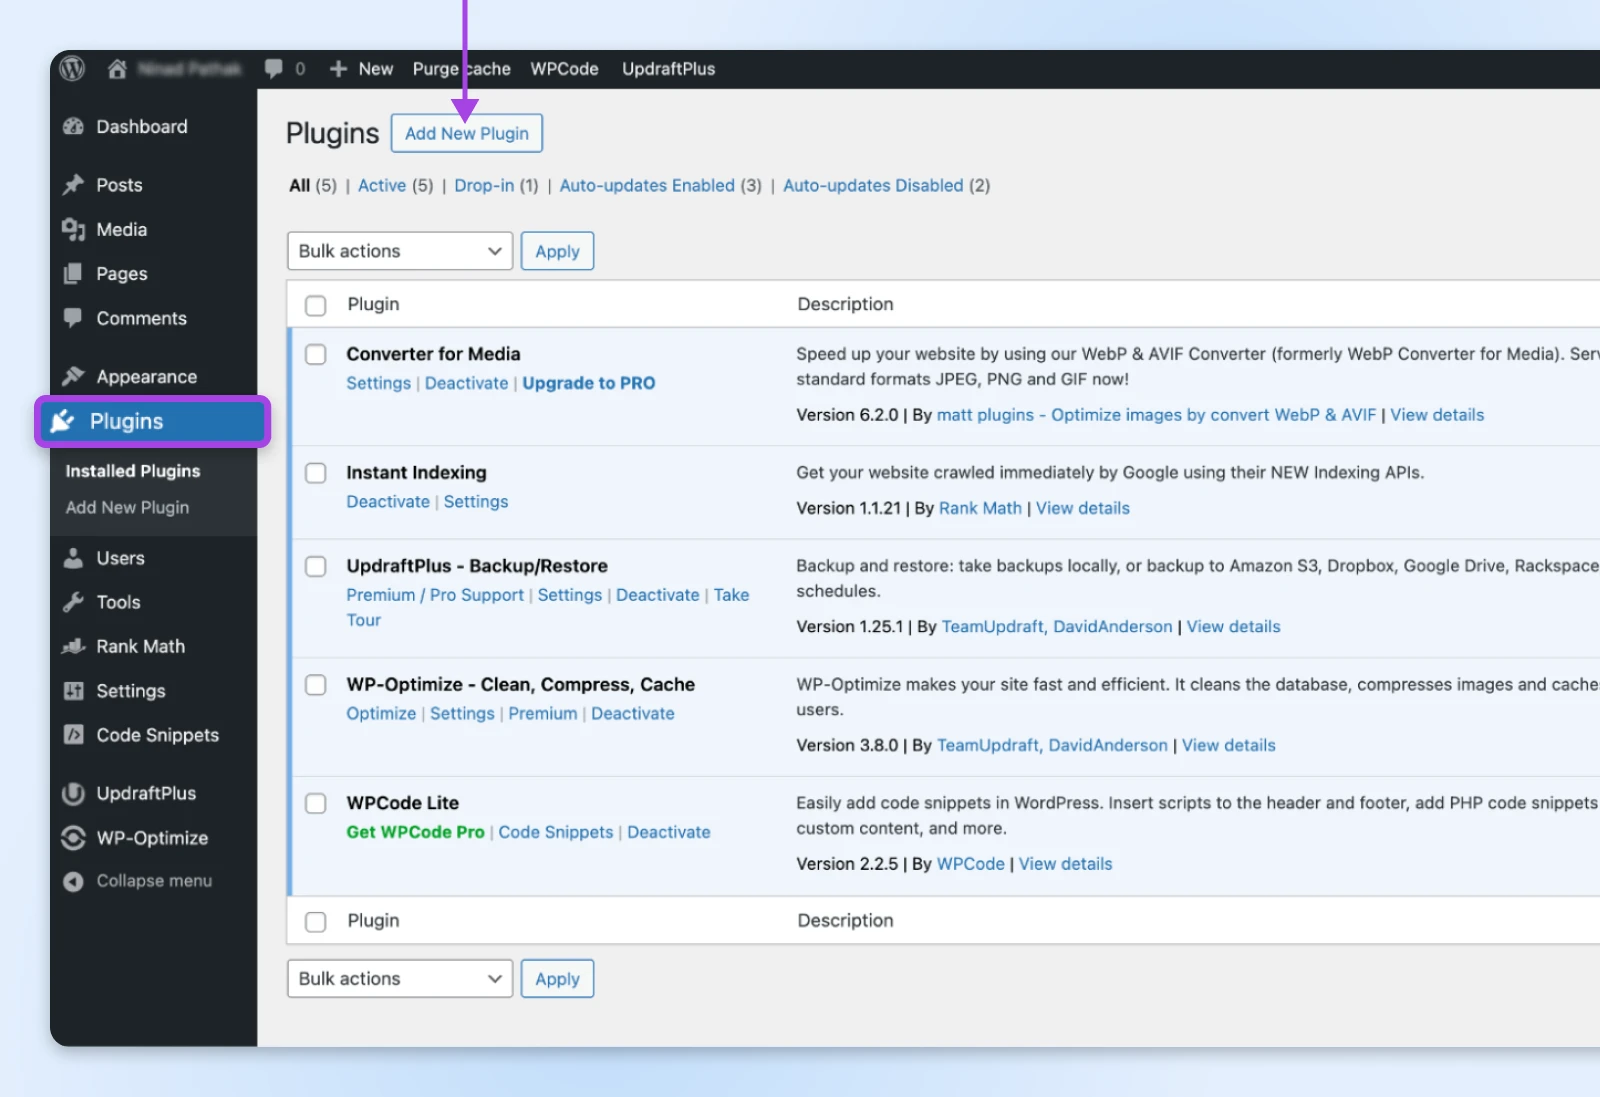
Click Plugins on the left > Add New Plugin.
Type “WPForms” in the search bar and hit Install Now.
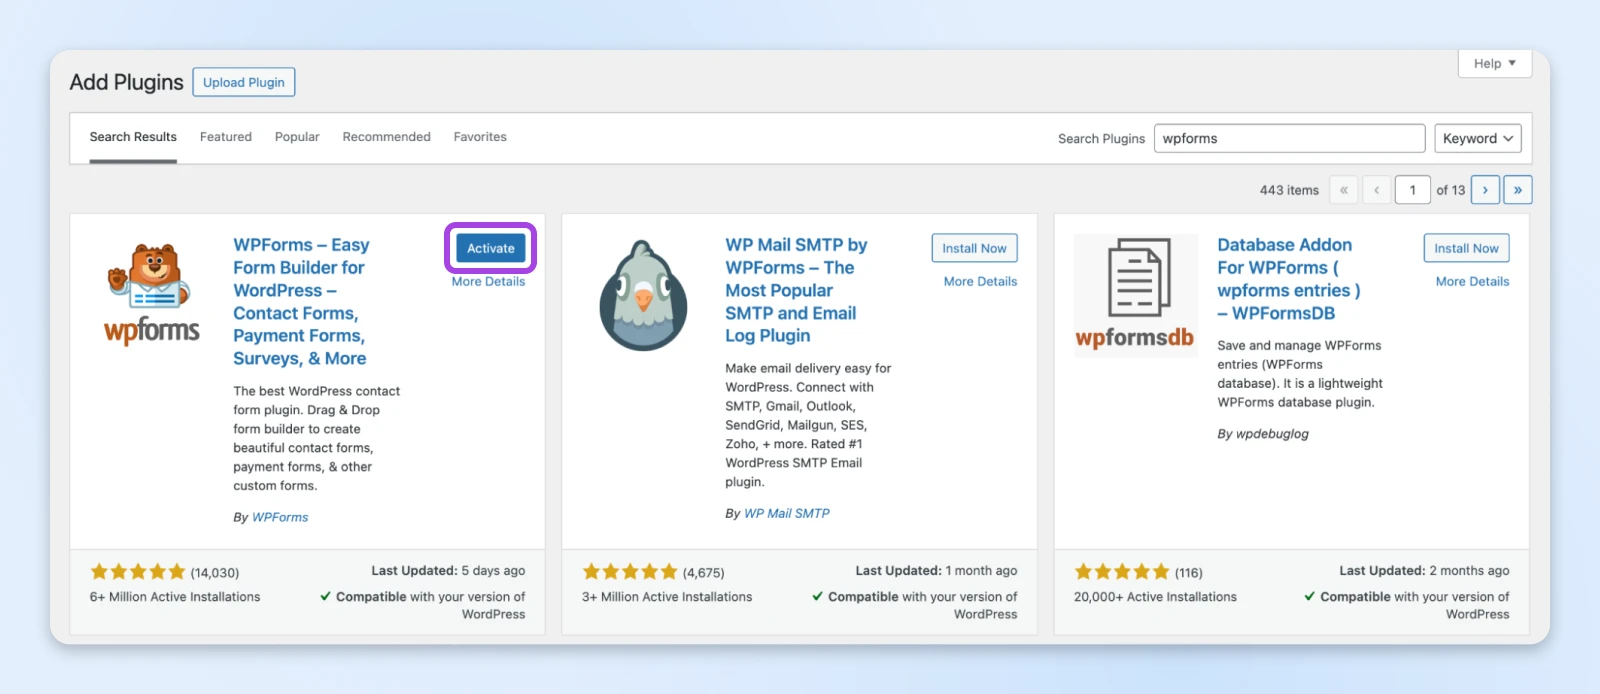
When WordPress is done installing, click Activate. WPForms will now appear in your dashboard menu!
Step 2: Create Your First Form
Click the WPForms menu link and then select Add New.
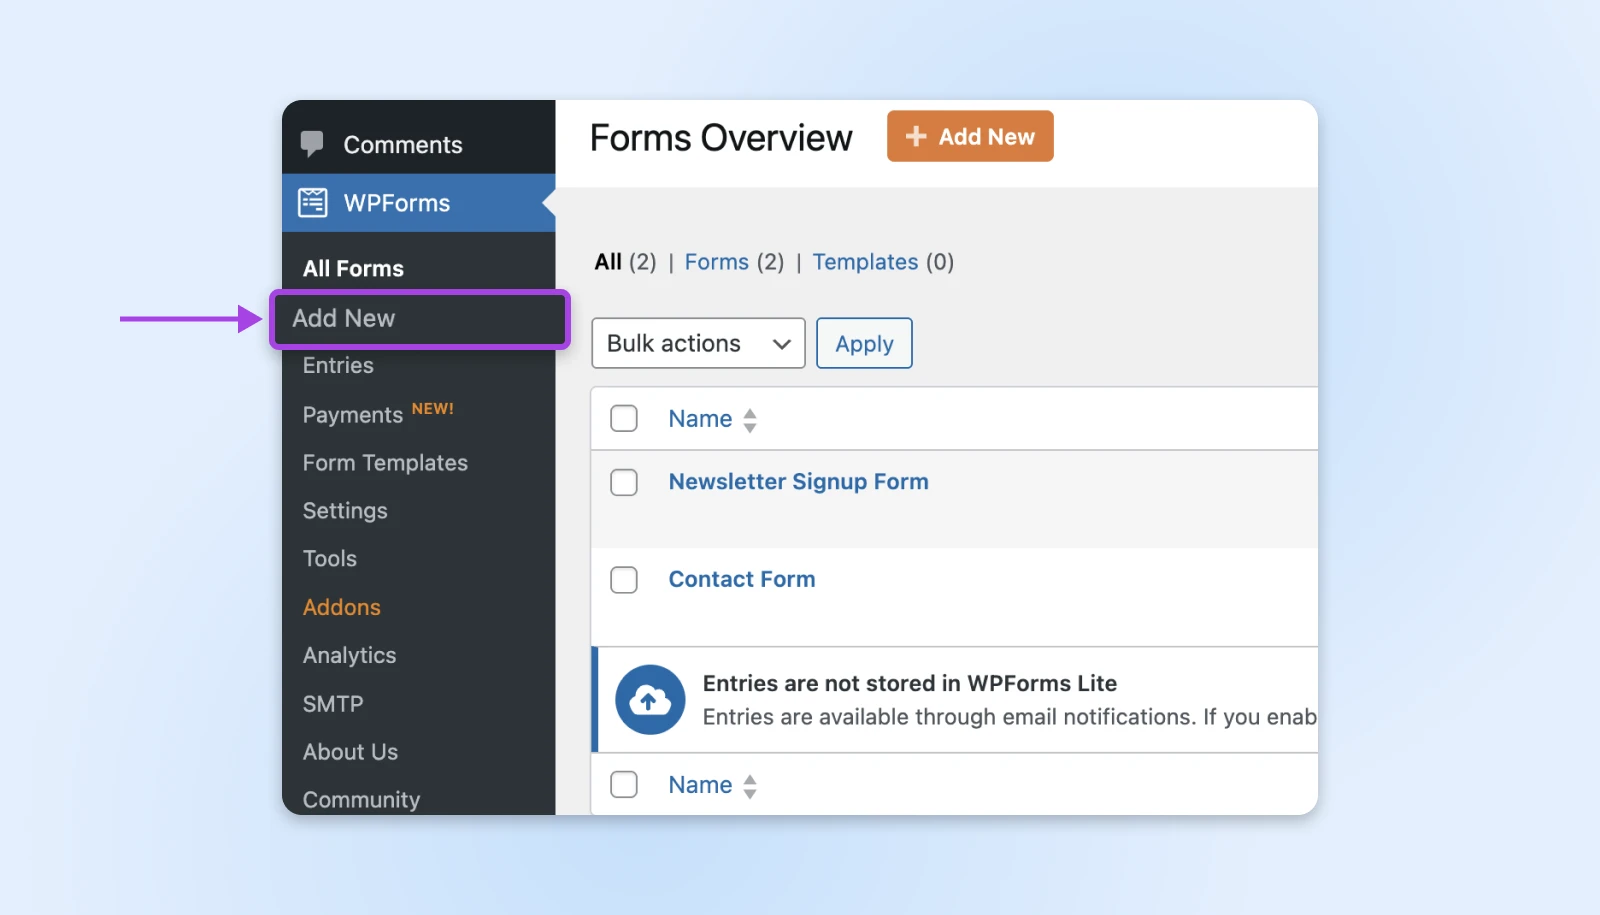
The plugin shows you a few templates, like a simple contact form or a newsletter signup.

Pick the basic contact form to start. You’ll see fields such as “Name,” “Email,” and a big text box for the message.
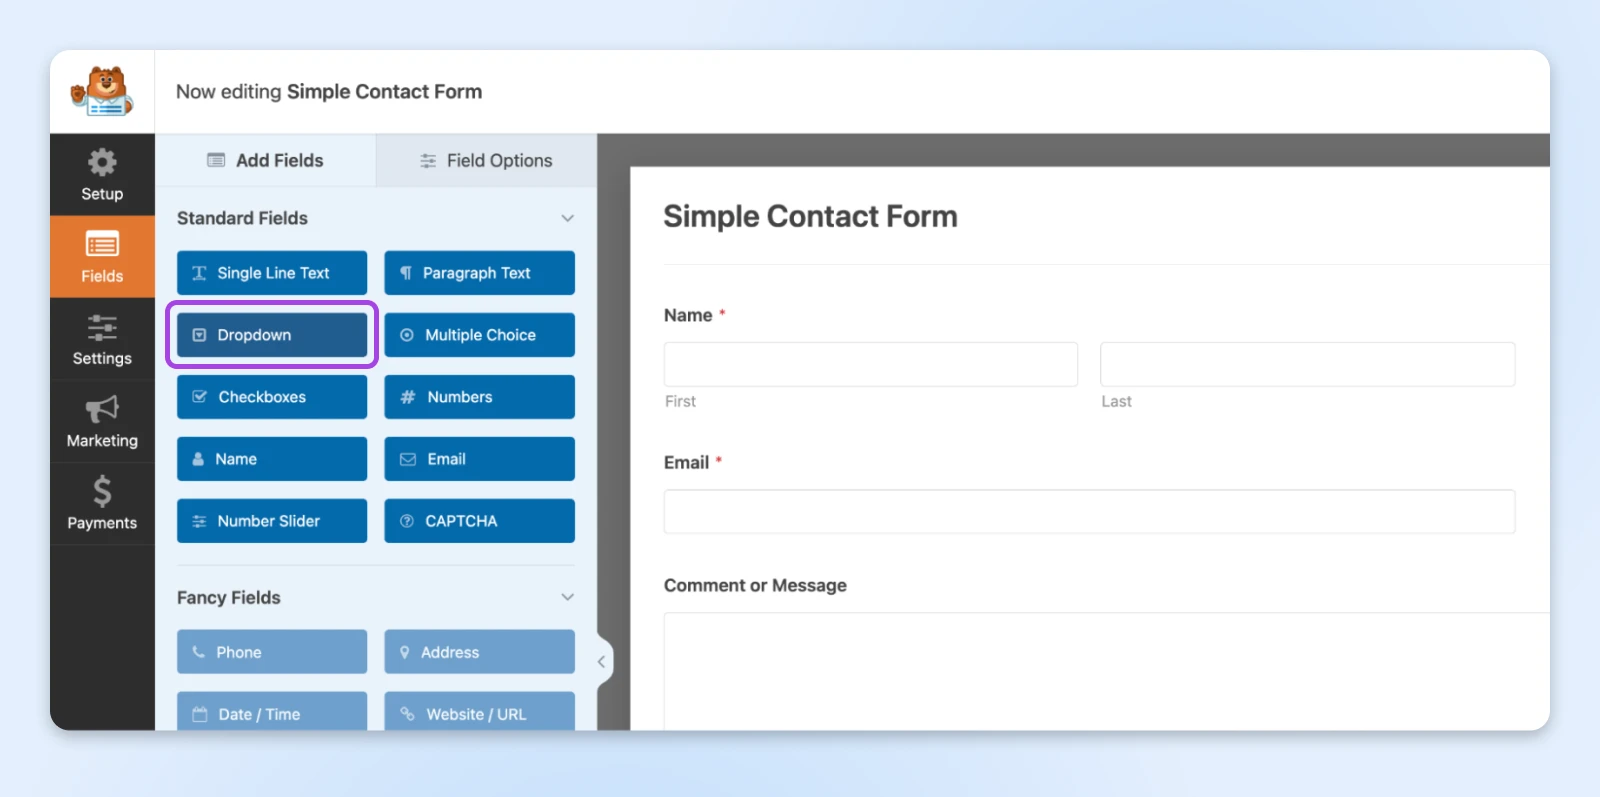
If you need extra fields (maybe a dropdown to let users pick a topic), you can drag and drop them from the left panel.
Step 3: Configure the Form Settings
Select Settings within the form builder. You’ll see choices for “Notifications” and “Confirmations.”
Click Notifications to set the email address where messages should go.
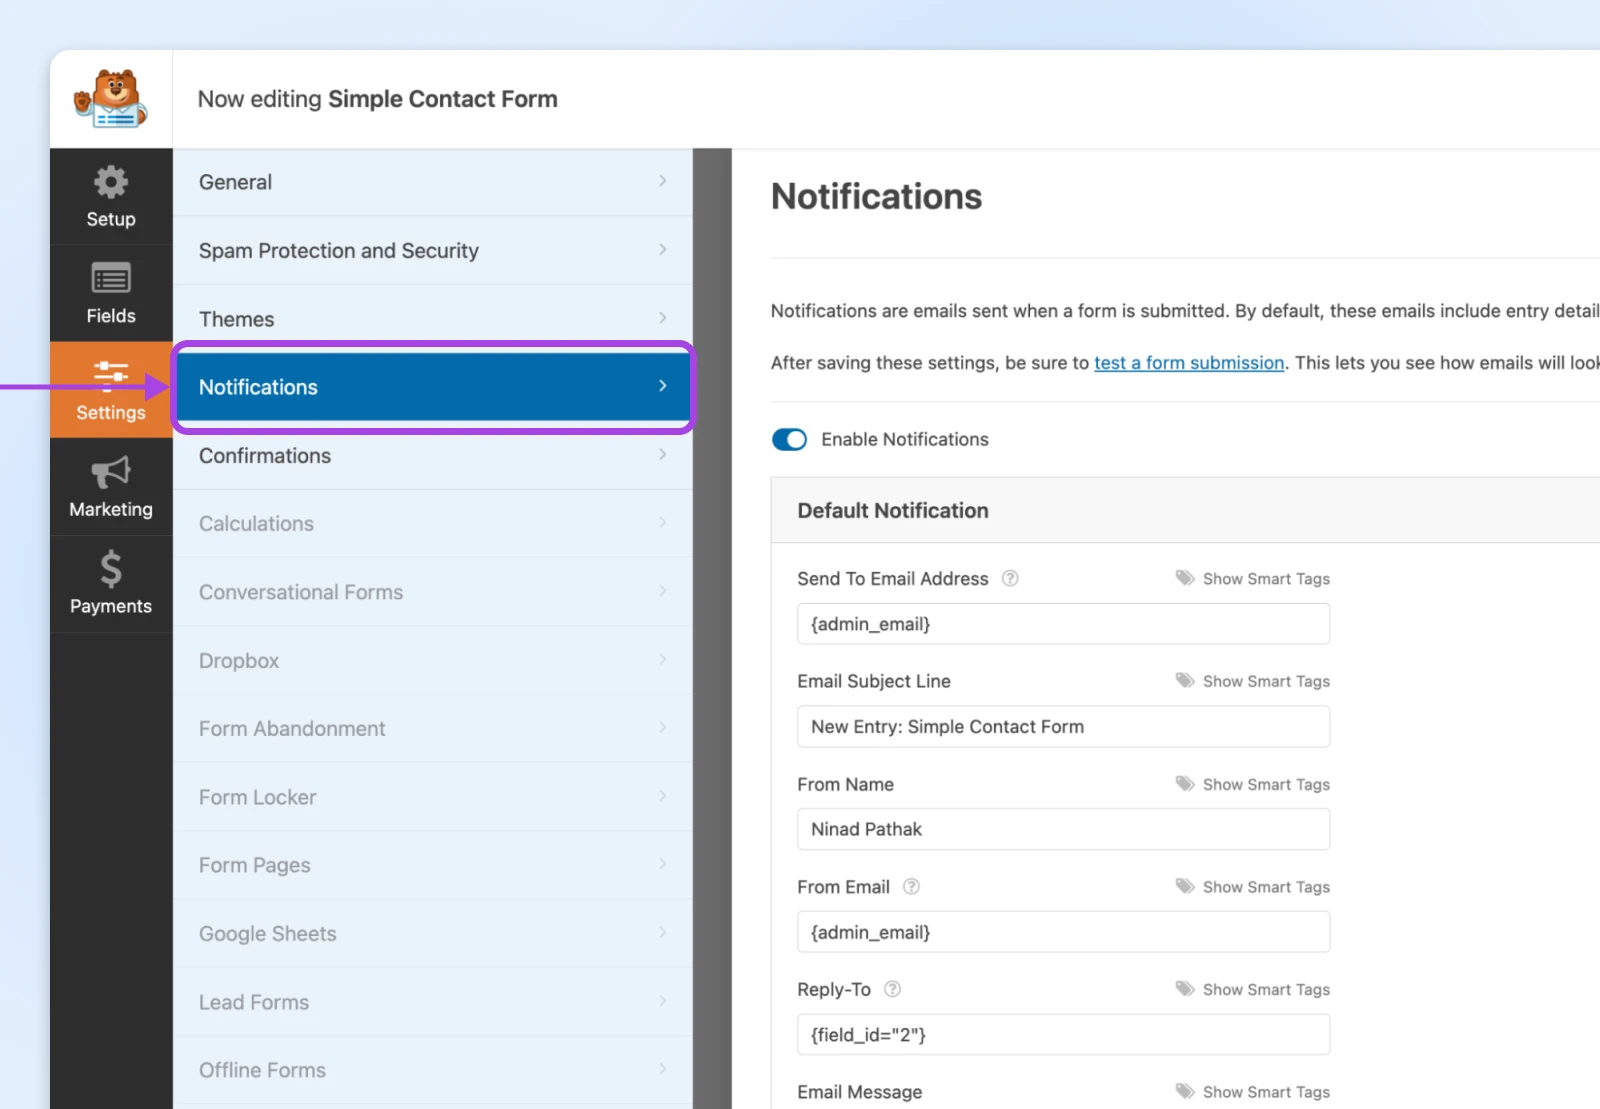
If you want a certain subject line, add that too. You can use something like “New Inquiry from WordPress Form” so you know when a new inquiry drops in your inbox from this contact form.
Then check Confirmations.
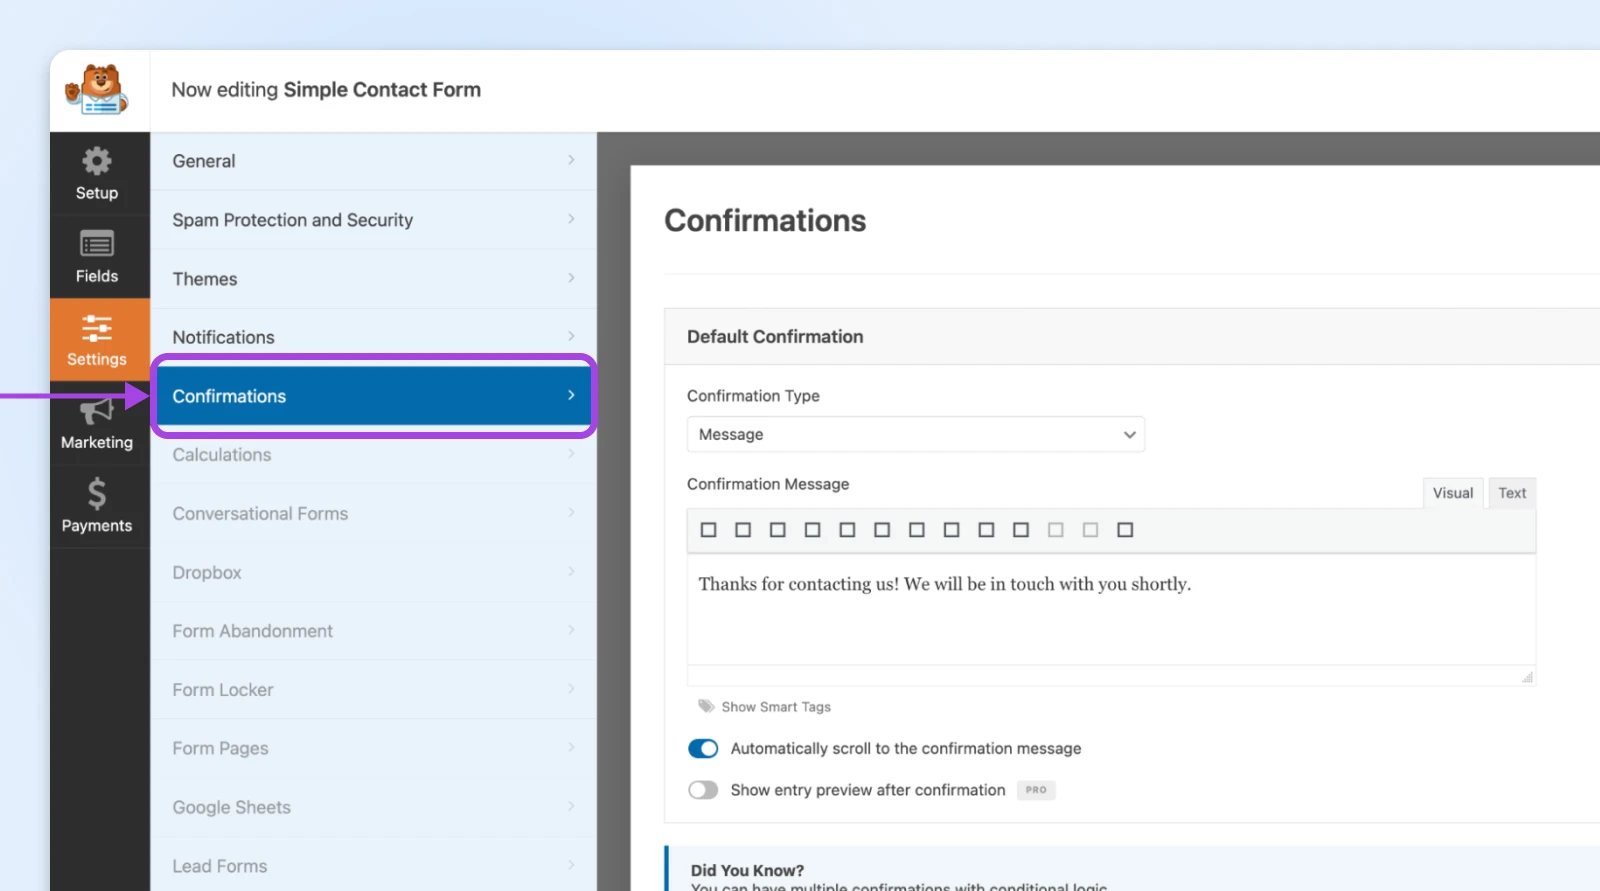
That’s the message visitors see after they submit. You could say, “Thank you for contacting us. We’ll reply soon!” or customize the message according to your brand voice.
Step 4: Embed the Form on a Page or Post
Go to the WordPress editor for any page or post.
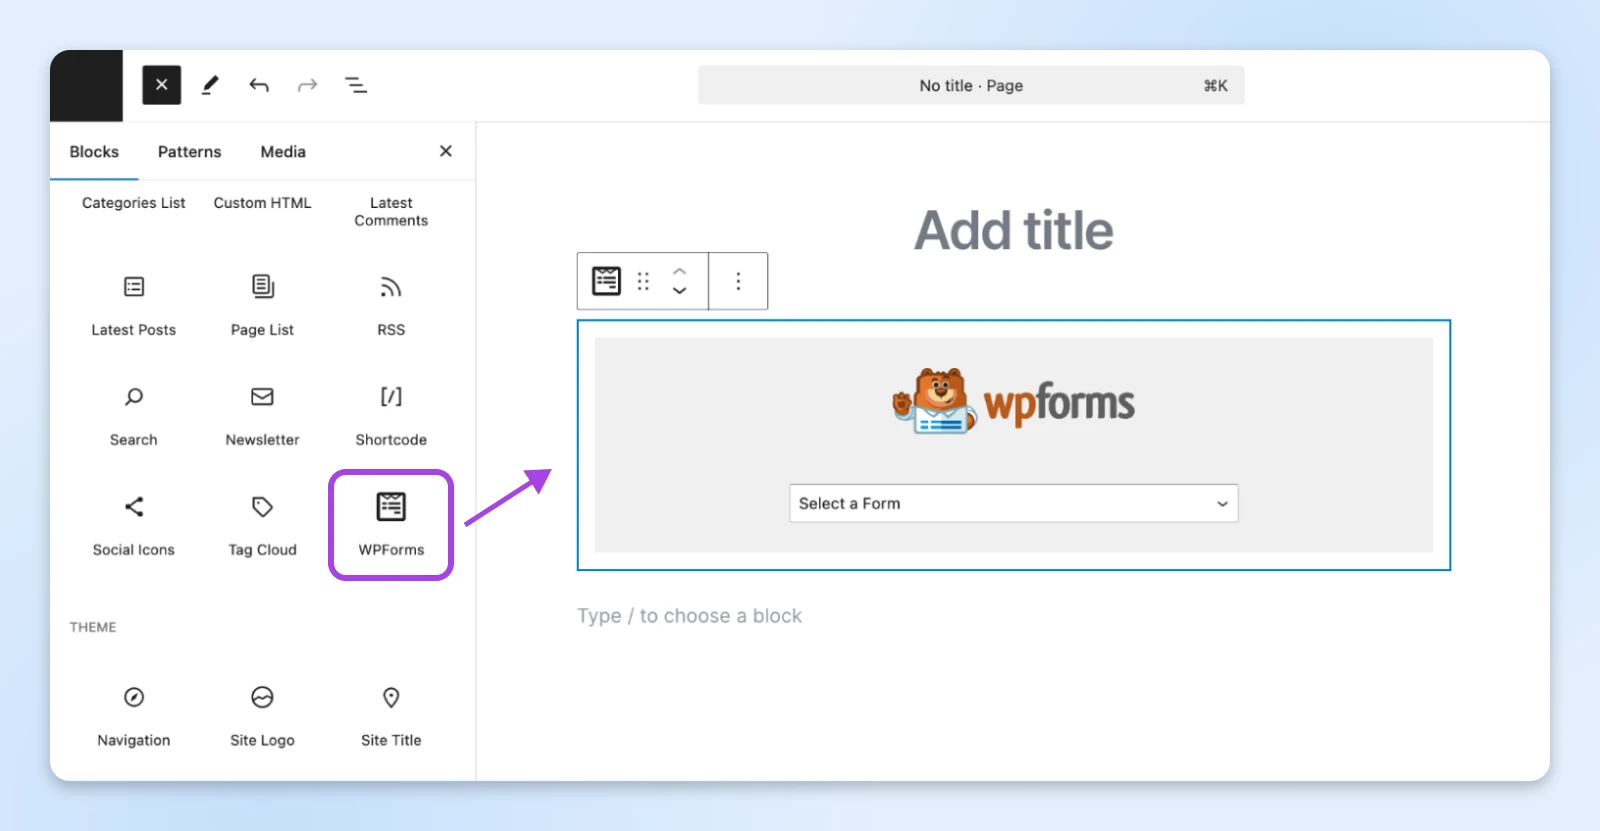
If you’re using the block editor, you’ll see a WPForms block. Insert it, then pick your form from a list.
Here’s another method: copy the shortcode from WPForms and paste it into the editor.
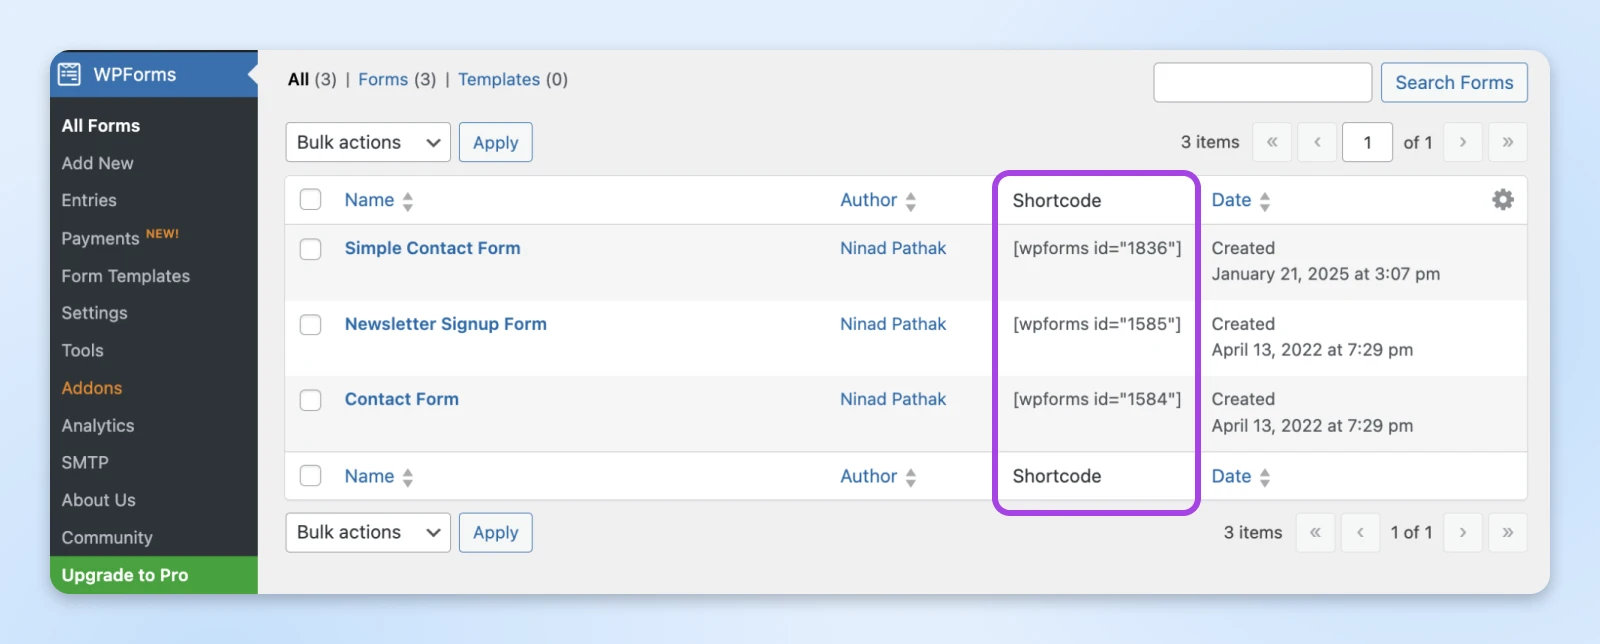
It looks like [wpforms id=”1234″]. Save or publish your changes.
Voila, your form is live!
Step 5: Test the Form
A quick test avoids headaches later. Open the live page and fill out the form with a test name, email, and a short message. Click Submit.
The page should show the confirmation you set up. Then check your email to see if the notification arrived.
If you don’t see it, look in your spam folder or verify that your email address is correct in the plugin settings.
Sometimes hosting providers or email clients filter out automated messages. If that’s an issue, you can add a plugin like WP Mail SMTP to improve email deliverability.
The perfect Contact Us page gives visitors the sense that you’re approachable. It doesn’t need to be fancy.
Here’s a Contact Us page from Swab the World. See how it reminds the visitor to share a note and they’ll be reading it all?

That’s pretty much all you need. A line or two to help the reader know there’s someone who will read their message.
Here are a few ideas you can adapt:
- Friendly: “We’re here to help. Send us your questions, and we’ll get back to you as soon as we can.”
- Business-like: “Have questions about our services? Please fill out the form below, and we’ll respond promptly.”
- Warm and personal: “Drop us a line if you need anything at all. We love hearing from you and will do our best to assist.”
If you have a dedicated support team, you can even mention their usual response time to set expectations.
Adding a form is the first step. Optimizing it can increase the number of useful leads and reduce spam or confusion. Here are a few suggestions to consider:
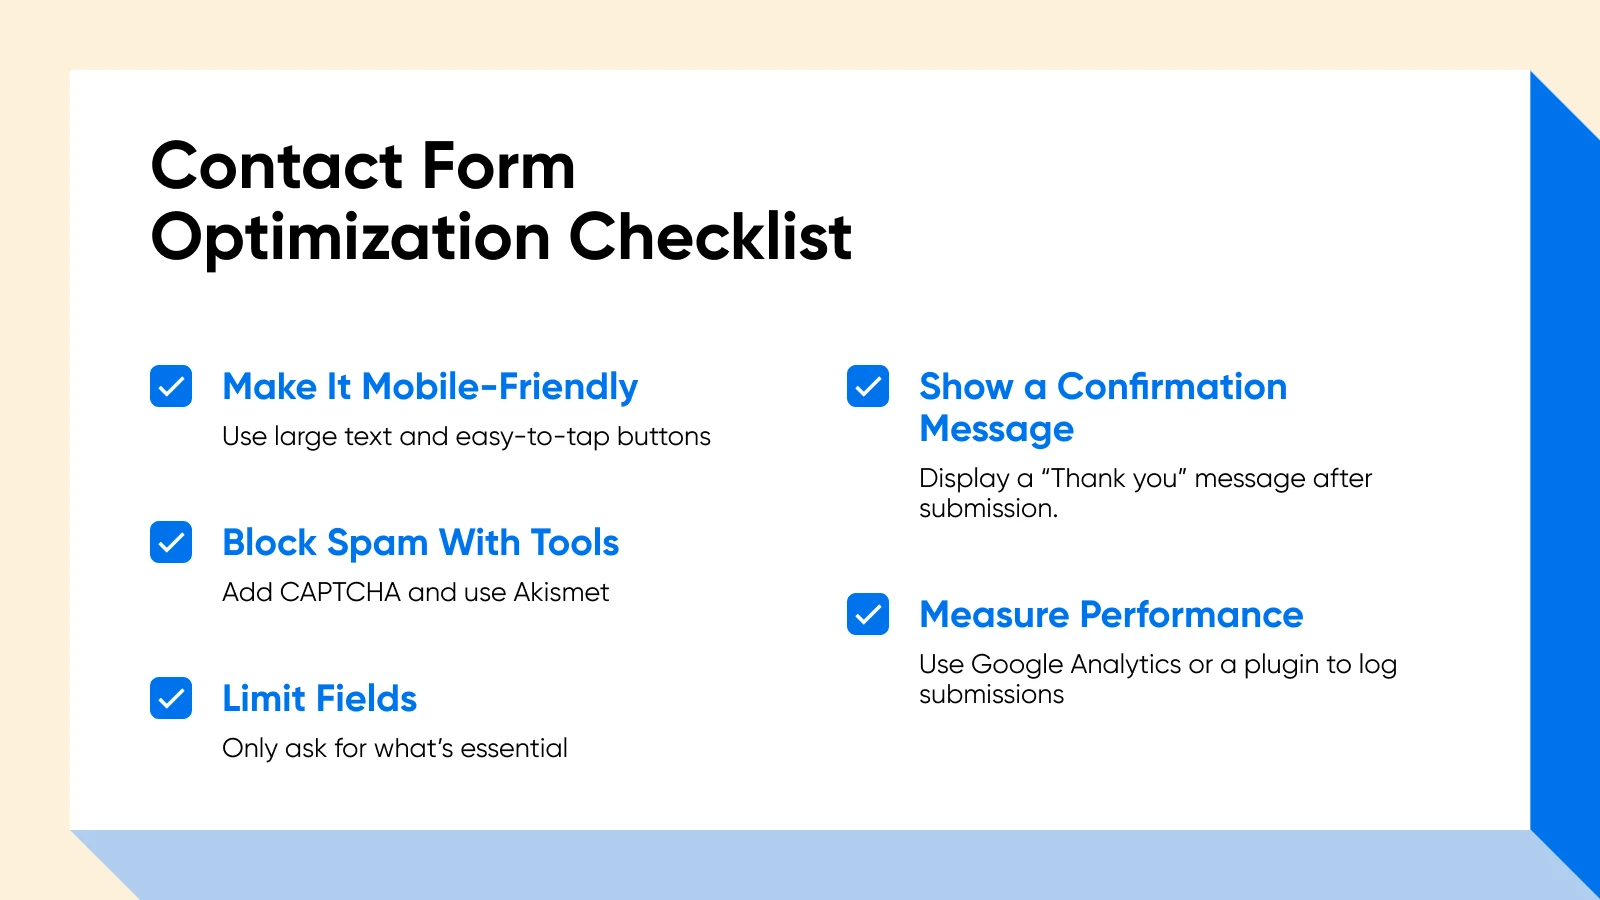
Focus on Mobile Users
Plenty of people browse on their phones these days. The form should look neat on smaller screens.
WPForms and other modern builders create forms that automatically adjust, but you can still preview them on a phone or tablet.
Make sure the text is large enough, and the buttons are easy to tap.
Filter Spam With CAPTCHA and Akismet
Spam submissions are annoying. CAPTCHAs test whether a visitor is a real person, while tools like Akismet scan messages for suspicious phrases.
Combine both if you notice a spike in unwanted submissions. This approach frees your inbox of nonsense.
Keep Only What You Need
Overly complicated forms scare people away. If you only need a name and email address, stick to those fields. If you must have a phone number or shipping address, add them.
Just remember that the more fields you include, the less likely people are to fill them out.
Offer a Clear Confirmation
When visitors click “Submit,” they want a sign that the message went through. That can be as simple as “Thanks for contacting us!”
You could also use the confirmation page to direct them to common questions or a link to your blog for more reading.
Let that be a smooth transition rather than a dead end.
Track Form Submissions
Form submissions might be a key part of your marketing or customer support workflow. Tracking them can show how well your site is doing. Google Analytics or a specialized plugin can log each submission, giving you a way to measure conversion rates.
If you learn that only a few people submit the form per month, you might test changes to the form fields, your calls-to-action, or your page design.
Ready To Get Visitors To Reach You?
Each time you make your site easier to use, you improve your connection with visitors. A WordPress contact form is an easy win because it creates a clear path for questions, leads, or support requests.
You can install a simple plugin, create fields that fit your business, and post it on your site without editing code.
But why stop at just adding a contact form? With the right tools, you can take your site to the next level.
At DreamHost, our mission is to make your site management as simple and seamless as possible. That’s why we offer WordPress hosting designed specifically for WordPress users. Check out our DreamPress-managed WordPress hosting plans to learn more!

WordPress Hosting
Optimize Your Business with DreamPress
Our automatic updates and strong security defenses take server management off your hands so you can focus on your customers.
Check Out Plans
Did you enjoy this article?

