Boost Website Speed With VPS Performance Tuning


Do you get that sinking feeling when your website loads slower than a snail on a Sunday stroll?
It’s a frustrating experience, especially if you’ve already invested in a virtual private server (VPS). Isn’t VPS hosting supposed to supercharge your site compared to shared hosting? Well, yes. But, you often have to fine-tune your VPS to fully unleash its speed potential.
That’s what we’ll explore here: a straightforward yet comprehensive guide to VPS performance tuning. By the end of this article, you’ll know what tweaks can make your site load faster, how to identify bottlenecks, and even when you might need to upgrade your hosting plan. (Bonus: how DreamHost can help).
Let’s dive in.
Why Site Speed Is Crucial for Small Businesses
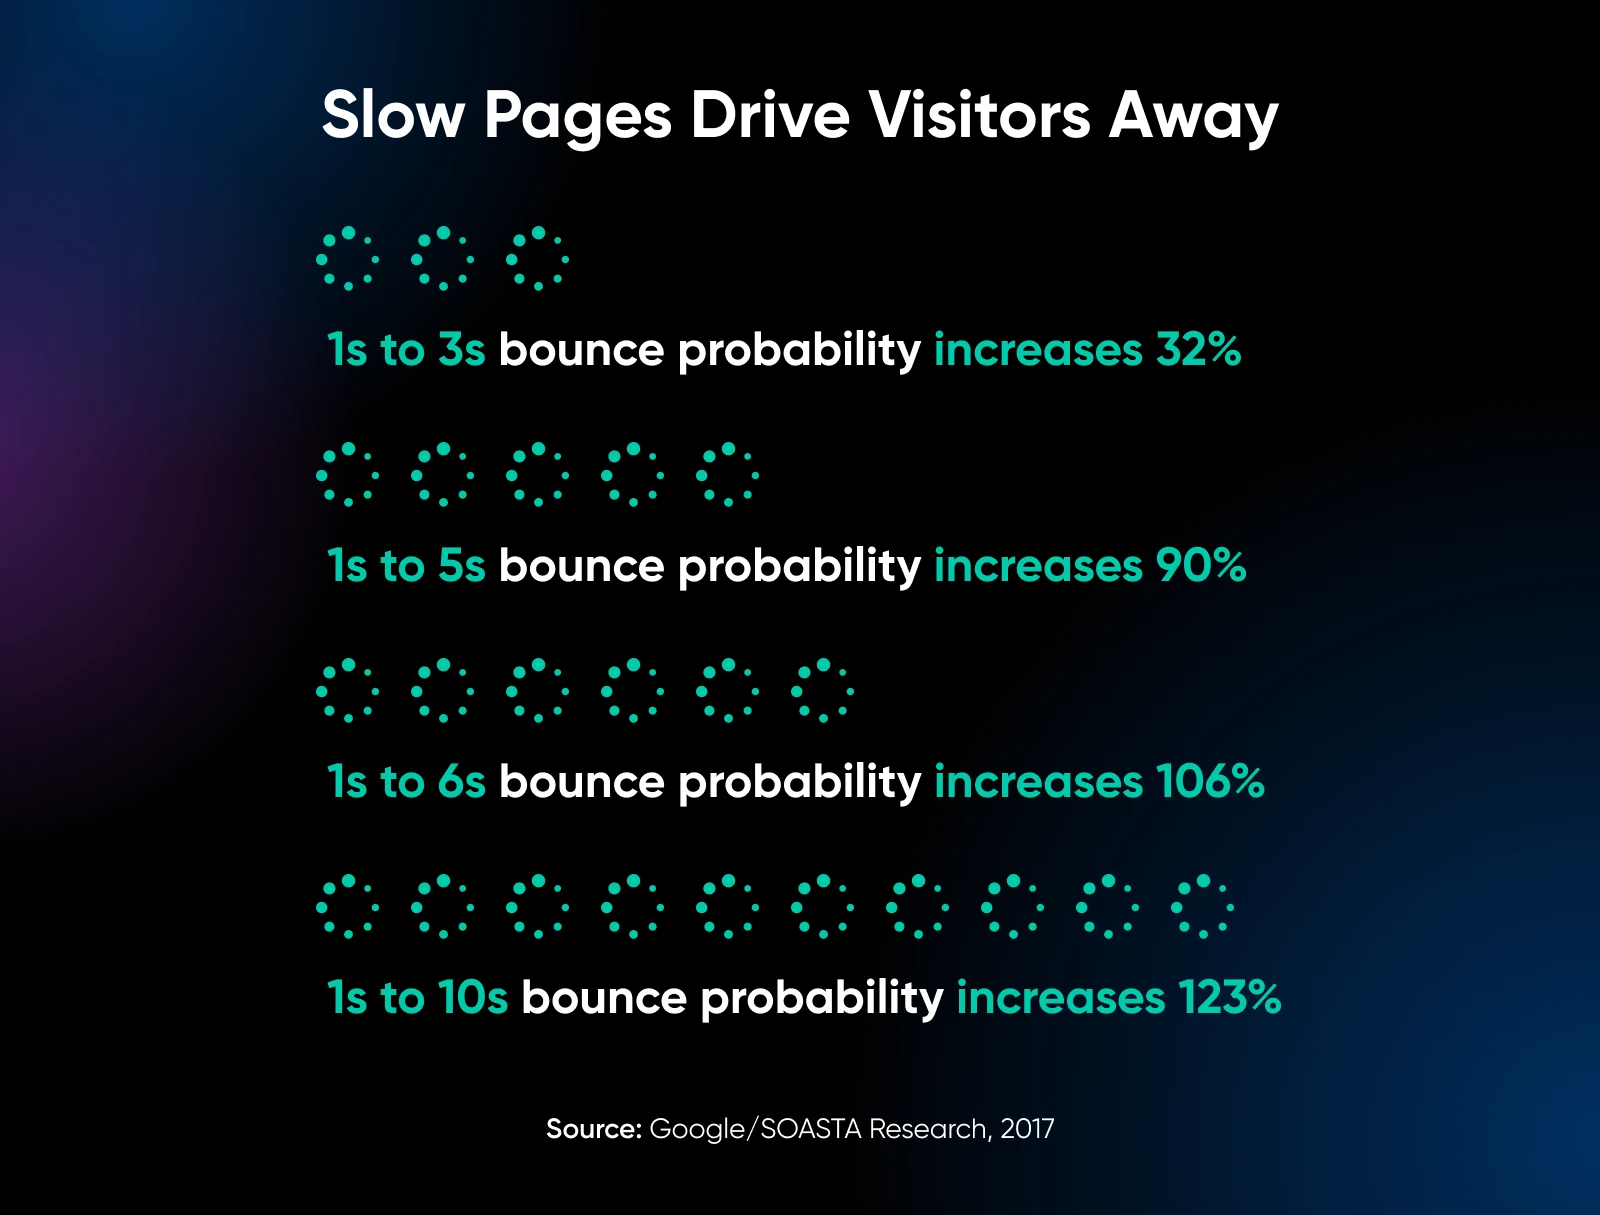
Your website’s speed does more than just satisfy the impatient —it can literally make or break sales. Research shows that many visitors will bounce if it takes longer than three seconds to load. For a small business, every lost visitor can mean lost revenue and a potential blow to your reputation.
Some other reasons why having a speedy site matters:
- User experience: People expect near-instant page loads. If they get stuck waiting, they might not come back.
- Conversion rates: A faster site can lead to higher conversions, whether “conversion” means a sale, a newsletter signup, or filling out a contact form.
- SEO: Search engines like Google prioritize faster sites. More speed can help you rank higher, which translates to more traffic.
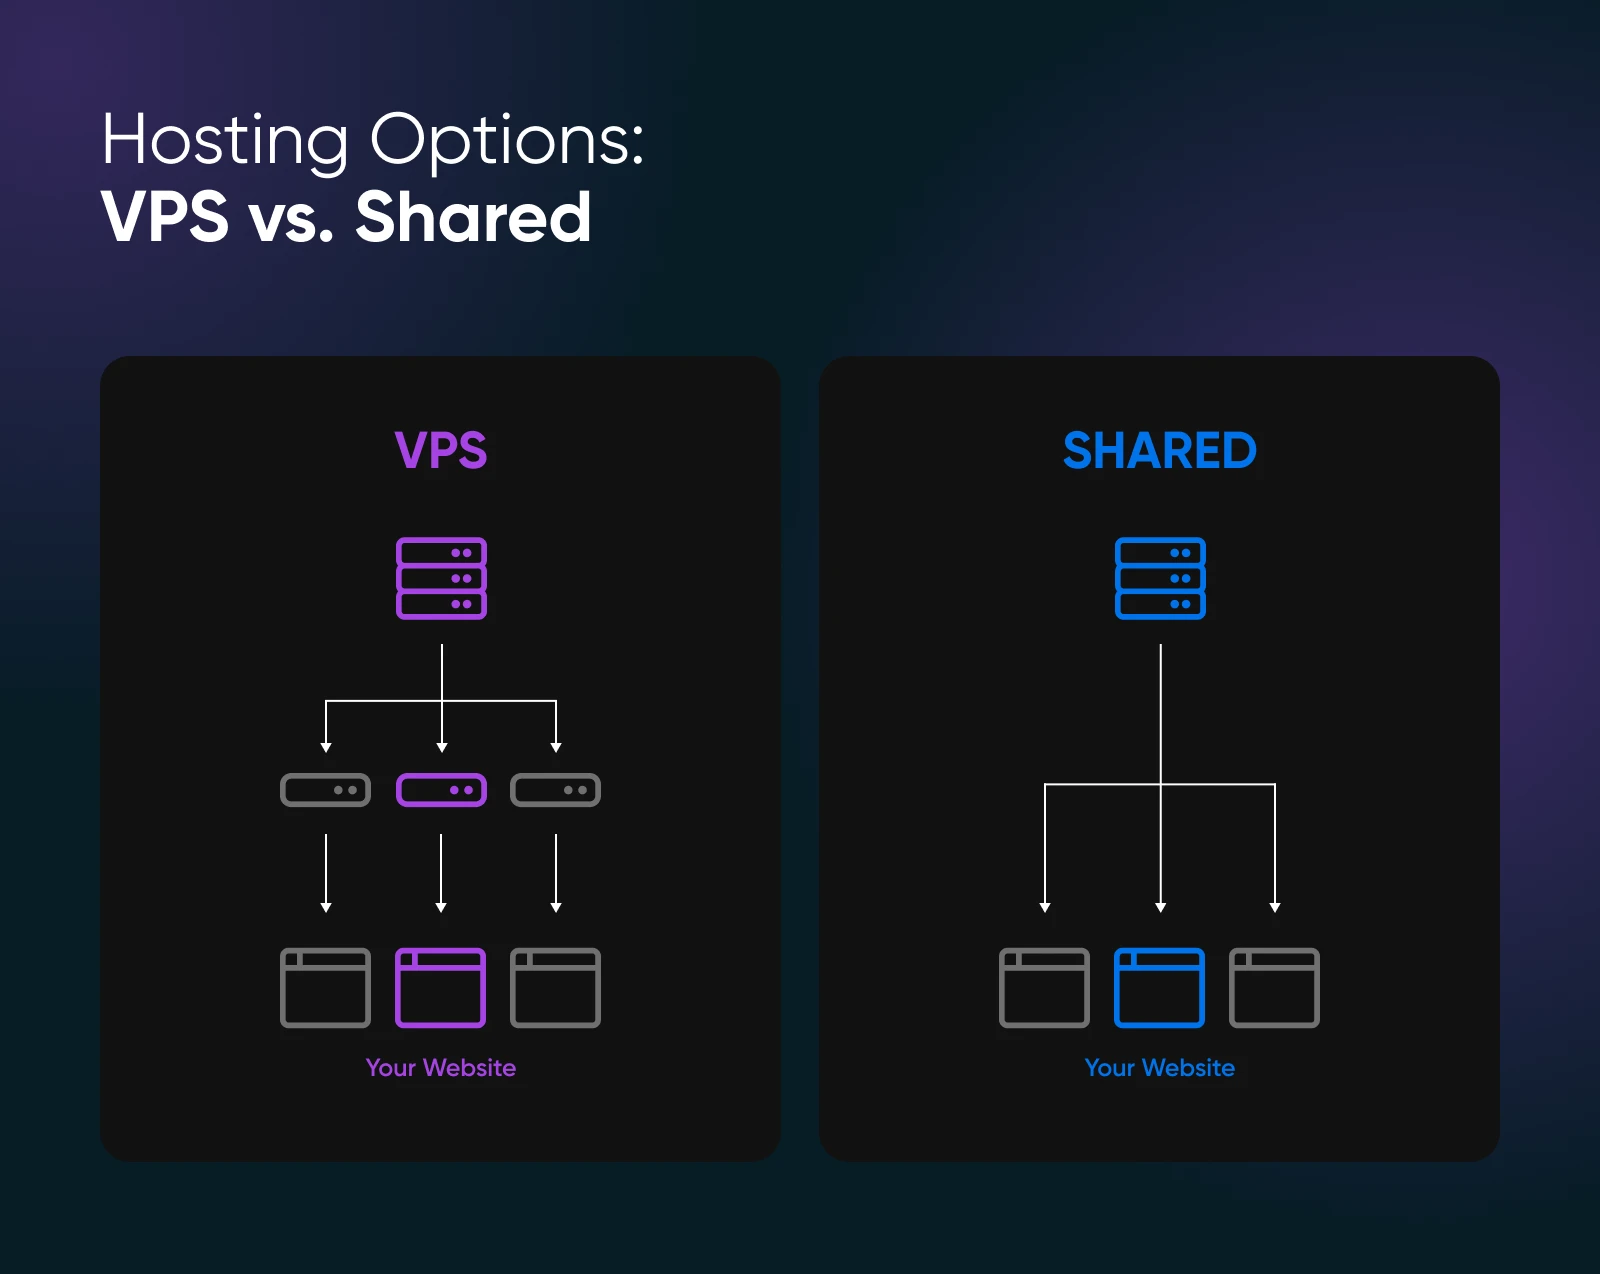
VPS Hosting vs. Shared Hosting
You might already know the basics, but let’s clarify why you should choose VPS in the first place.
With shared hosting:
With virtual private server or VPS hosting:
However, VPS hosting isn’t always plug-and-play. Sure, you already have more power and flexibility than you get with shared hosting, but you still need to optimize the server’s settings (and your site’s code) to see those blazing speeds.
👉🏼 Want to learn more? Check out our comprehensive comparison: Shared vs. VPS Hosting
What Is VPS Performance Tuning?
VPS performance tuning is the process of adjusting server configurations, software settings, and resource usage so your site runs as efficiently as possible. It can involve everything from updating your server software to tweaking database queries. The end goal is always the same: faster loading times and a smoother experience for your visitors.
What Issues Does It Solve
- Traffic spikes: Handles sudden surges in visitors without your site grinding to a halt.
- Resource bottlenecks: Prevents CPU or memory overuse that leads to slow load times or crashes.
- Custom needs: Tailors the server’s default settings to suit your specific website or application requirements.
Metrics To Watch
- CPU usage: High CPU usage means your server’s processor is working overtime, and could indicate the need for more CPU or better optimization.
- RAM usage: If you consistently hit memory limits, you might need to increase your RAM allotment or reduce memory-hungry processes.
- Server response time: Tools like GTmetrix measure how quickly your server responds to a request.
- Disk I/O: High input/output operations on your drive can slow things down if your site handles lots of read/write operations (for example, large media files).
Questions To Ask Before You Tune
Not every site speed issue is directly tied to VPS configurations. Sometimes, the fix might be as simple as compressing images. So it’s a good idea to check the basics and ask yourself a few questions before diving into advanced server tweaks.
Notice patterns like peak traffic hours. If your site only lags during certain windows, that may point to resource spikes or concurrency issues.
Massive image files or auto-playing videos can kill load times. Tools like TinyPNG or image compression plugins can help.
In WordPress, especially, every plugin can add overhead. Disable or delete the ones you don’t truly need to boost your site’s performance.
Check your VPS dashboard or analytics to see if you’re consistently hitting CPU or memory limits.
Malware or spam attacks can hog resources and slow your site to a crawl. Periodically scan your site for vulnerabilities.
If everything above seems in order — and your site still lags — it’s time to roll up your sleeves for some VPS performance tuning. Head to the next section and follow the steps to get started.
Step-by-Step Guide to VPS Performance Tuning
If you’re new to server management, the idea of “performance tuning” might sound intimidating, but rest assured, these steps can be taken no matter your level of expertise.
Below, we’ll walk through each optimization strategy so you can take immediate action and see real improvements in your VPS-hosted site’s speed.
1. Update and Patch Your Server Software
Keeping your server’s operating system and software up to date means you have the latest performance enhancements and security fixes. Outdated software can become a bottleneck, or even a security risk.
What to do:
Humble Brag/Tech Tip: DreamHost VPS plans are fully managed. What does that mean? Well, users don’t need to worry about managing server-level software. Let us handle the core systems while you focus on continuing to build your business.
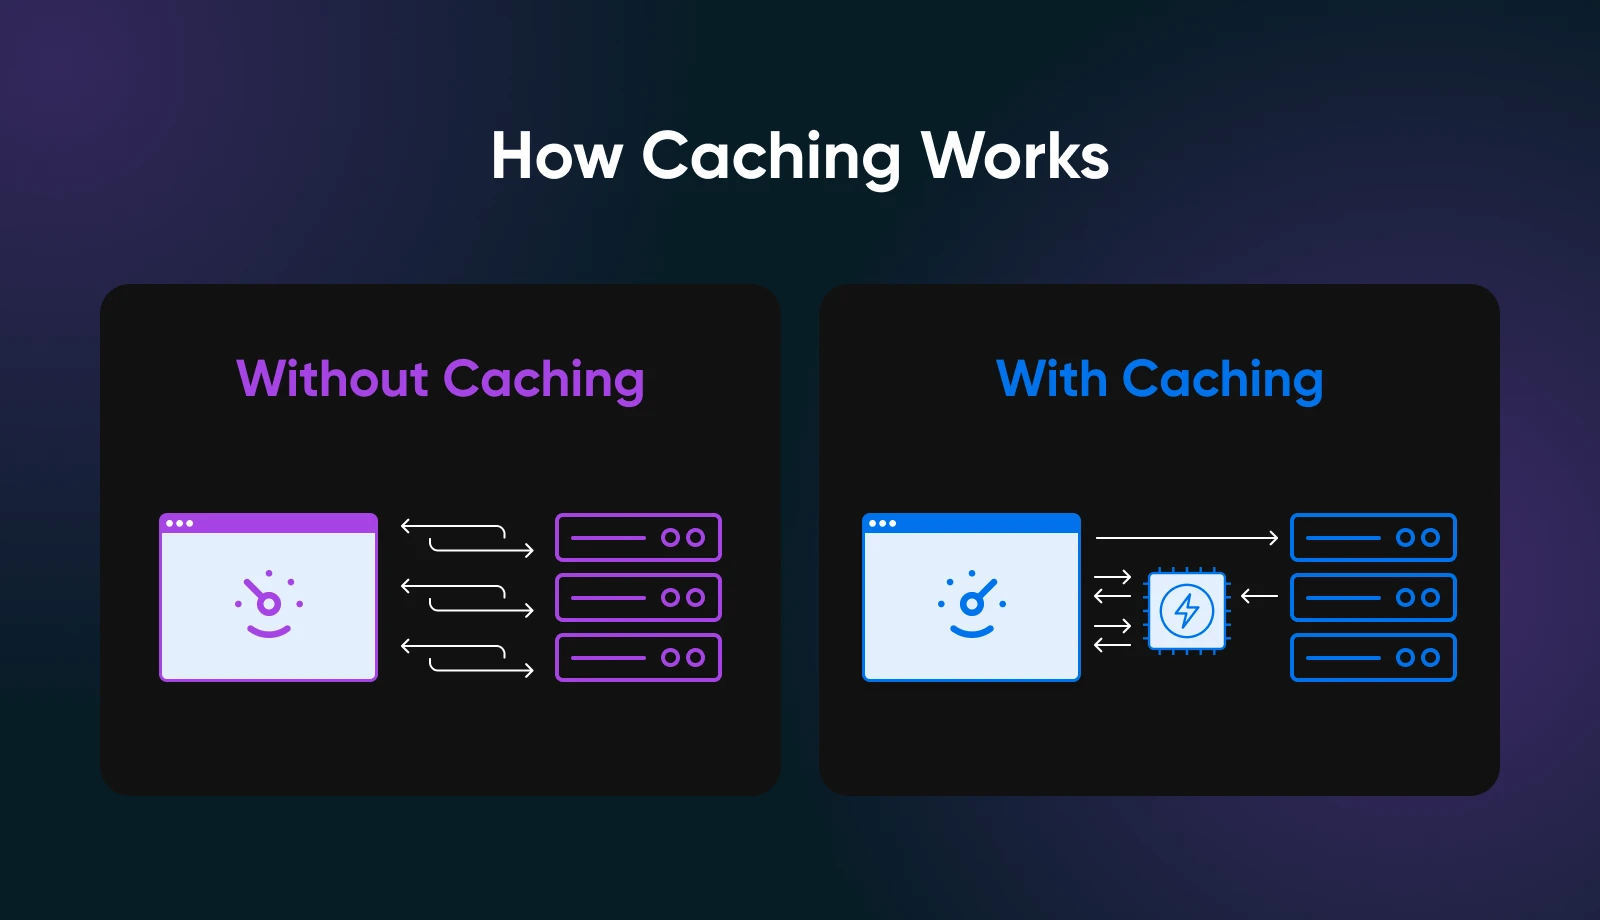
2. Configure Caching (Server-Side and Application-Level)
Caching prevents your server from doing the same work repeatedly. By storing frequently requested data in memory or on disk, your site can respond faster to requests.
What to do:
- For Apache, consider enabling “mod_cache” or “mod_deflate.”
- For PHP, make sure OPcache is running (often installed by default on newer PHP versions). You can check by creating a phpinfo() file or looking at your server’s PHP config.
- In your .htaccess (Apache) or server block (NGINX), set expires headers for static files (images, CSS, JavaScript).
3. Optimize Web Server Settings
Your web server software might be using default settings that aren’t ideal for your traffic levels or site structure. Tweaking concurrency, compression, and other parameters helps your VPS serve pages more efficiently.
What to do:
- Locate your server’s config file and increase or decrease worker processes/threads based on your RAM.
4. Fine-Tune Your Database
Databases can quickly become performance bottlenecks. Optimizing them means fast queries and efficient use of server memory.
What to do:
OPTIMIZE TABLE your_table_name;
ANALYZE TABLE your_table_name;
This reclaims unused space and updates index statistics. Then, remove old data, logs, or revision histories you no longer need.
slow_query_log = 1
slow_query_log_file = /var/log/mysql/slow-queries.log
long_query_time = 2
Check the log file to see which queries exceed two seconds, then work on optimizing those or adding missing indexes.
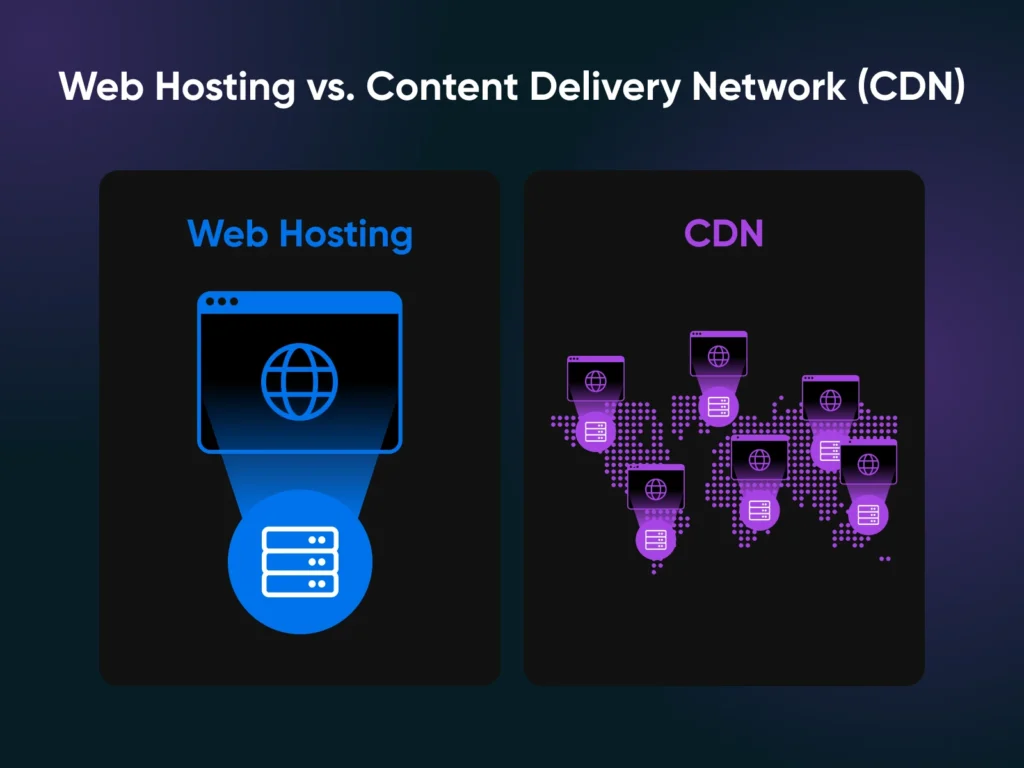
5. Enable CDN (Content Delivery Network) for Static Assets
A CDN offloads static files (like images, CSS, and JS) to multiple servers across the globe. When users visit your site, those assets load from the nearest server, reducing latency and boosting your site speed.
What to do:
- For Cloudflare, change your domain’s nameservers to Cloudflare’s. They’ll proxy traffic through their network.
- For other CDNs, you might just add a CNAME (e.g., “cdn.yourdomain.com”) pointing to their servers.
- Decide how aggressive the CDN’s caching should be. Typically, you want images, CSS, and JS to be cached for at least a week or more.
- Make sure dynamic pages (like cart or account pages) are not cached.
6. Adjust PHP and Script Execution Limits
Your VPS may be running PHP scripts that occasionally need more memory or time to complete. Setting these limits properly prevents out-of-memory errors without letting rogue scripts hog all resources.
What to do:
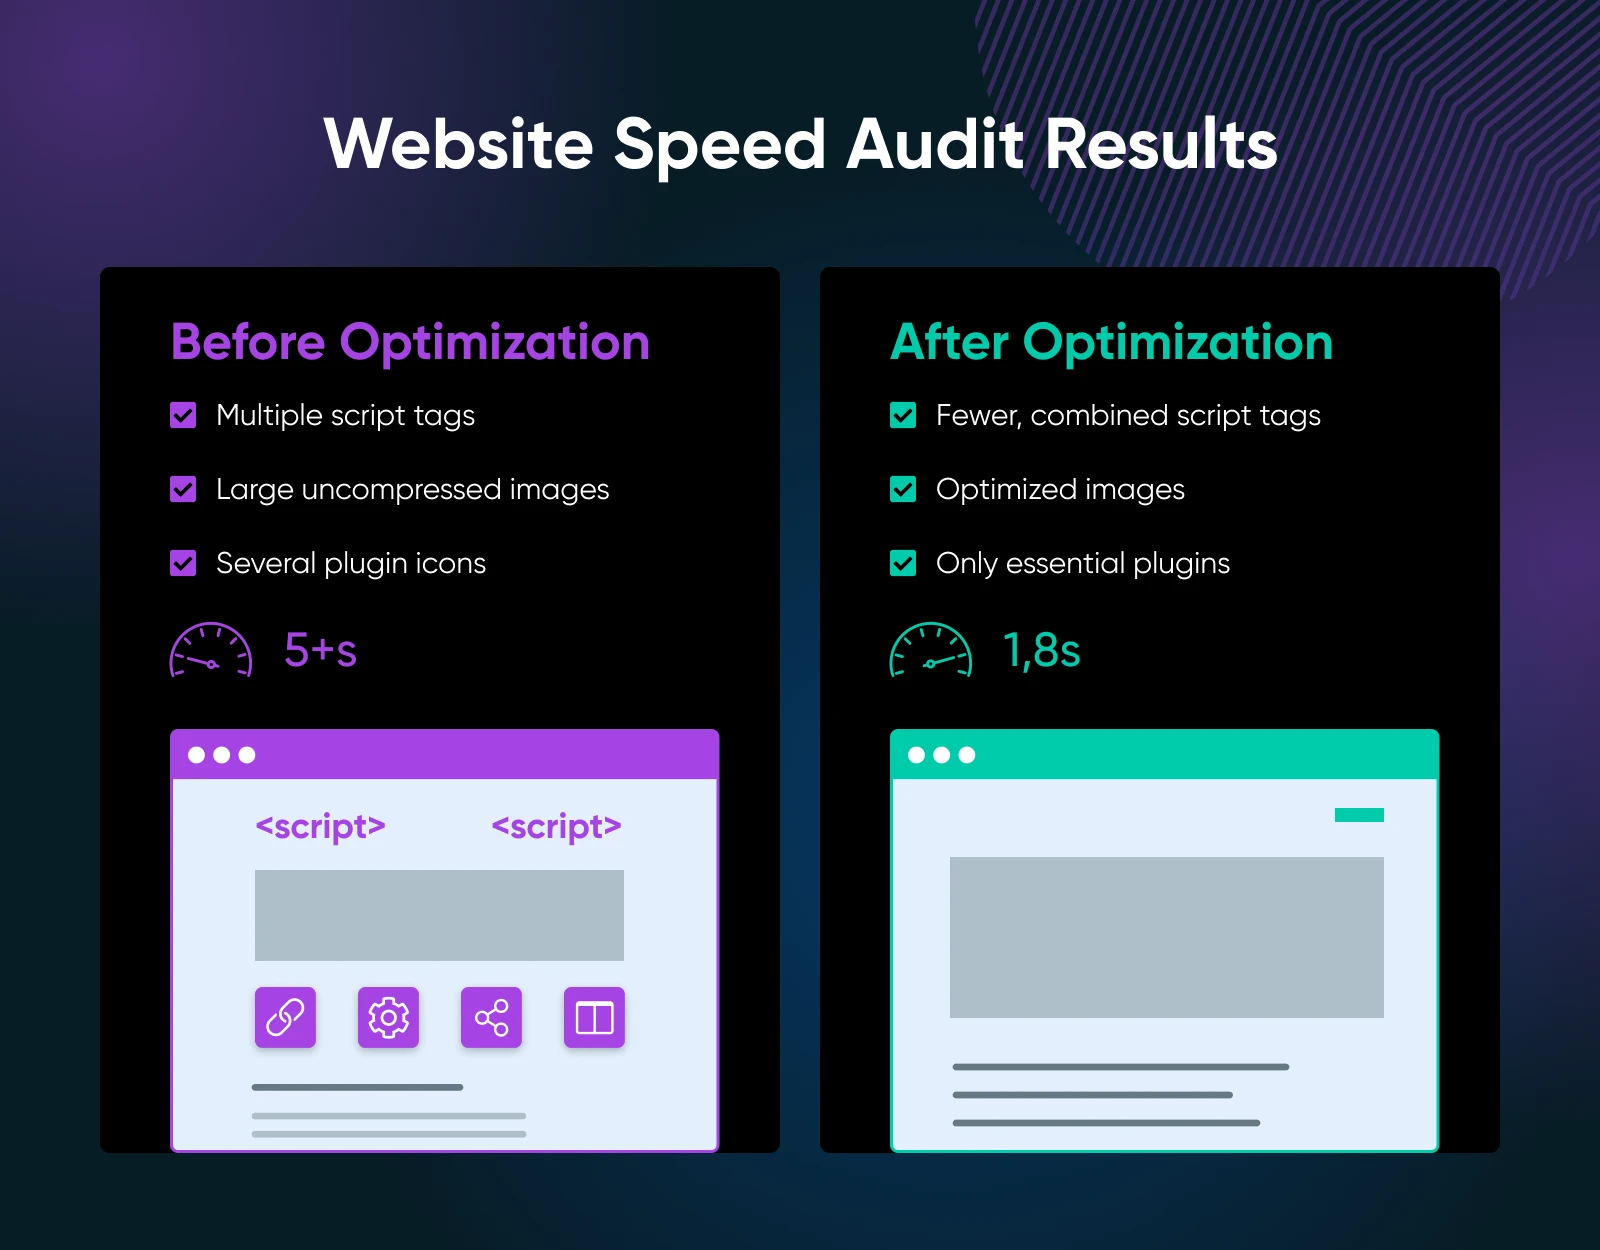
7. Audit Your Website for Bottlenecks
Even the best server optimizations can’t fix poorly coded themes or 100 uncompressed images. A thorough site audit will help you address front-end or application-level issues.
What to do:
When To Upgrade Your VPS Plan
You might try all the above tricks and still find your site crawling at peak times. That’s a strong hint you’ve outgrown your current VPS tier.
If you see:
- Constantly high CPU or RAM usage: Even with caching and optimization, your resource graphs keep spiking.
- Frequent slowdowns or crashes: You’re still battling downtime during traffic surges.
It may be time to invest in a higher-tier VPS. Especially for e-commerce sites that rely on speed to keep customers engaged and coming back, this is an investment that will pay for itself.
DreamHost offers several VPS plans with varying RAM and CPU allocations. Each plan includes an easy-to-use dashboard and proactive alerts, so you can scale up instantly when you’re ready.
Improving your site’s loading speed isn’t about tinkering with random settings and hoping for the best. There’s a method behind the madness, which begins with basic housekeeping (compressing images and removing bloated plugins) and progresses to server-level optimizations (caching, database tuning, and CDN integration).
Ready to get more speed? Check out DreamHost’s VPS hosting plans to see how easy it is to manage and tune your server, complete with user-friendly dashboards and top-tier support. Because a faster site isn’t just a perk — it’s a business advantage you can’t afford to overlook.

VPS Hosting
Take Charge with Flexible VPS Hosting
Here’s how DreamHost’s VPS offering stands apart: 24/7 customer support, an intuitive panel, scalable RAM, unlimited bandwidth, unlimited hosting domains, and SSD storage.
Choose Your VPS Plan
Did you enjoy this article?
