How to Create a Video Slider in WordPress (Easy Tutorial)

Are you wondering how to add a video slider to your WordPress site?
If you are seeing high bounce rates, then maybe your website is boring or poorly designed. Video sliders are a good way to liven up your home page or any other page on your website and capture the attention of your visitors.
In this article, we will show you how to easily create a video slider in WordPress.
Why Use a Video Slider in WordPress?
Images are great, but videos are even better for making your WordPress website more engaging. First impressions matter and can be the difference between a visitor staying to check out your products and services or leaving only to never return.
Plus, you can also use videos to showcase product demonstrations, reviews, or other promotional content.
For example, a real estate website could show virtual walkthroughs of properties. Travel websites can display hotel recommendations, travel destinations, and cool tour experiences to engage potential clients.
A video slider is a slider that contains only videos rather than static images.
Here are some potential ways you can use video sliders for your business:
- Create a dedicated slider with short testimonials from happy customers.
- Share videos of detailed case studies.
- Show product or service reviews.
- Demonstrate different product features and how they work.
With that being said, let’s go over how you can easily create video sliders in WordPress so you can engage your audience.
Adding a Video Slider to Your WordPress Site
The best and easiest way to add video sliders to your website is by using a plugin.
We recommend Soliloquy because it is the best WordPress slider plugin on the market. While most WordPress slider plugins slow down your website, Soliloquy is super fast and won’t hurt your page load time.
Plus, Soliloquy supports YouTube, Vimeo, and Wistia, so you can simply enter the URL of the video if it’s already published.
It is mobile responsive, so you can use it to create slides that work on every device and screen size. Finally, it allows for multiple slide types so that you can add videos, images, and content as well.
The first thing you need to do is install and activate the Soliloquy plugin. For more details on installation, check out our post on how to install a WordPress plugin.
Note: There is also a free Soliloquy plugin that allows you to create video sliders. However, we will be using the Soliloquy Pro plugin for our tutorial because it has built-in support for YouTube, Vimeo, and Wista, along with more video control settings.
Upon activation, simply go to Soliloquy » Add New.
Next, you need to give your new video slider a title. Then, click on the button that says ‘Select Files from Other Sources.’
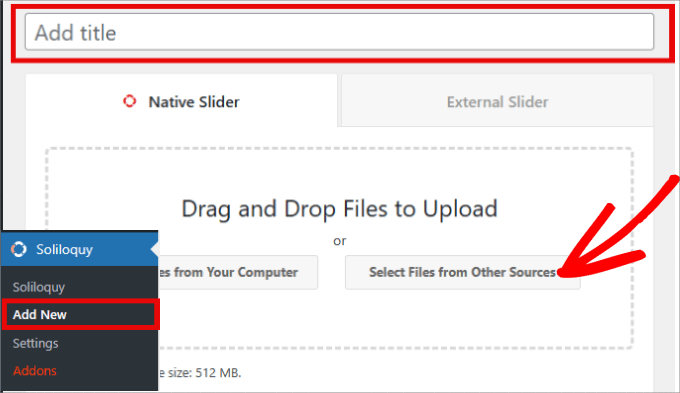
Soliloquy also gives you the option to upload videos directly, but we don’t recommend this. For more details, you can see our guide on why you should never upload a video to WordPress.
A pop-up window will appear where you need to click on the ‘Insert Video Slide’ option.
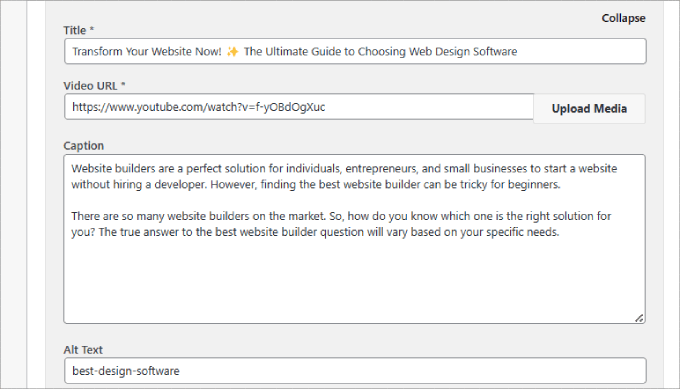
Here is where you will need to add the title, video URL, caption, and alt text of the video.
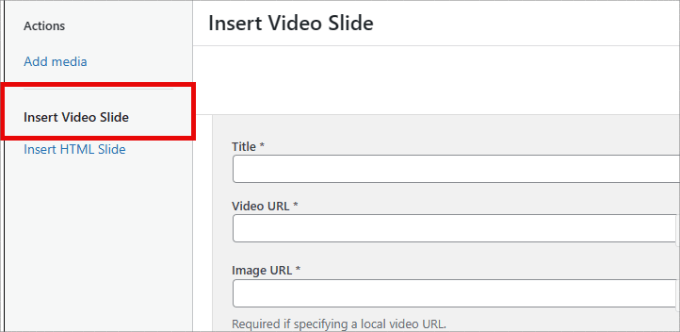
Go ahead and fill in all of the details based on your video.
In the Image URL field, you will also need to provide a placeholder image for the video. This image will be used when the video is not playing. Also, it helps to improve your WordPress performance because the video only loads when the user clicks on it.
Then, in the Video URL field, you can find the video URL in your media library or directly from a video hosting site like YouTube.
Note: It’s better to upload the video on a video hosting site since uploading it to the WordPress library can hurt your WordPress performance. Fortunately, Soliloquy supports YouTube, Vimeo, and Wistia.
You also have the option to provide a caption for the video. Try to write something engaging that also describes what people can expect when they click play.
If you want to add another video slide, then just click on the ‘Add Another Video Slide’ button.
From there, you will need to upload the title, video URL, image URL, caption, and alt text of the next video.

Repeat the process for all of the video slides you want to add.
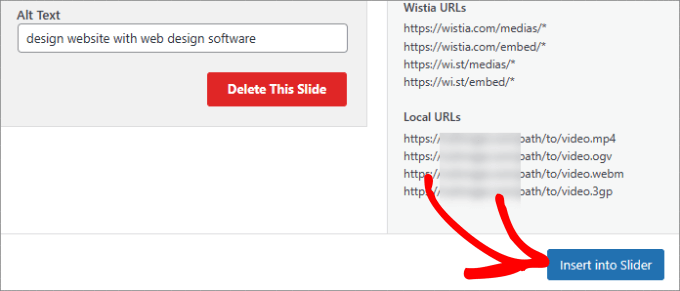
Once you are done adding video slides, simply click the ‘Insert into Slider’ button.
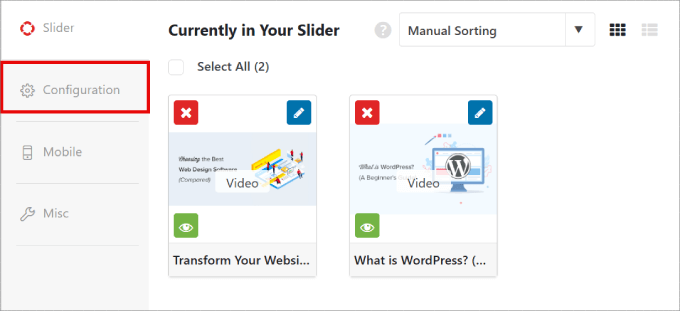
Your video slides will appear on the new slide screen like this.
If you need to make changes to them, you can always click the pencil icon to make changes to the video or click on the green ‘Active’ icon to make the video inactive.
From here, you can go to the ‘Configuration’ tab, where you can customize how you want your video slider to appear.
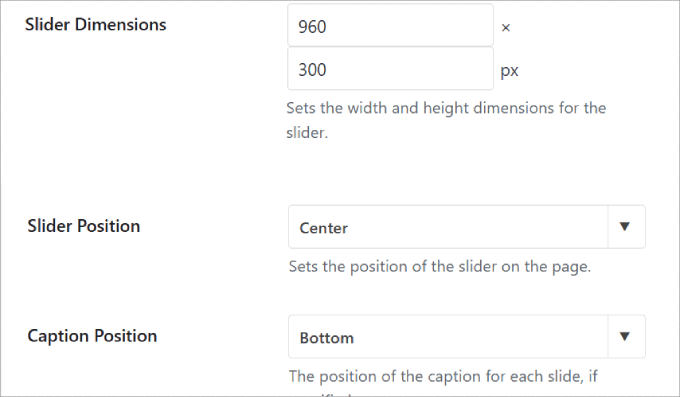
On this screen, there are plenty of settings you can toggle with. For example, you can change the slide dimensions to fit your web design.
Or you can customize the slider and caption position so that it sits in line with other elements on your page.
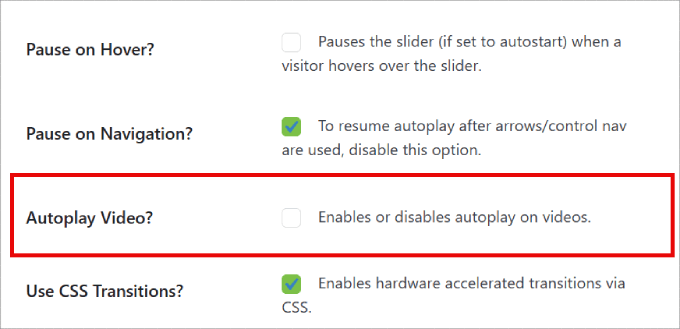
Another option you may want to consider is whether or not to allow video autoplay.
You can set the video slide to automatically play when a visitor lands on the page so that they are forced to watch your content. Keep it mind it could slow down the page speed since the browser also has to load the video.
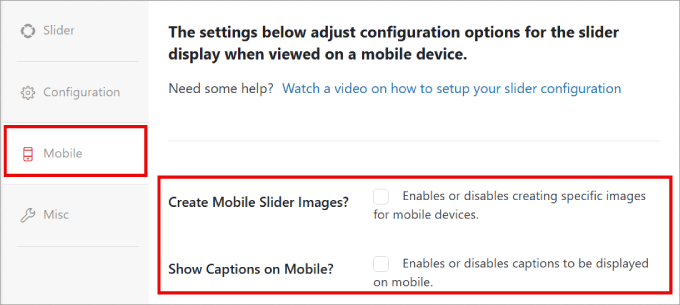
The good thing about Soliloquy is that the plugin can also optimize your video slider for mobile devices.
Head over to the ‘Mobile’ tab. You can create mobile slider images and show captions so that people know what they will be watching before they click to play.
Now, you are ready to add the slider to your WordPress blog or website.
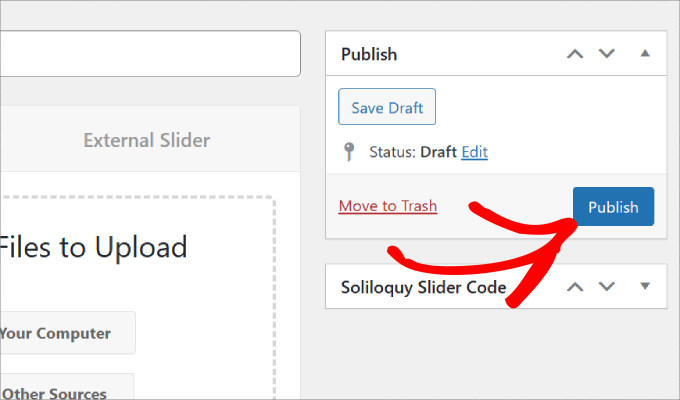
Go ahead and click on the ‘Publish’ button in the right-side panel.
Displaying the Video Slider in WordPress
To embed your slider, simply create or edit a post/page where you want to display the slider.
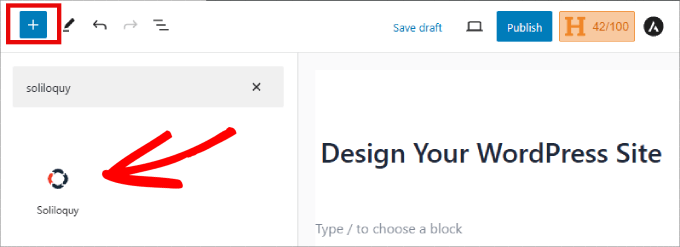
When you are in the WordPress editor, click on the ‘+’ button. Then, add the Soliloquy block to your page.
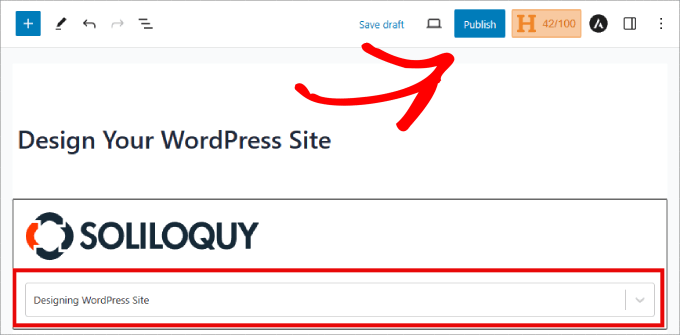
Select the video slider you’ve just created from the Soliloquy widget to insert it into your page.
Then go ahead and click on the ‘Publish’ or ‘Update’ button up top.
That’s all. You can now preview your post to see your video slides in action.
Here’s what it should look like:

If you are still using the classic WordPress editor, then you can also add a video slider to any WordPress page or post.
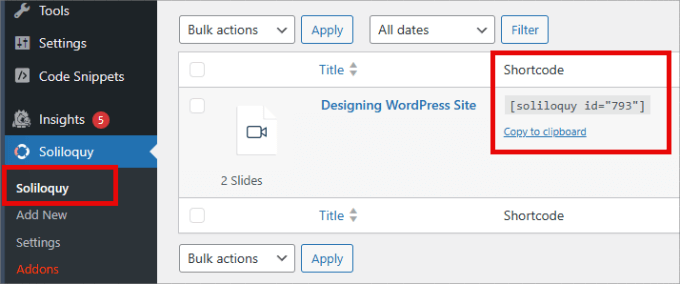
You will have to copy the shortcode located on the Soliloquy page, where all of your video sliders are stored. Then, simply insert that shortcode into your content.
For more information, you can check out our guide on how to insert a shortcode in WordPress.
Bonus: Adding a Featured Content Slider to WordPress
On top of adding video sliders to your website, you may also want to add a featured content slider to your WordPress pages.
Aside from showcasing your best blog posts, you can add featured content sliders for highlighting featured products from your online store, sharing reviews, showing off portfolio items, or displaying popular categories.
Unlike video sliders, a featured content slider can show a combination of images and links on the slide.
All you have to do is install the ‘Featured Content Addon’ in Soliloquy.
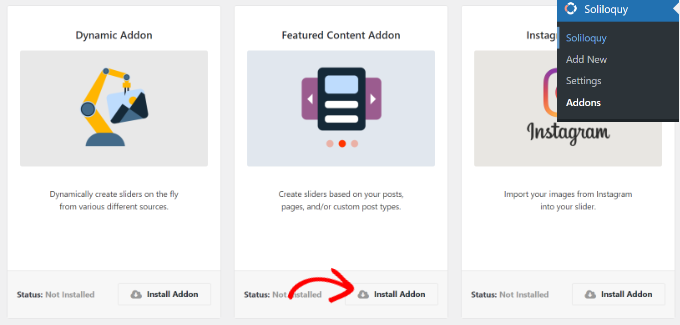
Then, add the content, links, and descriptions of your multimedia files, similar to how you did with the video slider.
For a more in-depth tutorial, just check out our blog post on how to properly add a featured content slider in WordPress.
We hope this article helped you add video sliders in WordPress using Soliloquy. You may also want to check out our list of the best video hosting sites for bloggers, marketers, and businesses or our guide on how to optimize videos for your WordPress website.
If you liked this article, then please subscribe to our YouTube Channel for WordPress video tutorials. You can also find us on Twitter and Facebook.


