WordPress Custom Post Types Guide
Your website is coming on strong, amigo.
Your homepage is a showstopper. Your blog is filling up fast. And now you’re adding even more — perhaps a portfolio or a section stacked with testimonials.
The only problem is, you’re not sure how to keep it all properly organized.
You know WordPress can handle different post types. But, uhhhh…how do you actually access that feature?
Don’t worry, you’re not alone. Custom post types are essentially like unicorns — everyone’s heard of them, but very few people have seen them in person.
To help you learn more about these mythical beasts, we’ve made a guide. A really good, comprehensive guide that anyone can follow. And you’re reading it now.
Give us 10 minutes of your time, and we’ll introduce you to the world of custom post types (CPTs).
Let’s get started!
What Are Custom Post Types (and Why Should You Care)?
As you’re probably aware, WordPress was originally designed as a blogging platform. And it still plays that role really well.
Of course, WordPress can do much more nowadays. Many WordPress-powered sites don’t even have a blog, but underneath the hood, that original blog-based skeleton is still there.
This means that whenever you publish content, it’s usually packaged in one of these default post types:
- Posts: Blog posts, that is
- Pages: Every page that isn’t a standard post
- Attachments: Media uploads, like photos and audio snippets
- Revisions: When you edit an existing post, the changes are stored here
- Nav Menu: Every menu on your site is stored in one of these
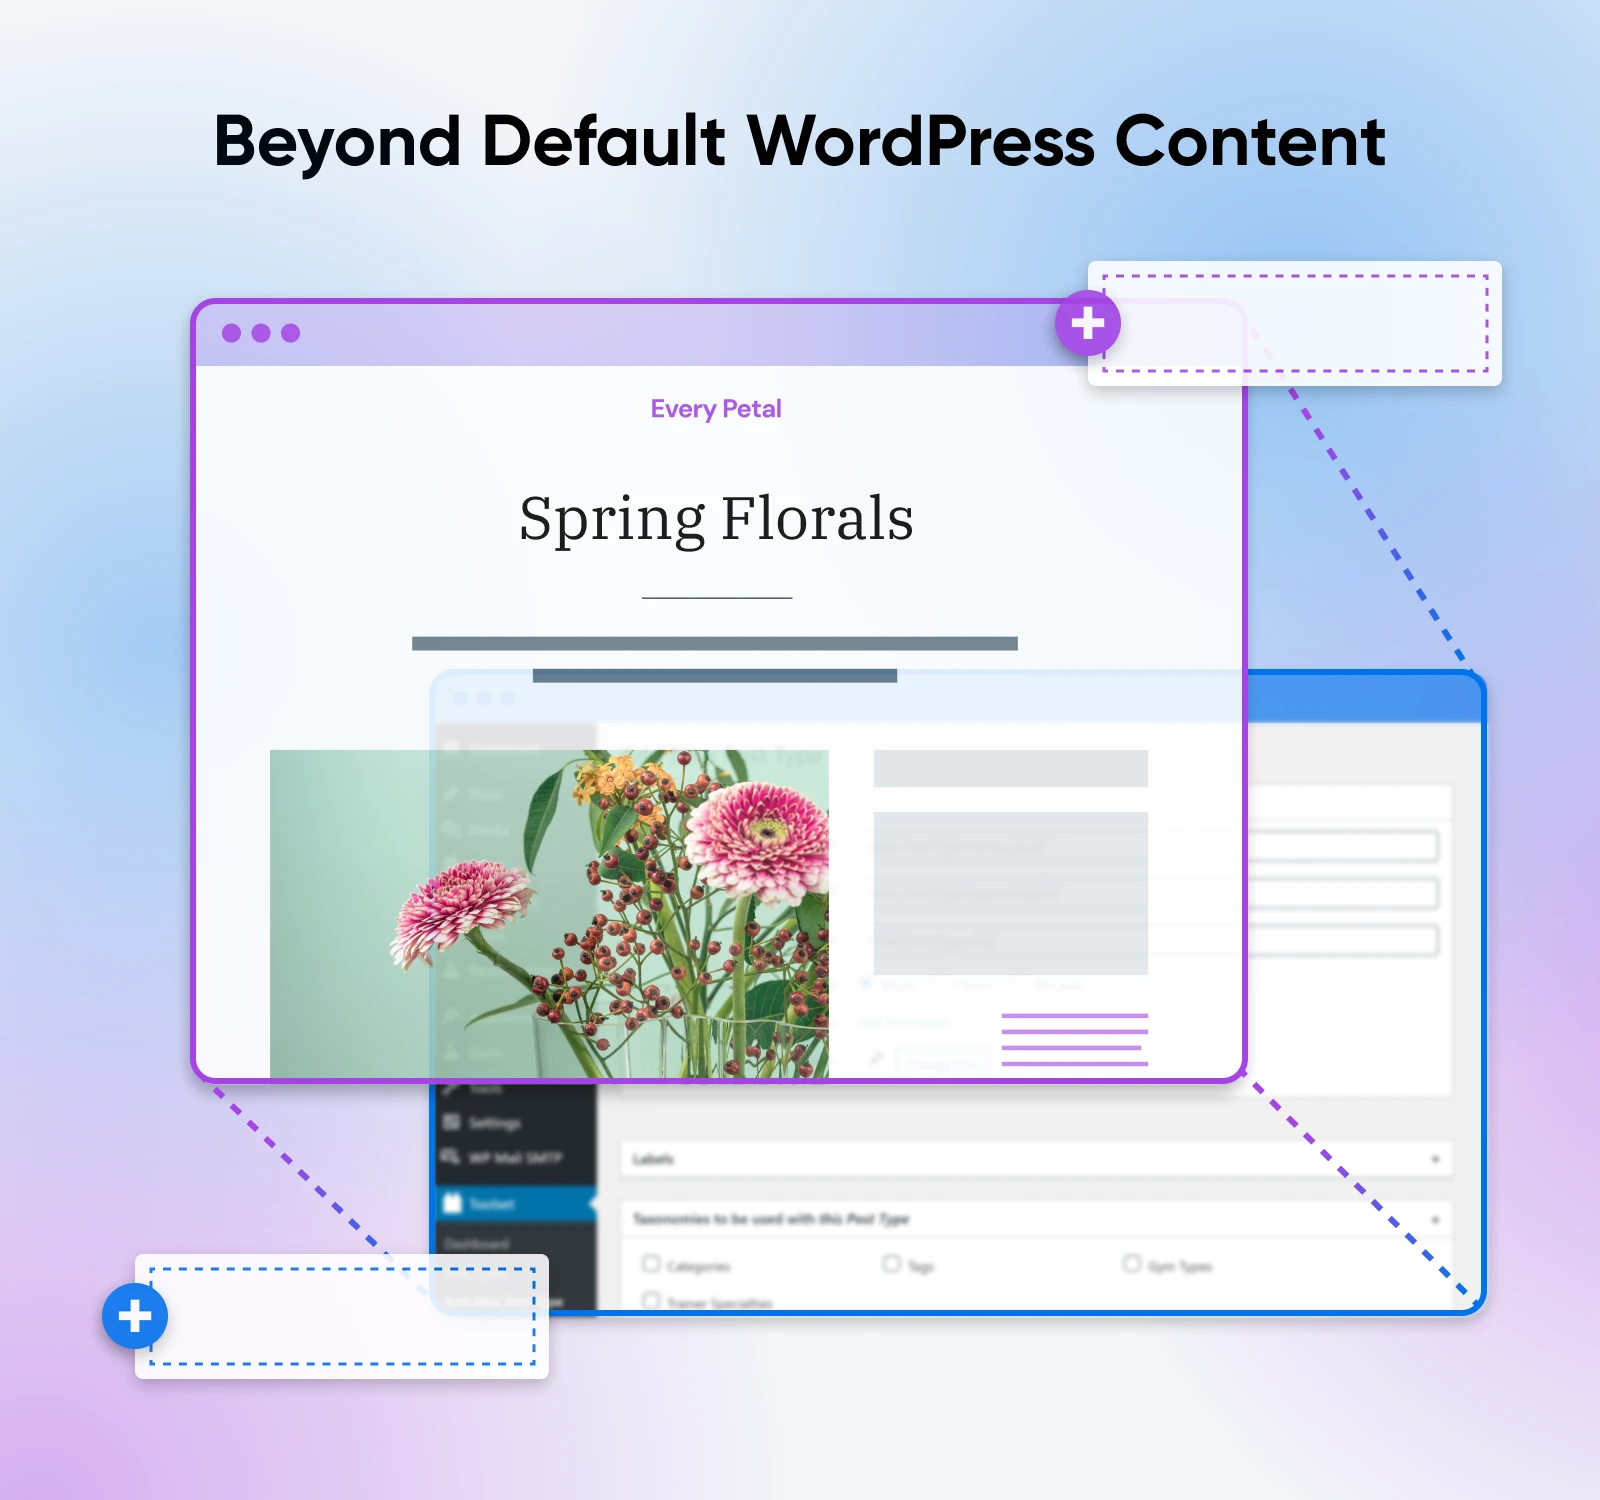
Sticking with these default options is just fine if you have a simple website, but what about if you want to run a store or create a visual portfolio?
You could jam your content into a post or a page, but how do you separate real blog posts from the other stuff?
Some site owners try to MacGyver the situation, using categories and tags to organize their content. The problem is, you end up with an organizational headache.
This is where custom post types come in useful. Basically, you can tell WordPress exactly what type of content you want to publish and how that content should be displayed.
There are multiple benefits.
- Improved user experience: By structuring content logically, CPTs help visitors navigate your site more efficiently, leading to better engagement.
- Enhanced SEO: CPTs can have their own taxonomies, metadata, and URL structures. In plain English, that means search engines can understand and index your content more effectively.
- Better scalability and flexibility: Creating a clear structure for your content means you’re less likely to encounter issues as your site grows.
- A bespoke admin environment: Your WordPress dashboard can be tailored with custom menu items and fields, so you can add new posts and make updates faster.
- Better integration with plugins: Many WordPress plugins, such as custom fields tools and page builders, are specifically designed to work with CPTs. Again, this opens up more options for customizing your admin environment.
- Consistent content display: Create a uniform look and feel for your new content types by creating custom templates.
To summarize: custom post types rock.
Do Custom Post Types Affect SEO and Performance?
You may hear some people say that custom post types will ruin your site performance and mess up your SEO.
That can happen, but that’s almost always the result of bad code.
If you set up your CPTs properly, you shouldn’t see any issues. In fact, creating a better structure might improve the search performance of your WordPress website.
4 Telltale Signs That Your Website Needs Custom Post Types
Okay, that’s the sales pitch done. Now, do you actually need this feature? There’s no point in reading a whole guide unless your site will benefit.
With that in mind, here are the main telltale signs that CPTs are worth exploring.
1. Your Site Has Multiple Types of Content
Content comes in many flavors. If your website features more than one, you might want to explore custom post types.
Some examples:
- A photography portfolio with image galleries and detailed descriptions
- Event listings that have date, time, and location fields
- Client testimonials that are structured differently from your blog posts
Any content that doesn’t neatly fit either the post or page format is prime CPT material.
2. Content Management Feels Like a Total Mess
Does your WordPress admin area feel like an untamed jungle? For example, are you:
- Using categories or tags to differentiate unrelated content types? (E.g., mixing blog posts and portfolio items)
- Relying heavily on page builders or shortcodes to create unique layouts for different types of content?
- Having difficulty filtering or sorting content?
These are all symptoms of a site that’s crying out for custom post types!
3. Some Content Types Don’t Display Properly on Your Site
Maybe your site only has one type of content…but these posts just don’t look right.
A common example would be product pages that look like blog posts. No one with an ounce of discernment is buying from that online store.
The solution involves custom post types. You can assign each new post type a unique template that is perfectly tailored to your content.
4. You Need Features That Posts and Pages Don’t Have
Posts and pages can handle text, links, images, embedded media…and that’s about it.
If you need something more, you should probably set up some CPTs.
Some real-world examples:
- Event pages that need date pickers, RSVP options, and countdown timers
- Real estate listings with price fields, location maps, and property details
- Job boards that have application forms and submission tracking
How To Create Custom Post Types
Hmm, seems like you could use some CPTs. Shall we create some?
There are several ways to register custom post types in WordPress.
The simple route calls for no technical knowledge. If you’re comfortable working with PHP snippets, the middle road offers more customization options. For coders, the fully hands-on method provides complete control.
Let’s work through them now.
1. The Easy Plugin Method (Beginner-Friendly)
Not a WordPress expert? We get you. Whether you’re new to the platform or new to running a website, the whole thing can seem overwhelming.
Not to worry. Tools like Custom Post Type UI plugin make it simple to install CPTs.
1. Install the plugin: In your WordPress admin area, visit Plugins > Add New Plugin, and search for “Custom Post Type UI.” Click Install Now.
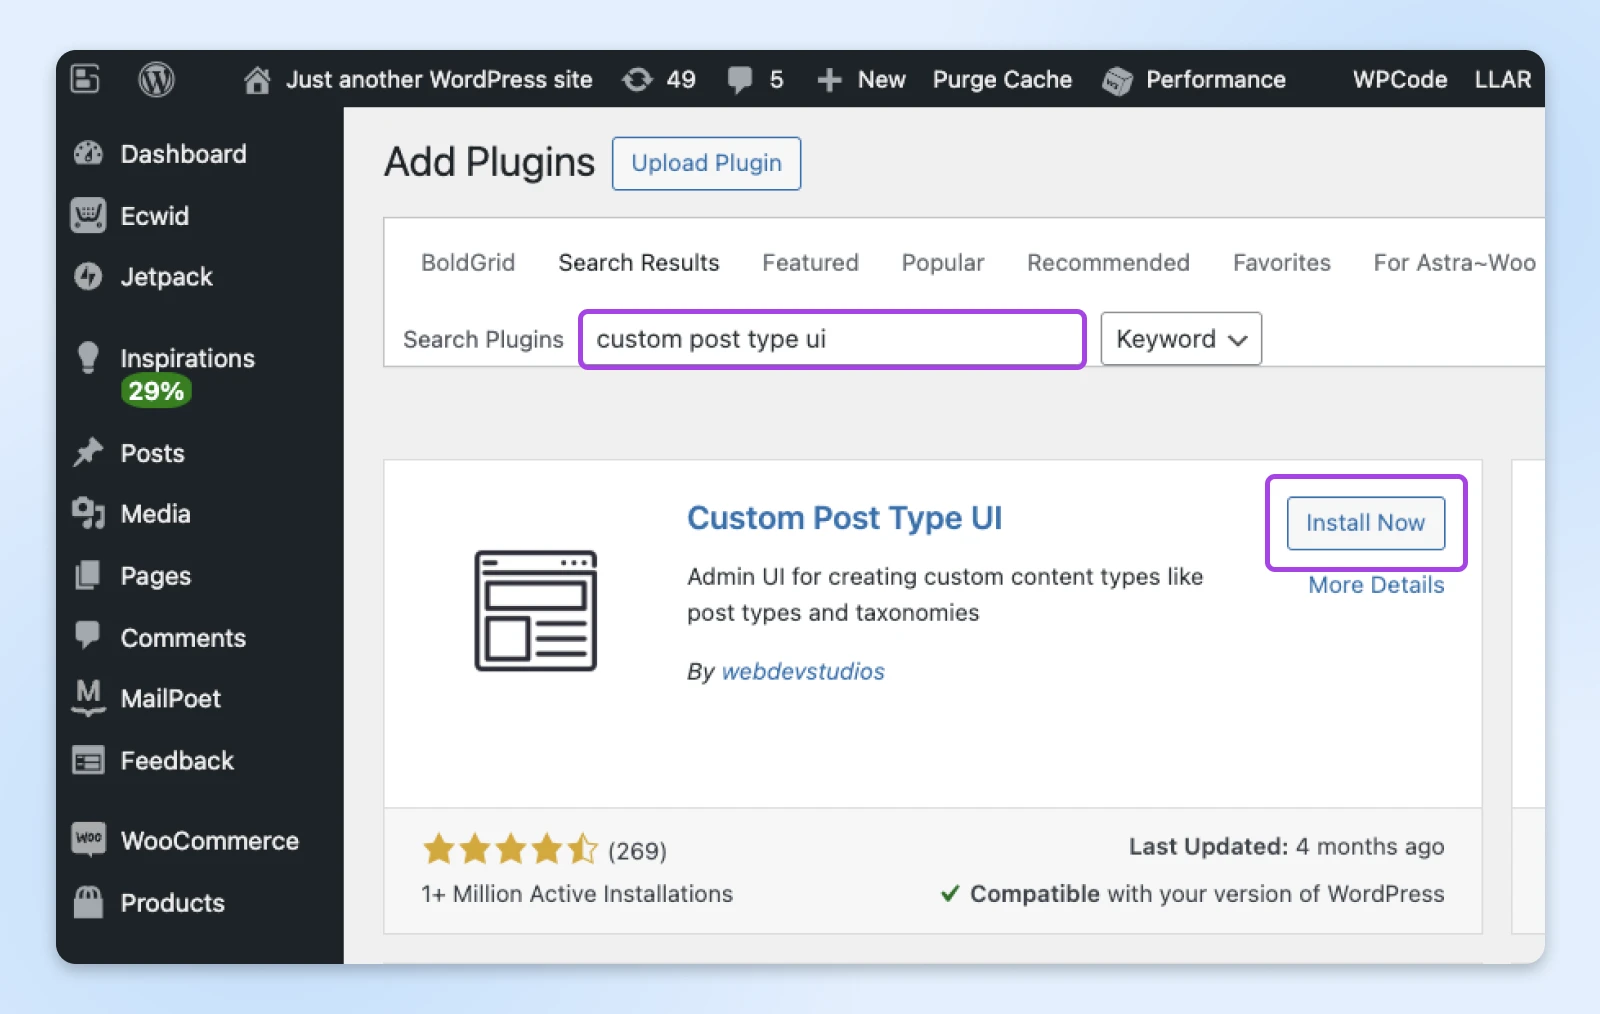
Once installed, the button will change to “Activate.” Click it.
2. Open the plugin settings: Via the sidebar menu, head to CPT UI > Add/Edit Post Types.
3. Fill out the basic settings: Choose a slug and a name for your new CPT. The plugin will ask you for both the singular and plural versions.
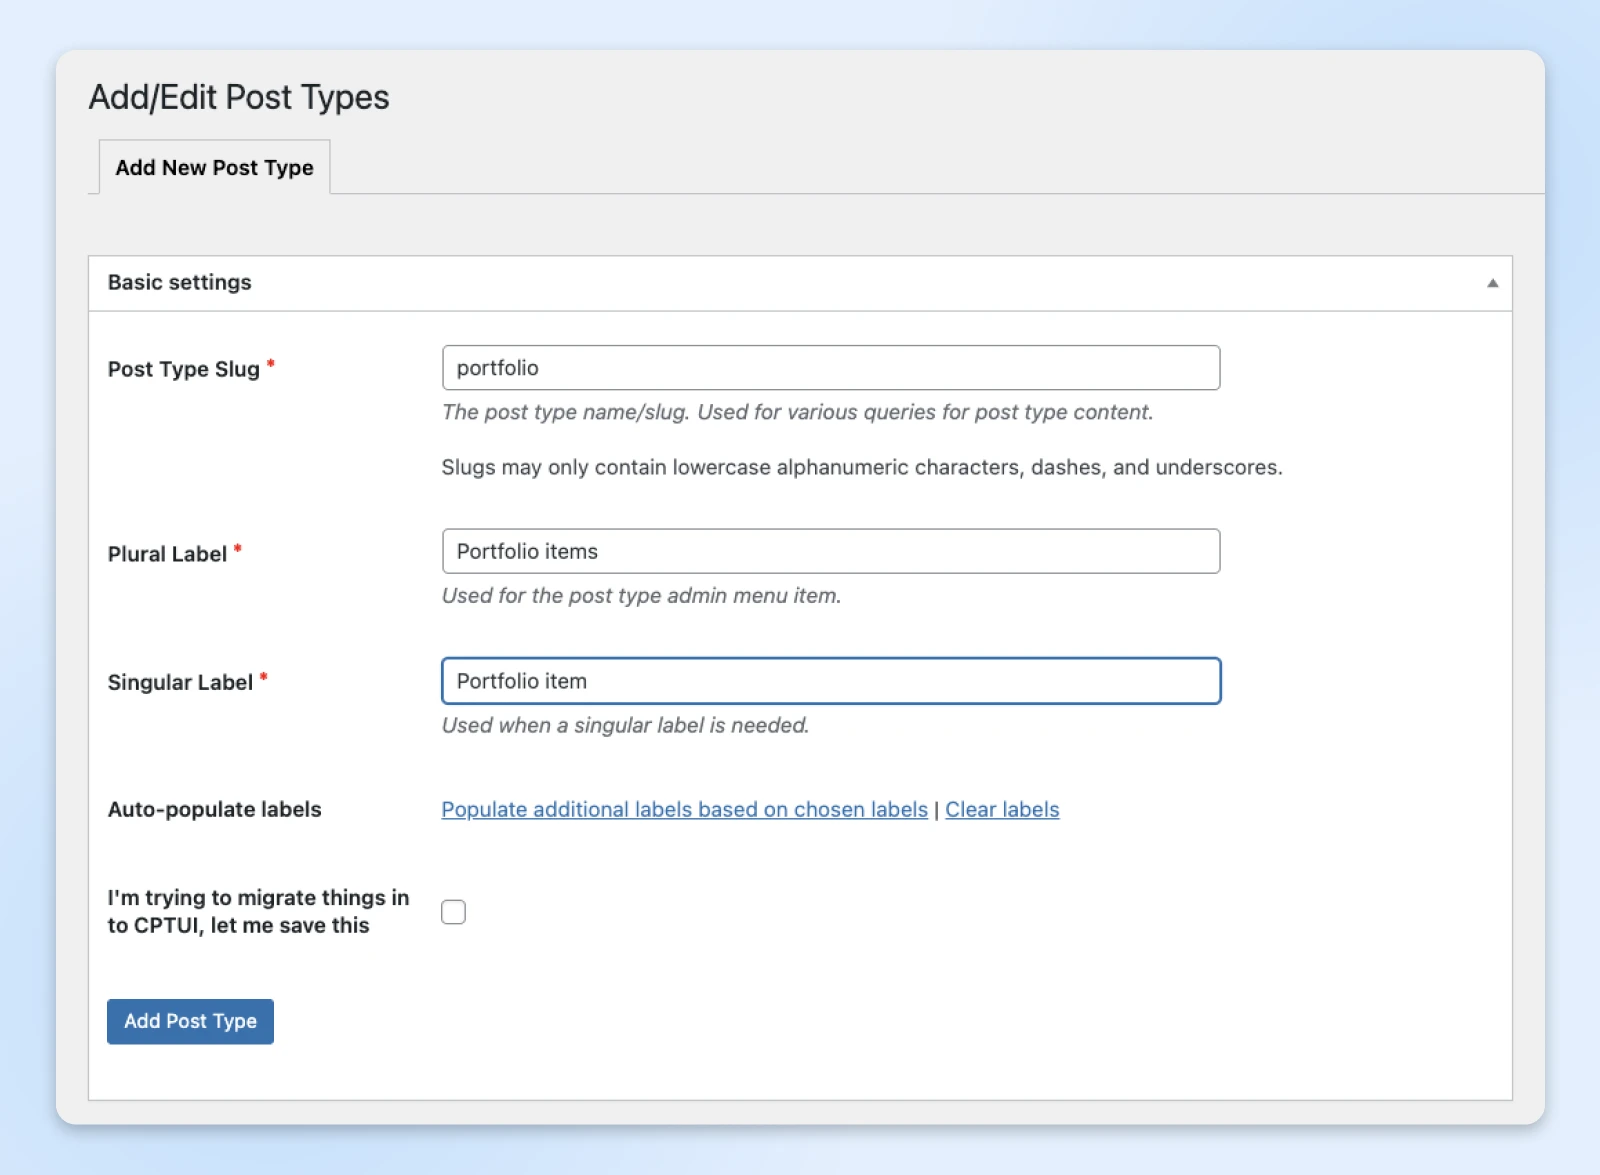
4. Choose your settings: This page has a huge range of options, allowing you to configure access, fields, functions, and additional labels for your new post type.
5. Publish: Once you’re done, click the blue Add Post Type button to create your new CPT!
The new custom post type will appear in the sidebar, like your Posts and Pages. You can open this new menu item to add and manage content.
2. Using WPCode for Manual Creation (Intermediate)
Let’s take things up a notch. If you’re comfortable customizing WordPress, this next method will give you more options to play with.
It’s based around a plugin called WPCode, which helps you add PHP snippets to core files in a secure way.
Here’s the process:
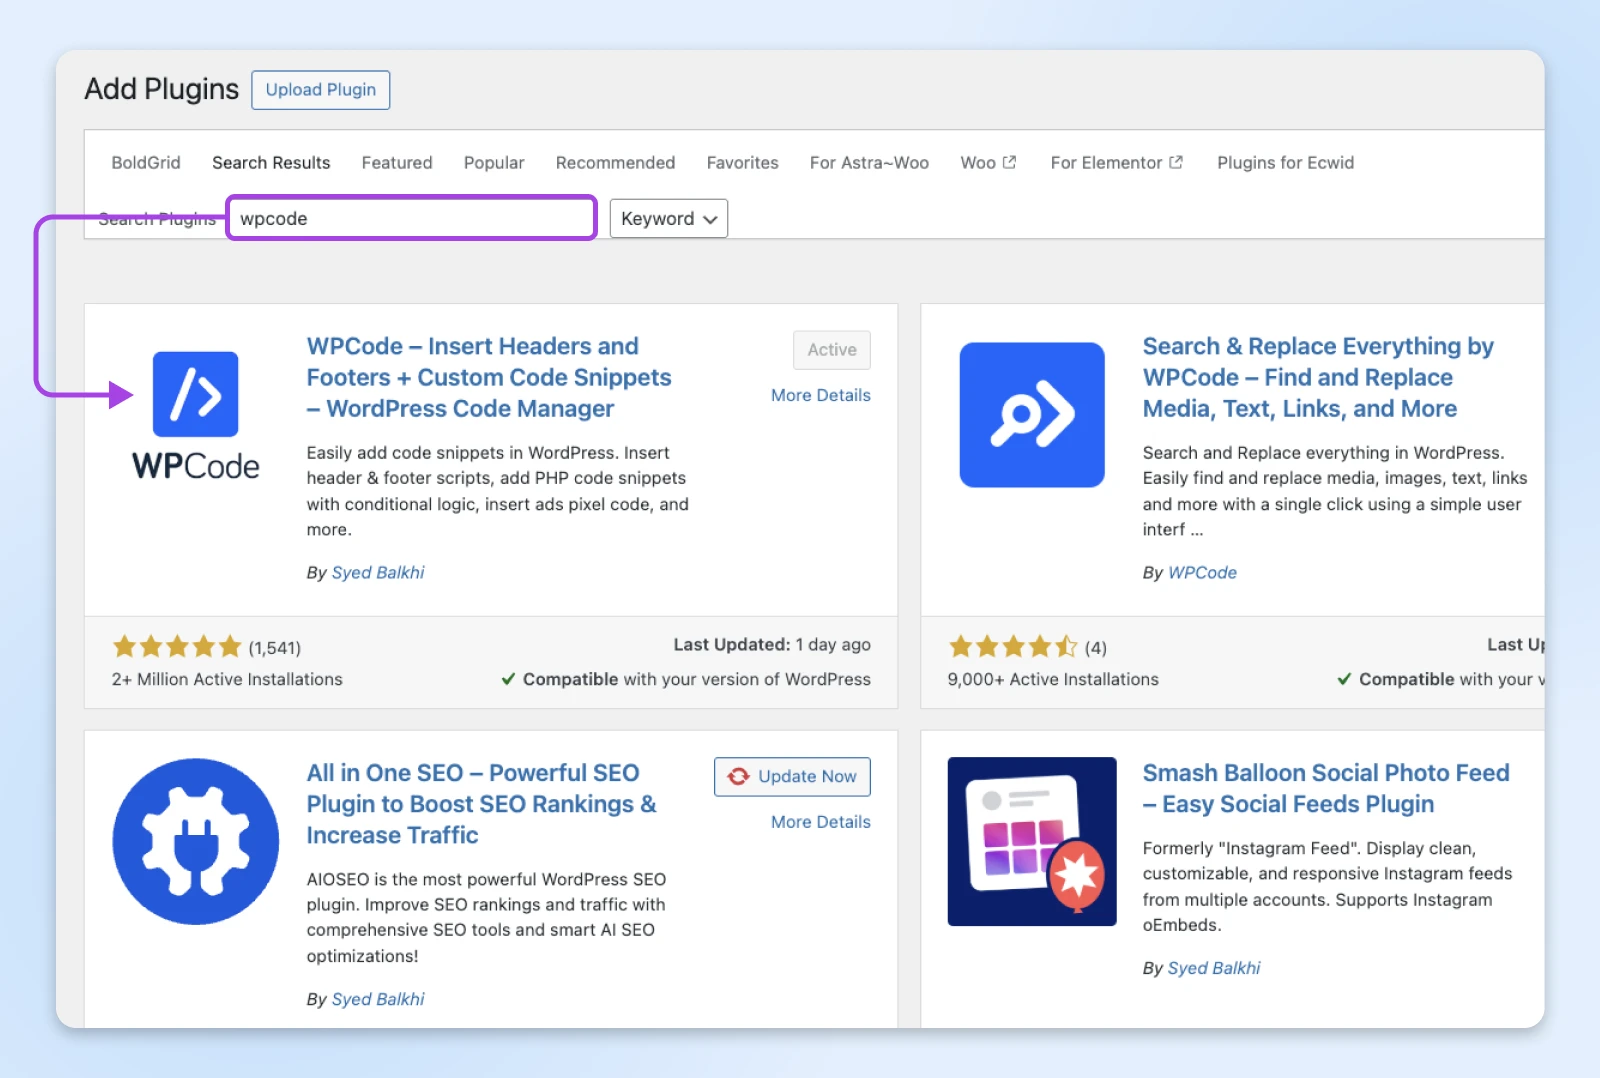
1. Install the WPCode plugin: In the sidebar, visit Plugins > Add New Plugin and search for “WPCode.” Install and activate it.
2. Add a new PHP snippet: Navigate to Code Snippets > + Add Snippet via the sidebar menu.
This will open up a library of ready-made code snippets.

There’s loads of useful stuff here — but for this task, you need to select Add Your Custom Code (New Snippet). It should be right at the top.
3. Build your snippet: From the pop-up panel, choose PHP Snippet.

You should then see a nice big box for your code.

To register your new CPT, you can paste in this template and make changes to match your requirements:
// Our custom post type function
function create_posttype() {
register_post_type( ‘portfolio’,
// CPT Options
array(
‘labels’ => array(
‘name’ => __( ‘Portfolio’ ),
‘singular_name’ => __( ‘Portfolio Item’ )
),
‘public’ => true,
‘has_archive’ => true,
‘rewrite’ => array(‘slug’ => ‘portfolio’),
‘show_in_rest’ => true,
)
);
}
// Hooking up our function to theme setup
add_action( ‘init’, ‘create_posttype’ );
4. Save and activate: Once you’re happy with your code, hit the Save button on the top right. To put your new post type into action, hit the toggle switch that currently says “Inactive” and click Update to finish up.
Once again, your new custom post type should appear in the sidebar menu. You can click on this label to start creating custom content!
Safety Tips
Whenever you’re playing with code in WordPress, think of yourself as a chemistry teacher doing a science experiment. Take some precautions, and you should avoid setting the whole place on fire…
- Test your new snippet on a staging site if possible.
- Always review and back up your website before adding new code.
- WPCode provides a sandboxed environment, but be careful if you’re not experienced with code.
3. Coding Directly in functions.php (Advanced)
Hello, WordPress veteran. You skipped to the end because you prefer to not use plugins. You just need a nudge in the right direction, and away you go.
Here’s your workflow:
// Register Custom Post Type for Portfolio
function register_portfolio_post_type() {
$labels = array(
‘name’ => _x(‘Portfolios’, ‘Post Type General Name’, ‘textdomain’),
‘singular_name’ => _x(‘Portfolio’, ‘Post Type Singular Name’, ‘textdomain’),
‘menu_name’ => __(‘Portfolios’, ‘textdomain’),
‘name_admin_bar’ => __(‘Portfolio’, ‘textdomain’),
‘archives’ => __(‘Portfolio Archives’, ‘textdomain’),
‘attributes’ => __(‘Portfolio Attributes’, ‘textdomain’),
‘parent_item_colon’ => __(‘Parent Portfolio:’, ‘textdomain’),
‘all_items’ => __(‘All Portfolios’, ‘textdomain’),
‘add_new_item’ => __(‘Add New Portfolio’, ‘textdomain’),
‘add_new’ => __(‘Add New’, ‘textdomain’),
‘new_item’ => __(‘New Portfolio’, ‘textdomain’),
‘edit_item’ => __(‘Edit Portfolio’, ‘textdomain’),
‘update_item’ => __(‘Update Portfolio’, ‘textdomain’),
‘view_item’ => __(‘View Portfolio’, ‘textdomain’),
‘view_items’ => __(‘View Portfolios’, ‘textdomain’),
‘search_items’ => __(‘Search Portfolio’, ‘textdomain’),
‘not_found’ => __(‘Not found’, ‘textdomain’),
‘not_found_in_trash’ => __(‘Not found in Trash’, ‘textdomain’),
‘featured_image’ => __(‘Featured Image’, ‘textdomain’),
‘set_featured_image’ => __(‘Set featured image’, ‘textdomain’),
‘remove_featured_image’ => __(‘Remove featured image’, ‘textdomain’),
‘use_featured_image’ => __(‘Use as featured image’, ‘textdomain’),
‘insert_into_item’ => __(‘Insert into portfolio’, ‘textdomain’),
‘uploaded_to_this_item’ => __(‘Uploaded to this portfolio’, ‘textdomain’),
‘items_list’ => __(‘Portfolios list’, ‘textdomain’),
‘items_list_navigation’ => __(‘Portfolios list navigation’, ‘textdomain’),
‘filter_items_list’ => __(‘Filter portfolios list’, ‘textdomain’),
);
$args = array(
‘label’ => __(‘Portfolio’, ‘textdomain’),
‘description’ => __(‘A custom post type for portfolio items’, ‘textdomain’),
‘labels’ => $labels,
‘supports’ => array(‘title’, ‘editor’, ‘thumbnail’, ‘custom-fields’),
‘hierarchical’ => false,
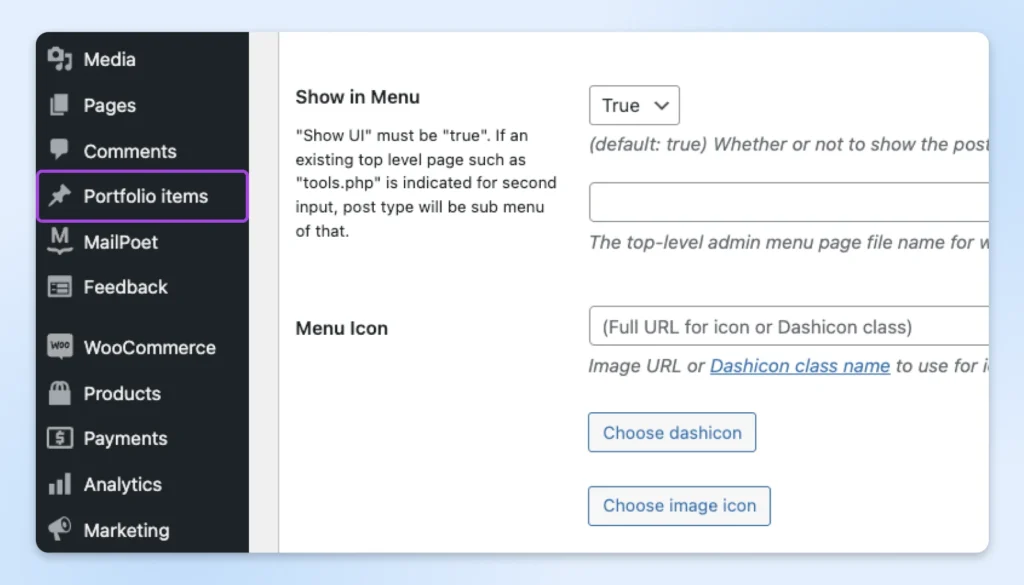
‘public’ => true,
‘show_ui’ => true,
‘show_in_menu’ => true,
‘menu_position’ => 5,
‘menu_icon’ => ‘dashicons-portfolio’,
‘show_in_admin_bar’ => true,
‘show_in_nav_menus’ => true,
‘can_export’ => true,
‘has_archive’ => true,
‘exclude_from_search’ => false,
‘publicly_queryable’ => true,
‘rewrite’ => array(‘slug’ => ‘portfolio’),
‘capability_type’ => ‘post’,
);
register_post_type(‘portfolio’, $args);
}
add_action(‘init’, ‘register_portfolio_post_type’);
Popular Custom Post Types
The reason custom post types are so powerful is that they are truly custom. If you can dream it, you can build it.
That said, there are a few post types that regularly pop up on WordPress sites.
Before you start trying to design something from scratch, it’s worth checking whether one of the formats below would meet your requirements.
- Portfolio item: You could use a template that shows off individual images or one that packages project descriptions and outcomes in a case study format.
- Testimonial: With a testimonial CPT, you could add star ratings and company logos. It would also allow you to organize testimonials without using blog categories.
- Event: It’s possible to advertise events on a page, but you may have to use a cocktail of plugins to display dates, location maps, and RSVP options. A custom event post type could have these functions built in.
- Product: If you’re trying to build an e-commerce store, having a dedicated template for showing off your products is essential.
- Listing: The same goes for other listings, such as real estate and classifieds. Creating a separate CPT lets you set up a bespoke template and keep your listings neatly organized.
As you plan upgrades to your site, consider whether these custom post types would fit your needs — or whether you need something completely custom!
How To Display Your Custom Post Types
Having registered the new CPTs, you need to decide how and where they should appear on your site.
The options here are literally unlimited. And that can feel a bit overwhelming.
If you’re not sure where to begin, try this starter pack:
Add Custom Post Types to Your Site Menu
There’s no point using custom posts if no one can find them.
In your WordPress admin area, navigate to Appearance > Menus and add the new CPT archive to your main menu.
Be sure to change the label to make it clear what visitors can expect.
Creating Dedicated Templates
You probably don’t want your new custom posts to be served up exactly like blog posts. That includes the archive page, where visitors can see your latest content.
Creating a new template gives you the chance to build your own layout.
Need some inspiration? Check out other websites to see how they present similar content!
Display Posts in Widgets
Did you know you can display your custom posts in any widget area?
All you need is a free plugin called Custom Post Type Widgets.
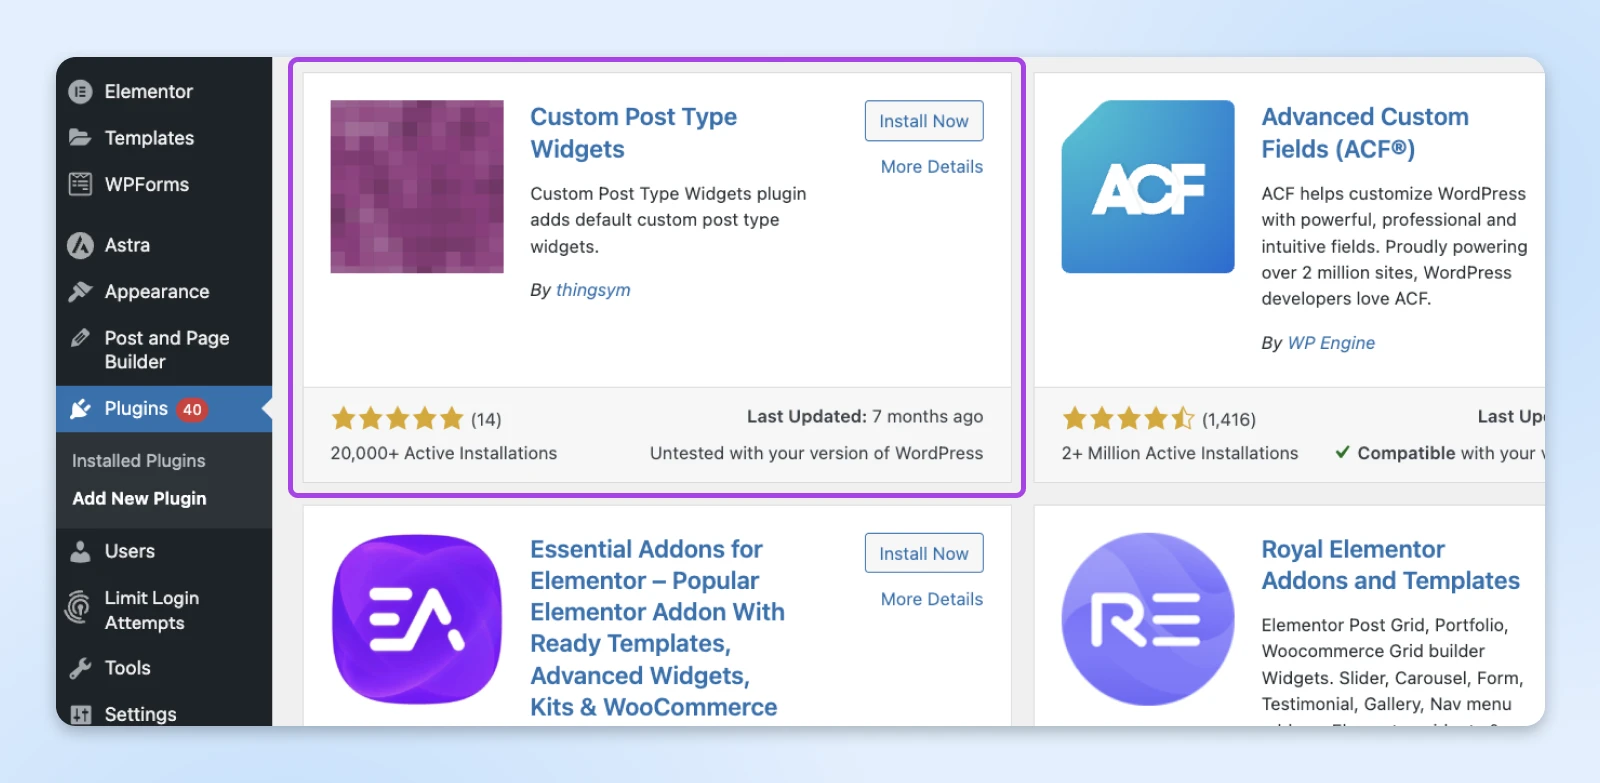
After you install and activate the plugin, head over to Appearance > Widgets and add a new widget.
From the big menu on the left, find and select Archives (Custom Post Type).
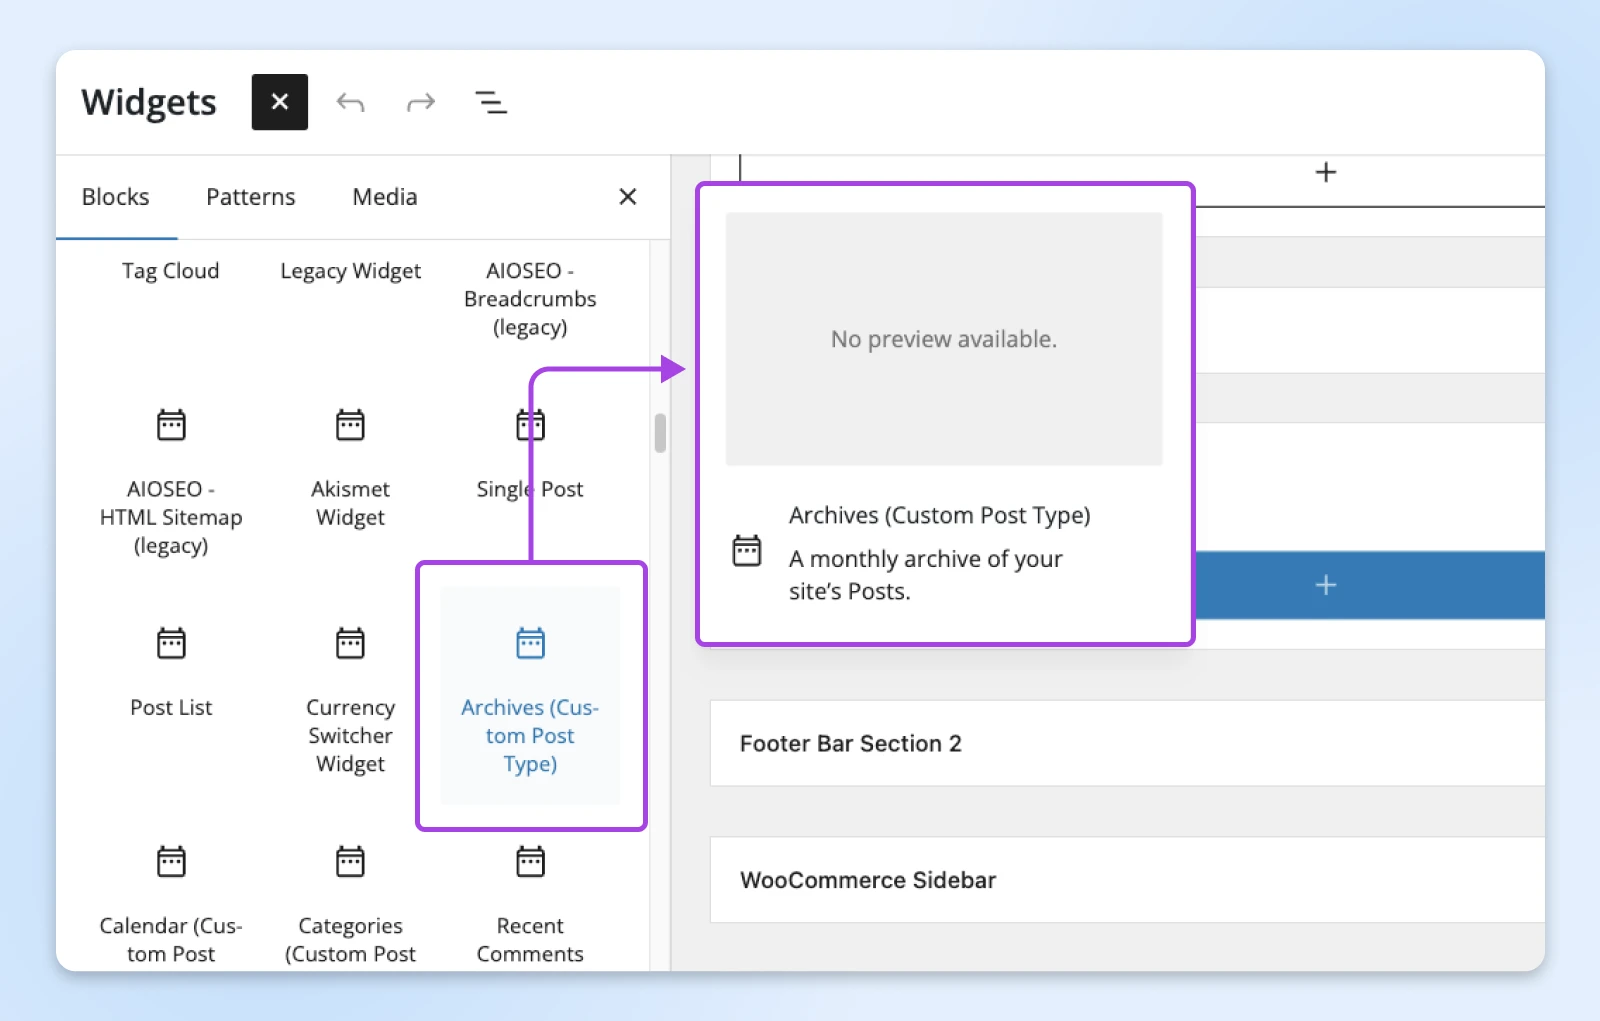
You can then configure your widget to display any post type you want!
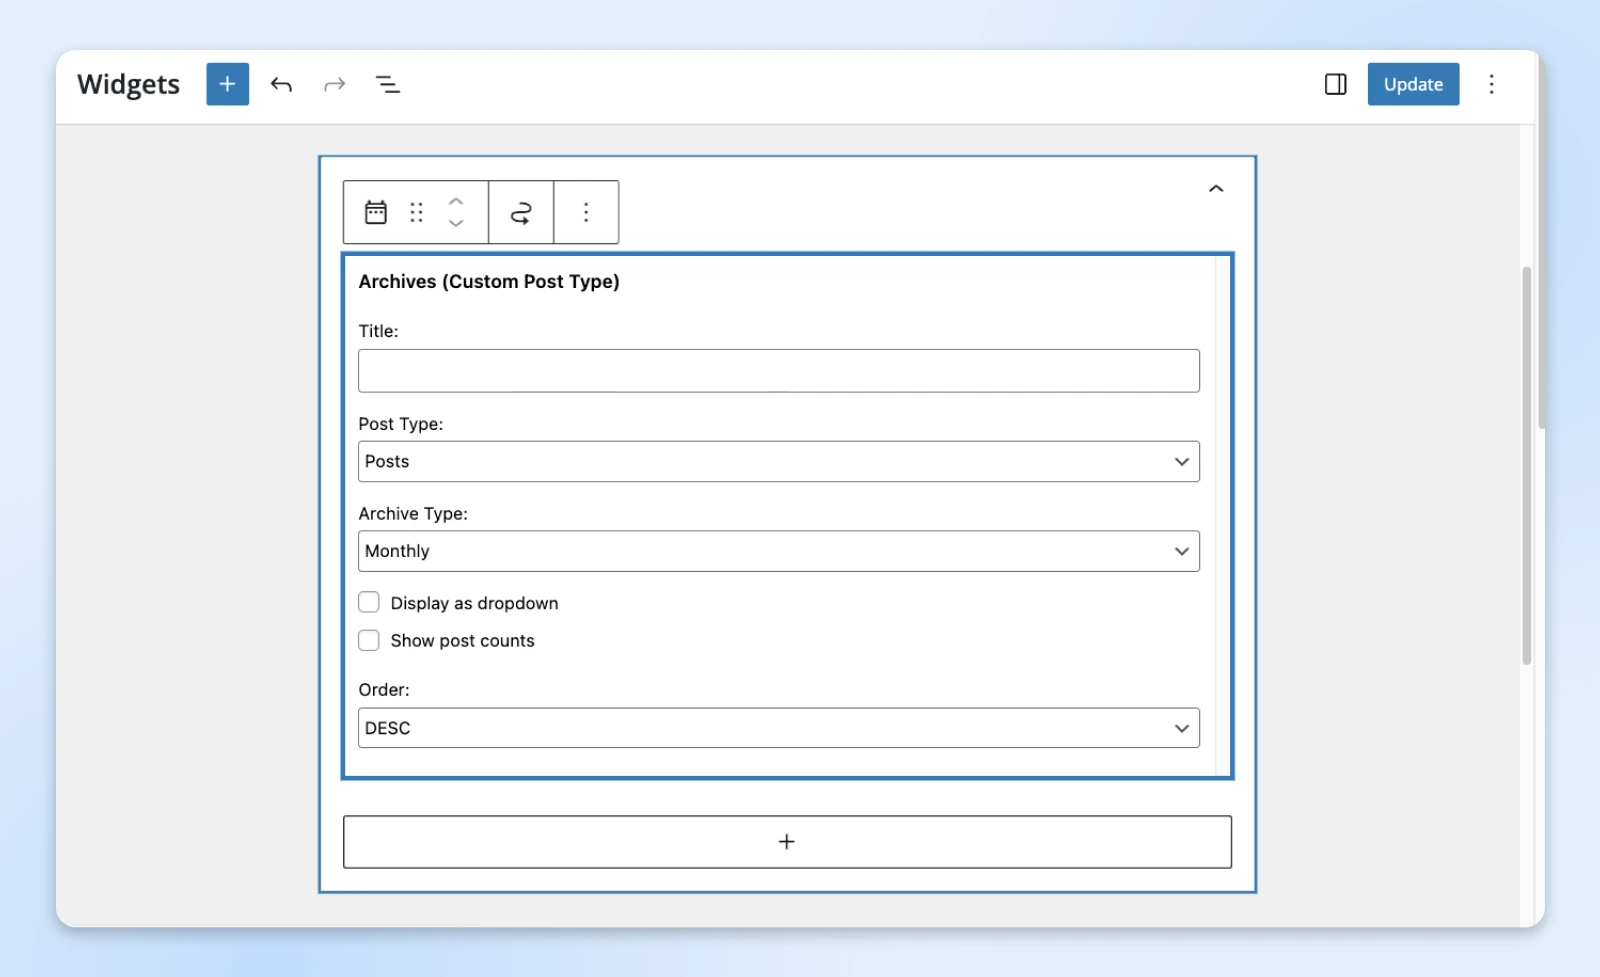
💡Top tip: This plugin also lets you display recent posts, a calendar view, a tag cloud, and more.
Upgrade Your WordPress Site Today
WordPress is amazingly versatile. From code to quizzes, it can handle pretty much any type of content. But, as we’ve learned, things can get messy when you mix and match content types.
If you want to create something more than standard posts and pages, it’s definitely worth using custom post types to keep your content tidy. The process is really easy, and it will instantly improve the usability of your site.
While you’re thinking about upgrades…have you heard about our dedicated WordPress hosting?
Our plans offer one-click staging, bulletproof backups, built-in caching, and a performance boost from BunnyCDN. Plus, you get free migration. It’s everything you need to take your WordPress site to the next level!
Sign up today to give your business website the hosting it deserves.

WordPress Hosting
WordPress + DreamHost
Our automatic updates and strong security defenses take server management off your hands so you can focus on creating a great website.
Check Out Plans
This page contains affiliate links. This means we may earn a commission if you purchase services through our link without any extra cost to you
Did you enjoy this article?

