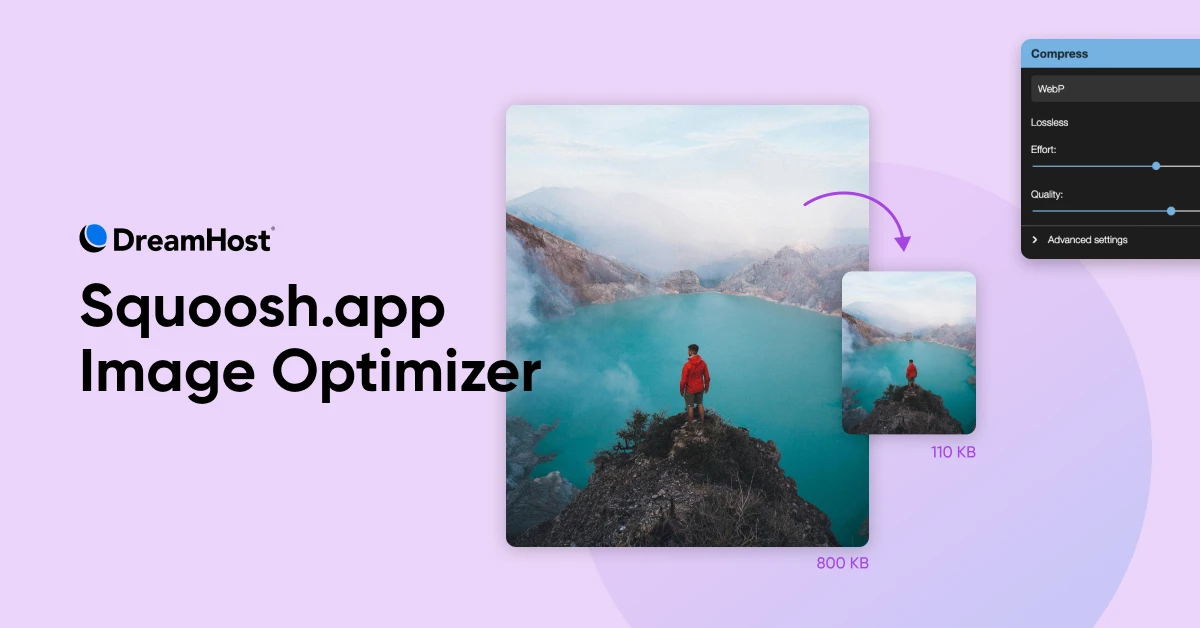
Optimize Images With Squoosh App

You probably know about image optimization already.
It’s meant to compress photos on your site, so pages don’t load at a glacial speed.
So far, you’ve kinda ignored the whole idea. Fair play — it doesn’t make a huge difference until your site is fully formed.
But now, the time has come to do something. Your arch nemesis…um, we mean…your nearest competitor is absolutely trouncing your site in the performance wars. It’s time to fight back.
Squoosh is one of the best tools at your disposal. It’s free, open source, and easy to use.
Open Source
In software development, open source projects are free for anyone to download, use, modify, and distribute. WordPress is one great example of open source software, although it’s far from the only one.
Read More
In this guide, we’re going to look at how to use Squoosh to compress images and reduce your load times. Let’s get going!
How To Optimize Images With Squoosh in 30 Seconds
Let’s get straight to business.
You can start optimizing images for your site very quickly.
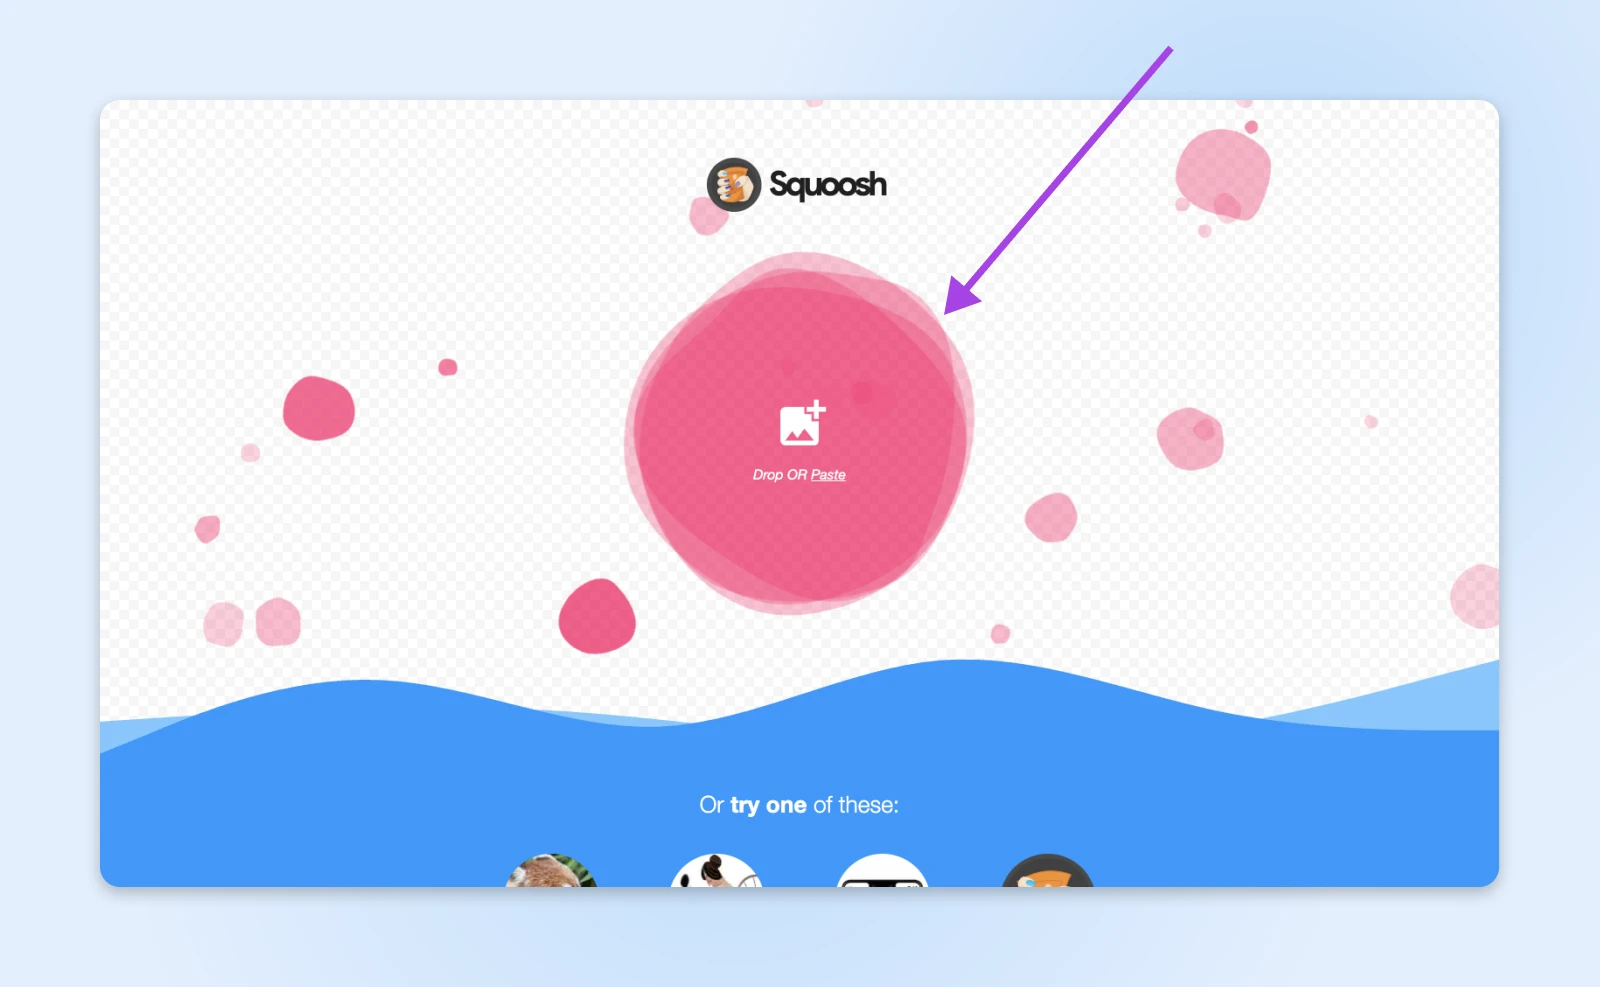
Head over to https://squoosh.app.
Click on the big pink blob at the top of the page, and select the image you want to compress.
You’ll then enter a preview screen, with a settings panel in the bottom right.
Here, you can choose to resize your image, reduce the color palette, change the quality, and select your preferred output file type.
Below that, a counter tells you how much smaller your new file will be.
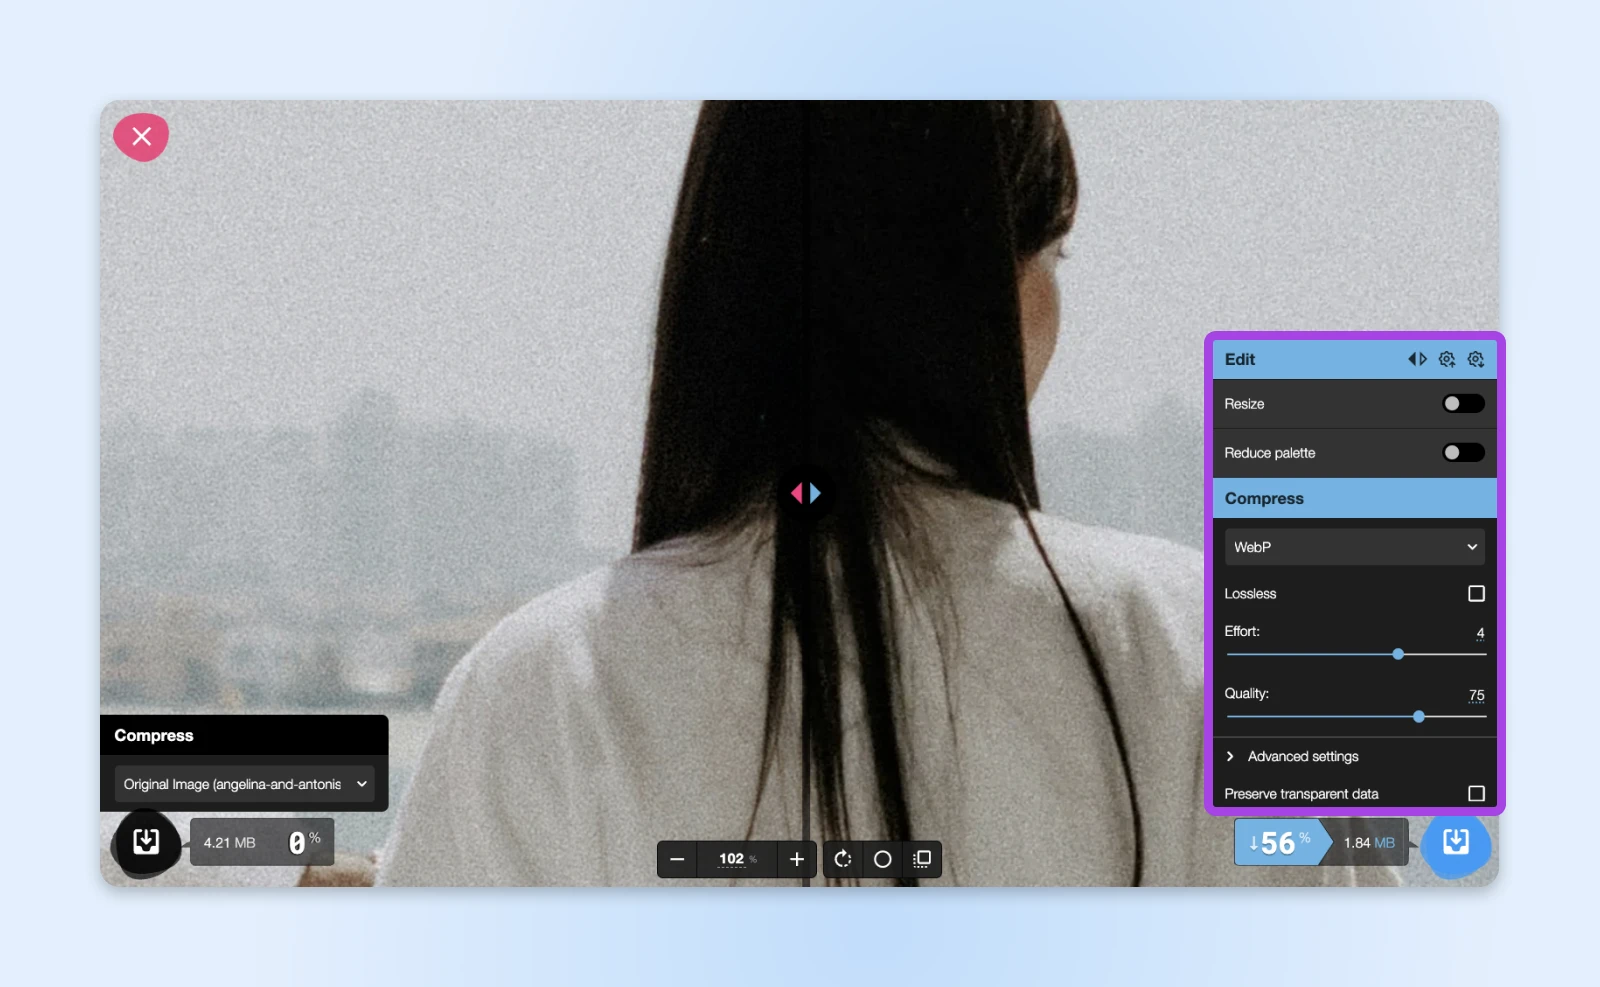
As you select different options, you can move the slider in the middle of your screen to see the effect on image quality. On the left is a zoomed-in view of your original image; on the right is a preview of your compressed version.
Looking good? Download your compressed image by tapping the blue blob in the bottom right. This is ready to add to your website.
Boom, done.

Pro Tip: Want to speed things up for the next image? Tap the little “cog” icon in the control panel. This will save your current settings as a preset, which you can load later by tapping the other cog icon.
Getting To Know Squoosh a Little Better
That’s the short version, but there’s a whole lot more to Squoosh.
This open-source image compression tool was actually developed by the folks at Google. It’s available both as a web app and a browser add-on for Chrome.
If you’re feeling techy, you can also download Squoosh from GitHub and run it offline via the command line.
Squoosh supports PNG, JPG, TIFF, GIF, and many more formats. Every version is free to use, and the app handles compression locally. That’s good news for privacy, because images never leave your machine.
Learning How To Use Squoosh Like a Pro
The other great thing about Squoosh is that it offers loads of control. You just need to know how to navigate the control panel.
Let’s take a quick tour.
When you first load an image into Squoosh, you’ll see just four options on the control panel:
Resize
If you’re planning to use an image for a thumbnail, you don’t need full resolution. You can flick this toggle to change the image size.
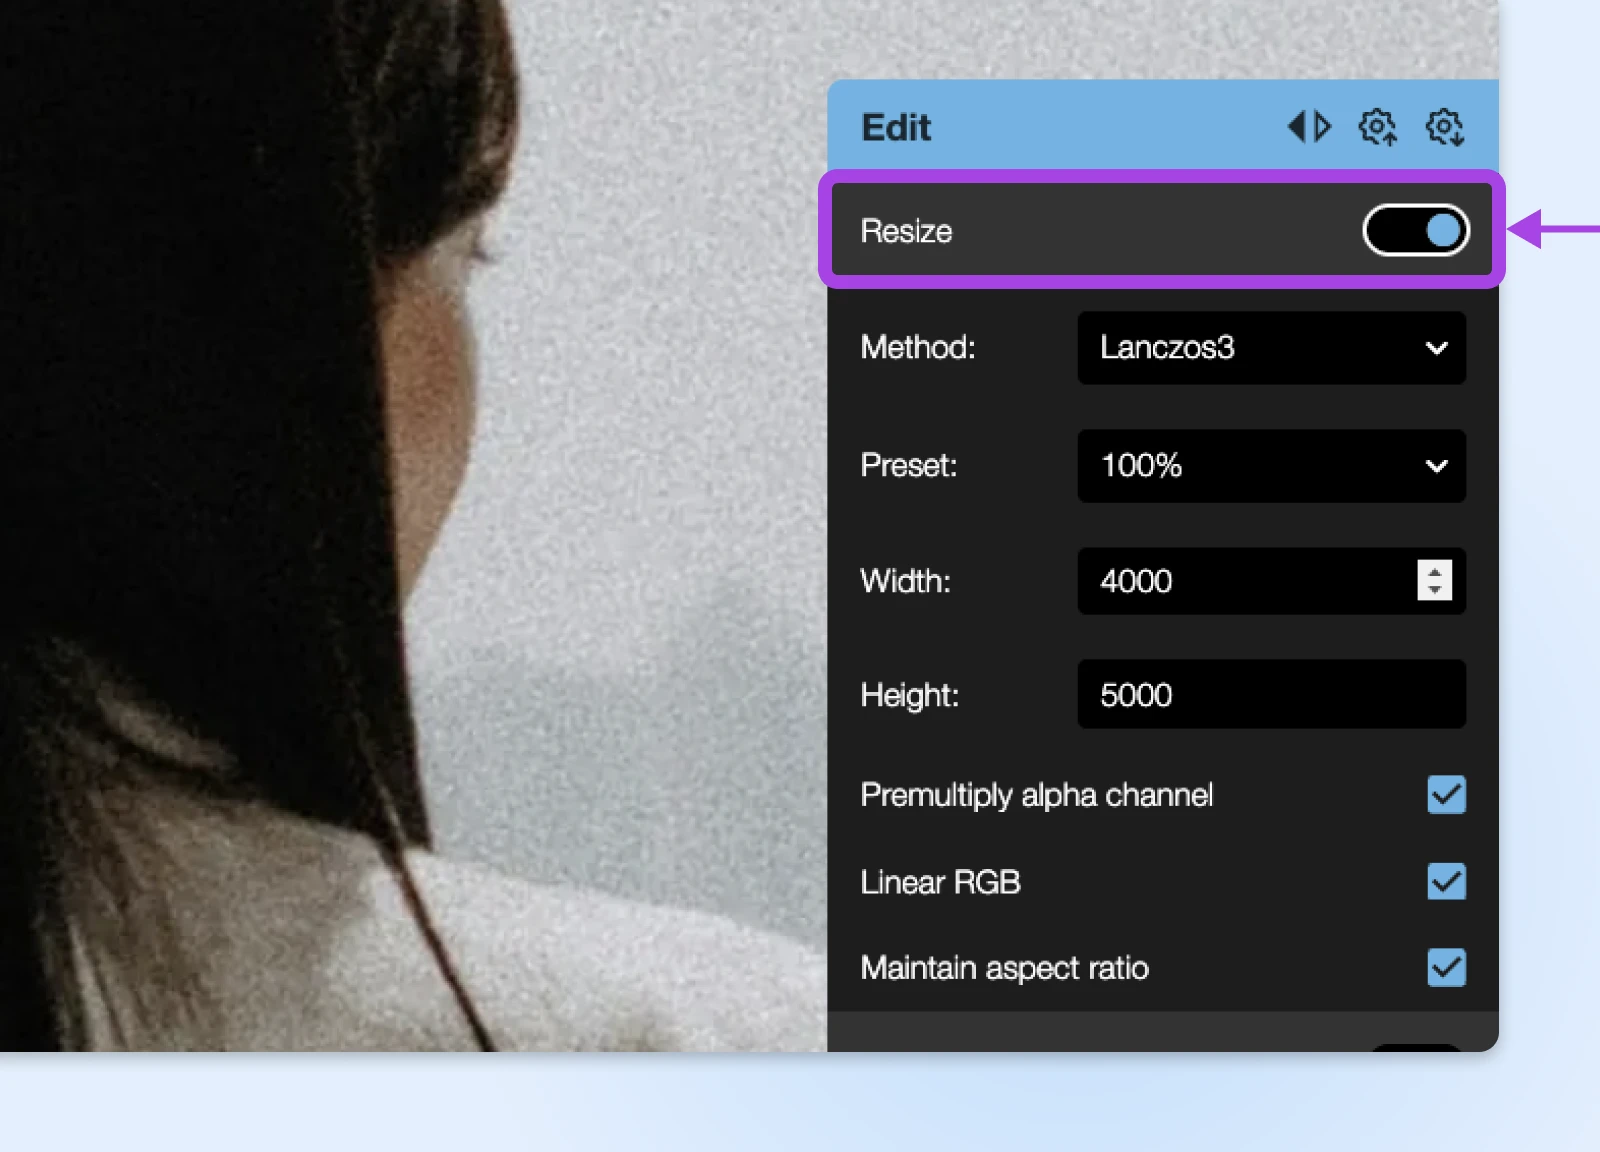
Put in the pixel count you want, but leave the default options selected unless you have a good reason. Make sure “Maintain Aspect Ratio” is selected to avoid warping!
Reduce Palette
Many images don’t actually contain that many colors. This option lets you throw away hues to reduce file size.
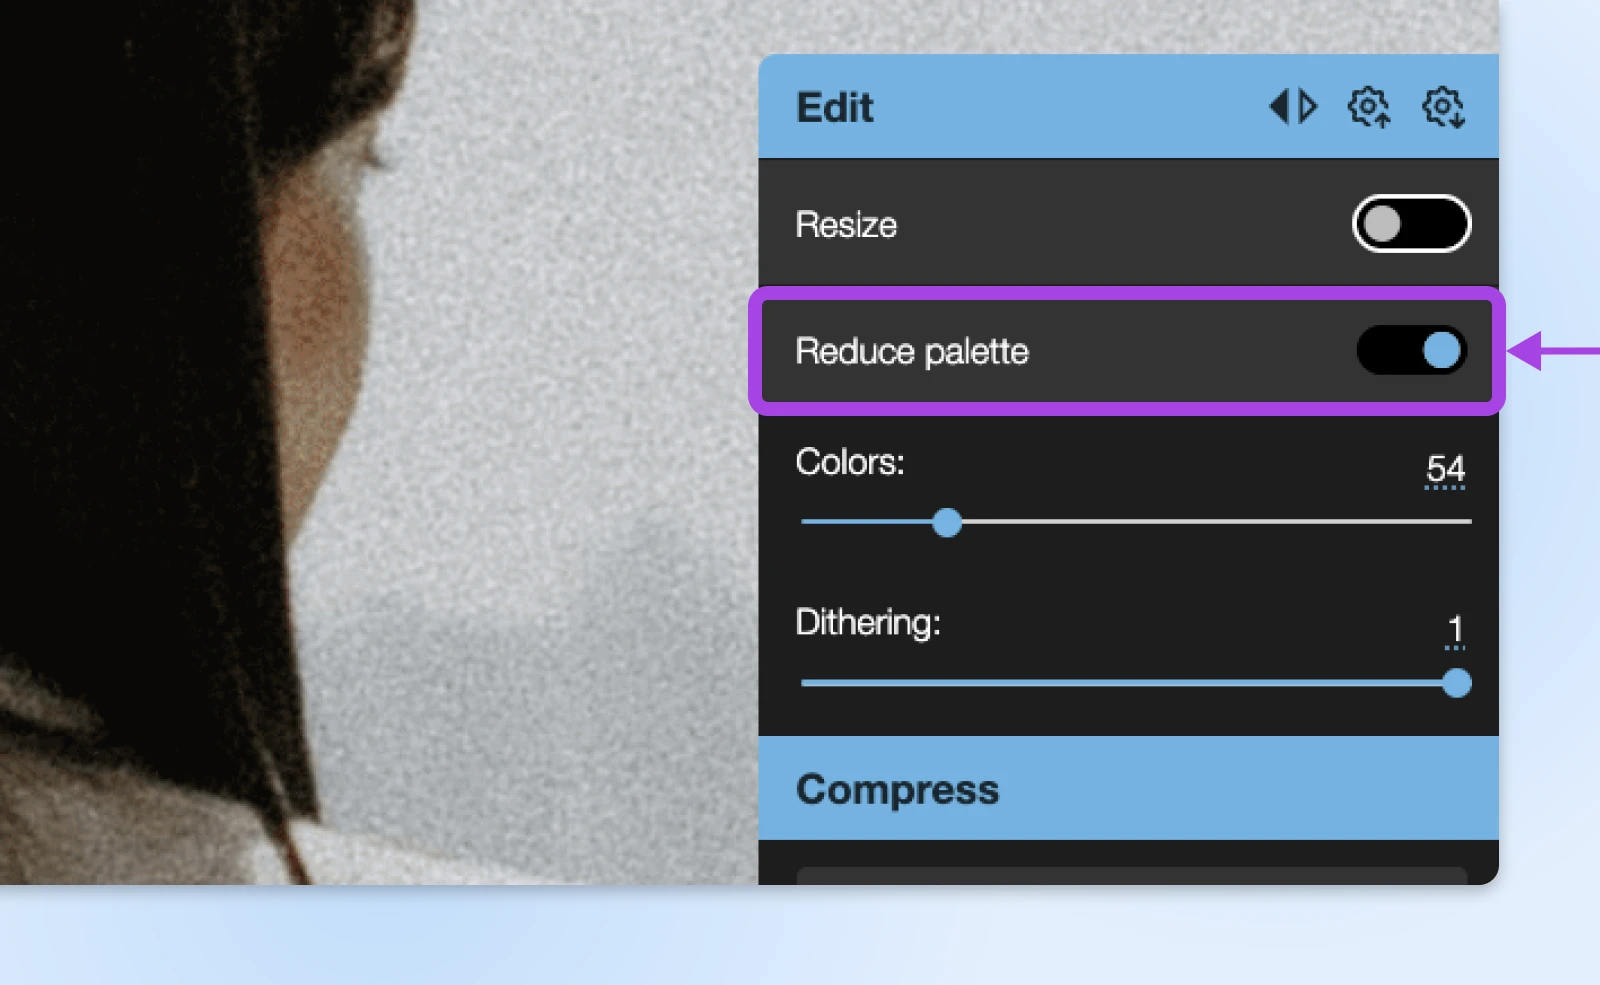
That “Dithering” slider? It essentially creates a noise pattern to disguise the reduced color palette.
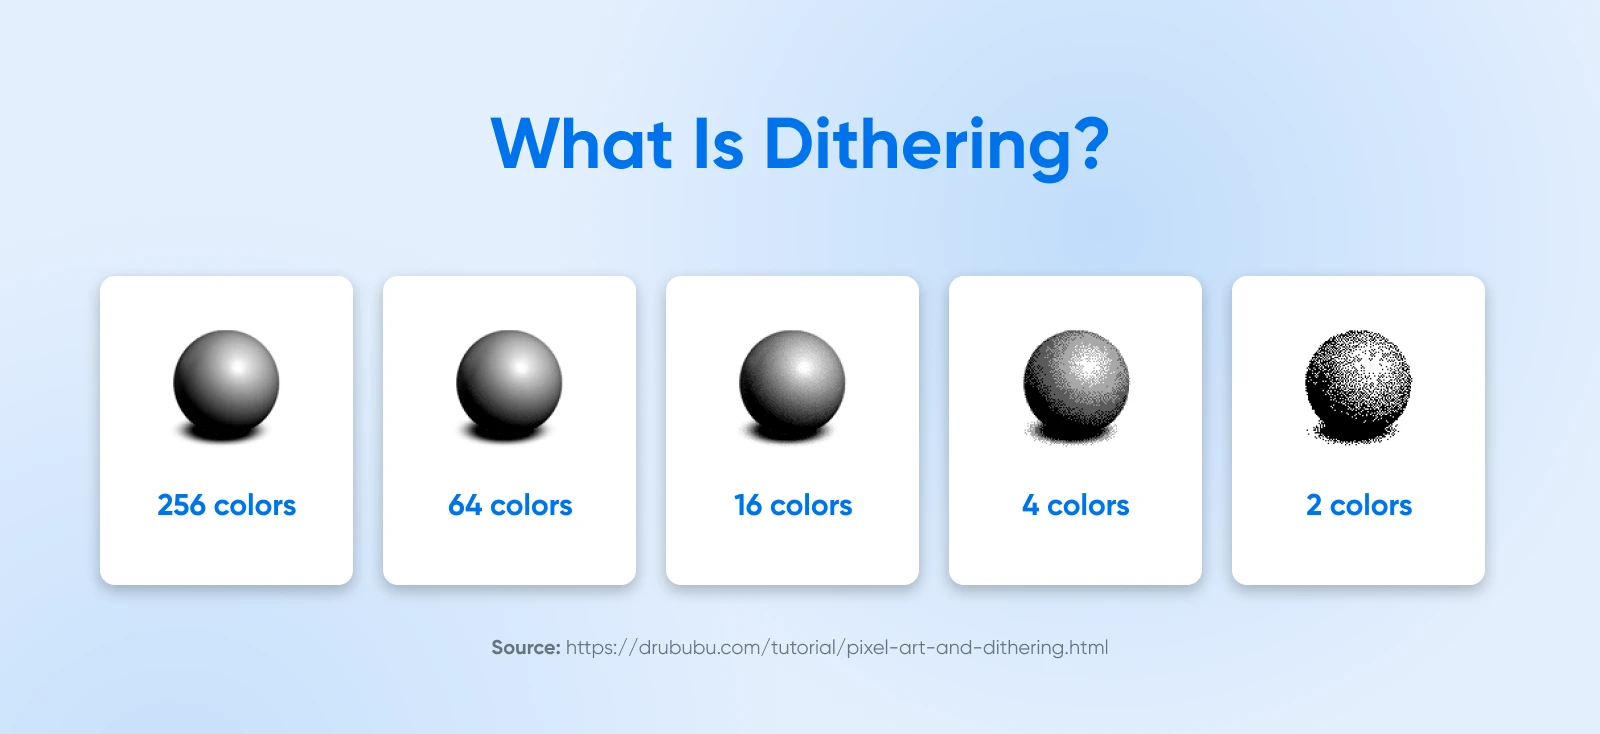
Note: This technique is best used on designs rather than photos, since photos can end up looking like bad photocopies.
Format
Under the “Compress” label, you can select an output format for your image. The options fall into two main categories.
- Lossy (e.g., JPG, GIF): These formats discard tiny bits of your image to save space. You generally won’t notice the difference, unless you want something with really high resolution.
- Lossless (e.g., PNG, AVIF): In contrast, lossless formats find ways to reduce file size without affecting the quality of your image.
As a general rule, lossy is fine for simple graphics, while lossless is better for crisp icons and detailed photos.
Quality
If you choose a lossy format, you’ll also see this slider. It runs from 0 (squashing your image flat) to 100 (no change).
Before saving your image, we would recommend moving this slider and seeing the effect in the preview area. To get a nice, small file, move the slider as far left as you can without creating ugly artefacts.
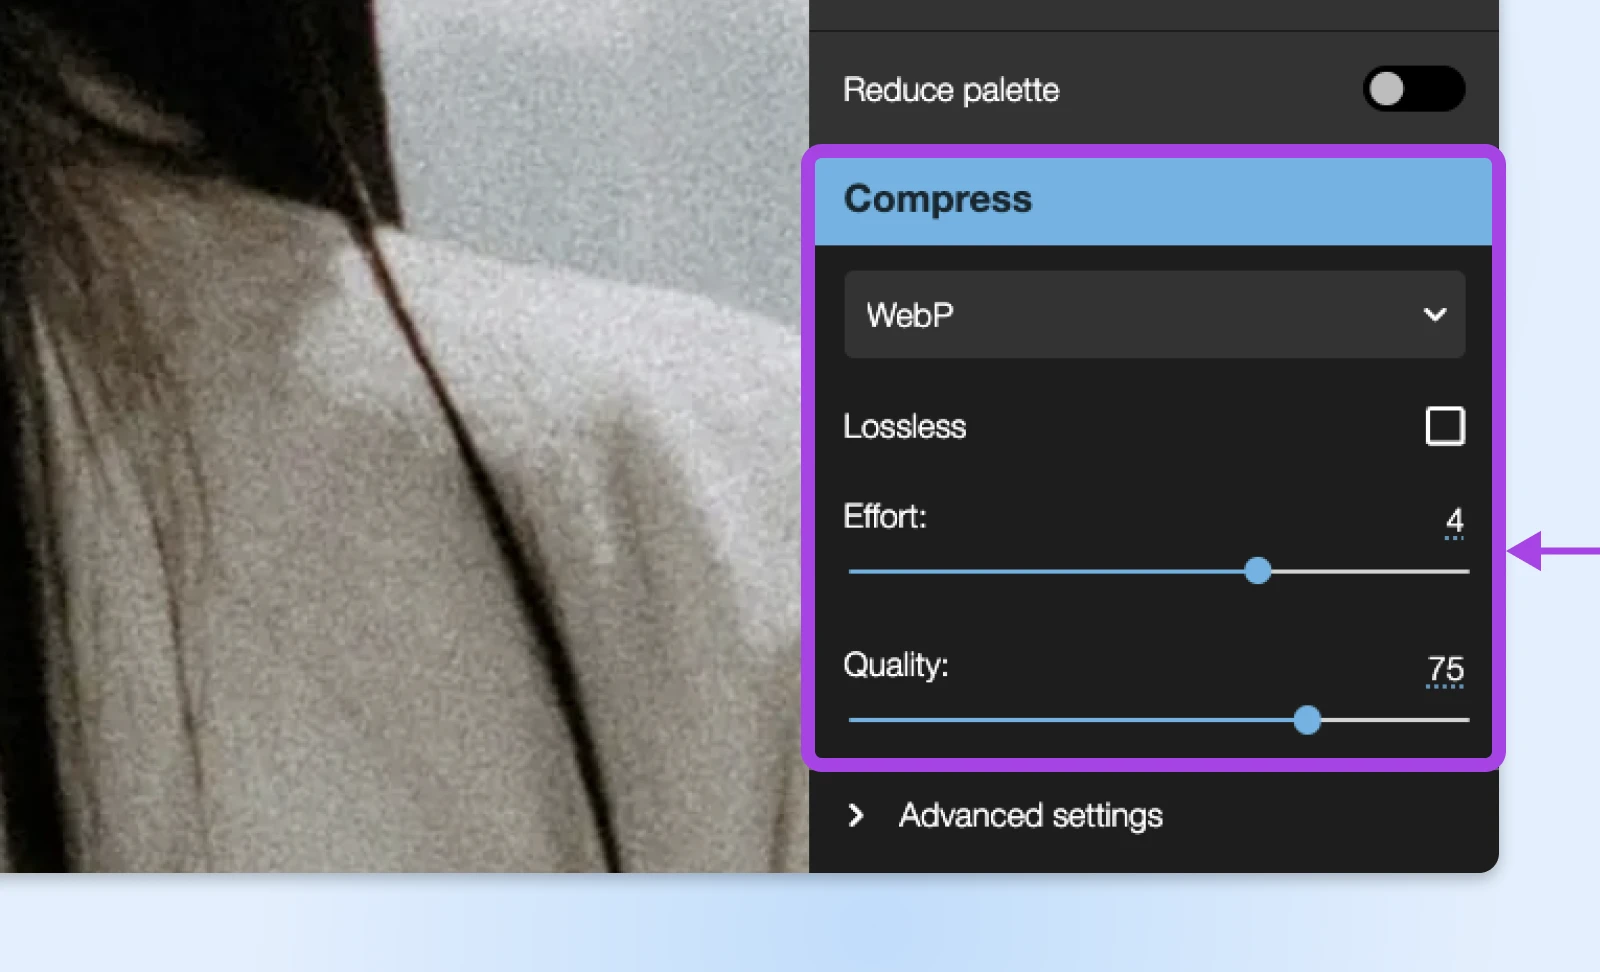
If you’re converting to WebP, you’ll also see an “Effort” slider. This controls how thoroughly Squoosh will analyze your image before deciding how to apply compression. Choose a higher number if you have details you want to keep.
Advanced Settings
Depending on the output format you select, you may have access to more options under the “Advanced settings” tab.
Unless you have a Ph.D. in image editing, these settings are best avoided.
Quick Tips for Squeezing More Out of Squoosh
Overall, Squoosh is super easy to use. And honestly, the section above contains everything you really have to know about the app.
But we see you, reader. You want to become a god of image compression, don’t you?
Well, here are some pro tips that will help you reach that immortal status.
- Drag and drop: Don’t bother with the file menu. Just drag your image right into Squoosh.
- Know your formats: Use WebP for modern browsers, MozJPEG for photos, and OptiPNG for graphics. Remember, AVIF is the new kid on the block; check which browsers can handle it.
- Size matters: Compress for quality, not just file size. If your image goes from looking like a masterpiece to a kindergarten art project, take a step back and adjust those settings.
- Effort counts: Crank up that effort slider for PNGs and WebP to squeeze every last bit out of the file size without dramatically impacting quality.
- “Reduce Palette” is your friend: How many different colors does your image contain? If it’s pretty simple, you can save a lot of space by moving the “Reduce Palette” slider to the left.
Remember, every MB saved means less waiting time for your users!
How To Manage Website Images for Better Performance
While Squoosh can shrink your images to a more manageable size, it’s not a catch-all fix.
Follow these guidelines to make sure your compressed images deliver the performance boost you’re hoping for!
- Use a CDN: Content delivery networks (CDNs) are optimized for media, and they take pressure off your host’s servers.
- Think carefully about file types: It’s easy to make all images the same. But your choice of file should match the requirements of each image on your site.
- Remove unneeded metadata: Does your image need to be lugging around location and camera information? Probably not.
- Try using sprites: Instead of using one big image with a repeating pattern, you may be able to use a tiny sprite multiple times instead. That could really speed things up!
If you’re curious about all the ways you can implement image optimization, our blog is absolutely stacked with helpful tutorials. Here are some of the highlights:
Squoosh is a great starting point for compressing and optimizing images for your website. However, there are other options out there:
- TinyPNG: This web app instantly compresses images while retaining impressive quality. It’s free for batch uploads of 20 images or fewer; you can unlock more for $39 per month.
- ShortPixel: If you own a WordPress website, this plugin lets you compress images right from your admin area. It’s free for up to 100 images a month.
- ImageOptim: One for the Mac owners. This open-source app lets you compress batches of images on your computer. And it’s totally free!
- Kraken.io: This powerful image compression tool works quite like Squoosh, albeit without the nice preview display. Oh, and it’s only free for files up to 1MB in size.
- JPEGmini: Work with a lot of high-quality photos? With a quick drag and drop, this desktop app lets you reduce the file size of JPGs by up to 80%.
Make Your Site Run More Smoothly Today
Optimizing images is a chore. But it’s worth the effort when your pages load at lightning speed. Plus, it’s not too much effort when you have a tool like Squoosh.
Of course, images aren’t the only cause of slow page loading. Your hosting plan could be to blame.
Want something that offers more reliable performance? At DreamHost, all our plans come with 100% guaranteed uptime and unlimited bandwidth. That means your site will never wobble under pressure.
Want to give it a go? Sign up today to feel the difference!

Pro Services – Site Optimization
Get Your Site Up to Speed
With 20+ years of experience supporting millions of sites, we’ve perfected a process to make your website super fast at an affordable price.
Learn More
